1.0 Introduction
 Arch Linux is not an easy distro to install and get working. It doesn't even really have an installer as such: you have to partition your disks, copy software across and configure everything pretty much by hand. The result, however, is a lean, mean distro that is constructed precisely as you want it to be.There is thus much to recommend it as an efficient, rock-solid operating system. Arch also happens to be a "rolling distro", which means that it is continually updated (rather than being released as a new version every six months or so, as Fedora or Ubuntu are). That means you are always working with the latest software (though with a slight risk that the next update might knacker your entire system!)
This mixture of attributes makes Arch an interesting distro to work with -and a worthwhile one, even though it isn't particularly popular. Accordingly, I added it to my list of distros that my music-related software has to work with and get tested on and that in turn means that I need to be able to construct an Arch virtual machine on which I can actually test things out.
This has proved trickier in the past than I would have liked: there's always something to get wrong during the installation process, something I've missed or forgotten about! I've therefore put these notes together so I can do it right and repeatably in the future.
These are instructions I used to build an Arch distro in a VirtualBox Virtual Machine, running the Gnome desktop, with a bare minimum of software installed to ensure administrative capabilities, access to the Internet and a platform on which my music software will run without drama. I don't go into the details of why certain things are done: if you're contemplating running Arch yourself, you need to be an already-competent user of Linux, so such explanations would be rather redundant! So this is the short and sharp guide to getting Arch working 🙂
2.0 The Basics
I provide my VirtualBox VM with:
- 8192MB of virtual RAM
- 2 virtual CPUs using PAE/NX
- 15GB virtual hard disk.
- 128MB Video Memory and 3D Acceleration enabled
It is configured to use NAT'd networking (it will need to be able to connect to the Internet) and has audio enabled via my host's PulseAudio driver.
I obtained my Arch Linux installation medium from here, specifically the archlinux-2021.03.01-x86_64.iso file. You can of course make your VM more powerful and the specific installation medium to use will change over time.
3.0 Getting Started
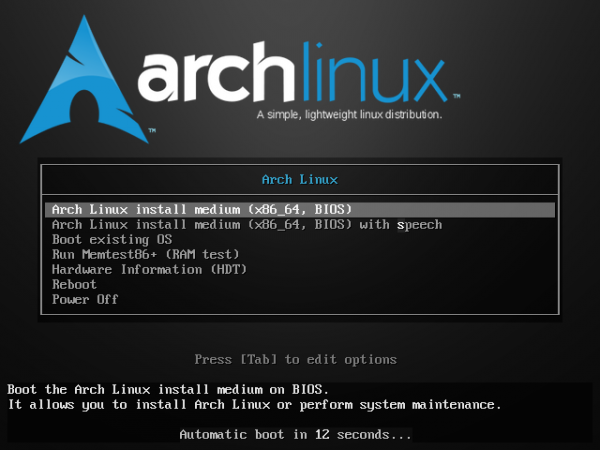
The virtual machine is started and immediately boots into a startup menu:
The top menu option is the correct option to take: note that it is booting in BIOS mode, not EFI. Either let the automatic boot countdown time itself out or press [Enter] to accept the top menu selection. When the boot process completes, you are dumped somewhat unceremoniously at a command prompt, logged in as root. Everything from this point consists of typing a string of commands, correctly, in the right order and without missing anything out!
3.1 Initial Configuration
To begin with, be aware that Arch's default keyboard map is US English -which is fine if you're using a US Keyboard layout! If you are not -and in the UK, I am not!- you need to specify a different keymap now. The command:
ls /usr/share/kbd/keymaps/**/*.map.gz | less
...will list all available keymaps, so if you need a French or German one, read that list carefully. The bit you need to take note of is the last part of the file name, but ignoring the ".map.gz" extension. So, a Spanish keyboard would probably be listed under 'es' for 'España'; an Italian one under 'it' and so on. The standard UK Qwerty keymap is listed as 'uk.map.gz', so lopping off the extension, you arrive at plain 'uk'. Knowing that, issue the loadkeys command:
loadkeys uk
Next, confirm what hard disks exist on your system with the command:
fdisk -l
Ignoring any loop devices listed, you'll probably see just one device listed called /dev/sda. This is your virtual machine's 'virtual hard disk' and we need to partition it and format it before doing anything else. The command to do that is:
fdisk /dev/sda
That takes you into the fdisk utility where it unhelpfully sits there prompting you to type a 'command' of some sort. These are issued by typing individual letters. The key sequence you need to supply now is as follows:
- n
- p
- [Enter] [Enter] [Enter]
- w
That creates you a new primary partition, accepting the defaults for its size and location on the disk, and writing those configuration details to disk, so they actually take effect: congratulations, you now have a new partition on the hard drive, called /dev/sda1. You now need to format it (and I'm only going to use the very unexotic ext4 file system to do so):
mkfs.ext4 /dev/sda1
You now have a usable hard disk onto which we can install the Arch operating system and software itself.
3.2 Installing the Operating System
The Arch software is actually fetched from the Internet (the boot ISO you booted your VM with is only to get a 'live' Arch system up and running, with which to issue all these commands). It would therefore be helpful if the source of the software was located geographically close to you: copying over the Internet will be faster that way. So, to start, we need to make Arch aware of the closest software mirrors it can use:
pacman -Syy
pacman -S reflector
These commands use the pacman package manager to make sure it's initially synchronised, so that it can then install a new program called 'reflector'. When you are prompted whether to proceed with software installation, answer 'y'.
Now we can ask the reflector package to work out where the closest software mirror is:
cp /etc/pacman.d/mirrorlist /etc/pacman.d/mirrorlist.orig
reflector --country GB -f 12 -l 10 -n 12 --save /etc/pacman.d/mirrorlist
The first command takes a backup of the existing mirror list (just in case we have a disaster fetching the new one!) and the second actually gets the new list of 10 mirors for us, fetching them from a specific country I figure is close to me (I live in the UK, but GB is the correct country code, I fear!) If the command errors out, keep repeating it until you get a non-error return. If in doubt, cat the /etc/pacman.d/mirrorlist and satisfy yourself that a suitable set of mirrors has been found.
Next, we need somewhere to install the operating system to. Sure, we have a /dev/sda1 partition that's willing to do the job, but we need to make it available to the 'live' Arch O/S we're actually running if it's to be able to write to it. Accordingly:
mount /dev/sda1 /mnt
That means our virtual hard disk is now accessible from the /mnt mountpoint. Anything we write to /mnt now will therefore be written to the virtual machine's hard disk.
Finally, the command to fetch the operating system from the Internet and copy it to /mnt is:
pacstrap /mnt base linux linux-firmware nano sudo
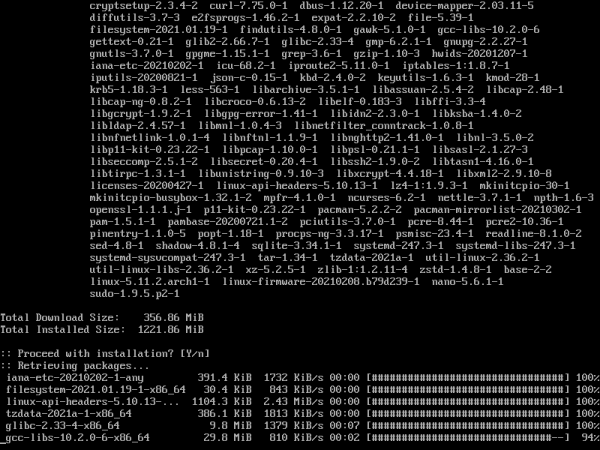
That gets us a barebones base Linux system, with a text editor and the sudo program (needed to give normal users root privileges when they need them). A lot of file downloading will now take place:
As you can see, the quantity of stuff to pull down is not enormous (356MB or so), but even so, it will inevitably take a few minutes on a good Internet connection to get that much copied over. So be patient and just let the process complete in its own good time. Should your network connection fail for any reason, don't panic: just re-issue the same pacstrap command again once normal network service has been resumed. The process will pick up from where it last reached.
3.3 Post OS-Installation Configuration
Now that your operating system is installed onto the VM's hard drive, we need to issue a few commands to knock it into a shape where it can be successfully booted into. First, we need to create an fstab so that the new OS knows what drive(s) it's got to mount in the first place:
genfstab -U /mnt >> /mnt/etc/fstab
That's the 'live' Arch system writing into the contents of the /mnt folder, so that what it sees as /mnt/etc/fstab will, eventually, become the new system's actual /etc/fstab. But everything else we need to configure can't really be 'posted into' the /mnt system like that. We actually have to sort-of 'go into' /mnt and do everything from within that system:
arch-chroot /mnt
That command essentially makes the /mnt file system appear to start at '/', the root file system. So everything we now do will affect the VM's soon-to-be operating system files directly. There are a bunch of fairly low-level system config and networking commands to get right now:
timedatectl set-timezone Europe/London
hwclock --systohc
The first command says I'm in the UK. If you are not, you'll first need to issue the command timedatectl list-timezones and work out from there what actual timezone to use instead. The second command sets the hardwareclock time from the current system time.
Next, we need to say what 'locale' our system should use. In my case, I want to say I'm using UK currency, date and time conventions and also using the UTF-8 character set (I need the ability to type the occasional umlaut, or cedilla, given I listen to a lot of classical music by European composers!). So:
nano /etc/locale.gen
That document lists every possible locale: your job is to find the one you want and to remove the hash from the start of the line so that it is uncommented. In my case, I'm looking for en_GB.UTF-8 (English, Great Britain, UTF-8 characterset). Once uncommented, press Ctrl+X to quit and then tap 'y' to save when prompted, finishing with a final [Enter] to accept the proposed file name. With one locale un-commented, type the command:
locale-gen
...and you should see confirmation that the correct locale has been generated.
In similar vein, now do:
nano /etc/vconsole.conf
...and type in:
KEYMAP=uk
Again, press Ctrl+X, y, Enter to save the changes. Note that you only put in here whatever you supplied in Section 3.1 for the 'loadkeys' command. If you didn't change the keymap then, because you're using a US keyboard, you don't need to edit the vconsole.conf file now either.
Finally, there's a bit of networking to sort out. Our VM will need a proper hostname and a loopback adapter if networking is to function correctly. So, issue this command:
echo stravinsky > /etc/hostname
...to set your new VM's hostname to 'stravinsky'. If you want a different name, be my guest and supply it instead -but make sure you replace all future mentions of 'stravinsky' in this article with whatever alternative name you decided upon!
Now, finish things off with:
nano /etc/hosts
Into this mostly-empty file, append the following information:
127.0.0.1 localhost
::1       localhost
127.0.1.1 stravinsky.dizwell.home stravinsky
Of course, replace 'stravinsky' with your actual choice of hostname. Also note that 'dizwell.home' is my home network's 'domain name': you'd have to change that to whatever you use in your home network, too. Save the edited file.
Next, we need to give our future root user a working password:
passwd
Whatever password you type in (twice!) when prompted, make sure you don't forget it!
3.4 Finishing things off
We're almost done. There are just a few loose ends to sort out. First, we need to tell our new operating system how it should boot itself:
pacman -S grub
grub-install /dev/sda
grub-mkconfig -o /boot/grub/grub.cfg
That lot installs the grub bootloader software, installs the bootloader onto the VM's hard disk, and then creates a grub configuration that will display a nice boot menu and so on. That makes the new OS at least bootable... but it will be missing most useful software, so let's add that to the mix now:
pacman -S xorg xterm gnome gnome-terminal which firefox make gcc binutils git linux-headers wget bc networkmanager
That's not a huge amount of software: a terminal, a browser, a few developer tools... and the Gnome desktop (but without a lot of Gnome add-ons). It is pretty much the bare minimum you can get away with, I think. There's nothing to stop you adding extra packages to this list now if you know you'll want them in time, too. Incidentally, if you didn't want the Gnome desktop environment but preferred to use KDE, you'd remove those two gnome-related packages from that list and instead add in: plasma plasma-wayland-session to the list (and if you want lots of KDE-specific programs added, too, feel free to throw kde-applications into the mix).
When you submit this command, you'll receive various prompts about which members of groups you want to install: just press [Enter] every time to accept the default suggestions, until you finally get a chance to type 'y' to confirm that installation should proceed.
Inevitably, it takes yet more time to copy all the software down and install it: be patient once more!
When all the software is installed, it's time to create a new non-root user who can exercise root privileges when needed. Type:#
export EDITOR=nano
visudo
Scroll quite a way down the document until you find the line that currently reads # %wheel ALL=(ALL) ALL, and remove the leading '#' and space (so it ends up not being commented out, basically). It means anyone who is then made a member of the group 'wheel' can assume root privileges whenever needed. Save the edited file. Next:
useradd -m -G wheel hjr
passwd hjr
Here, I'm creating a user called 'hjr': you supply whatever name you like for your own user, obviously! The crucial point is that as I create the user, I'm making it a member of the 'wheel' group -so hjr will be a non-root user that can exercise root privileges if necessary. Type the new password for the user when prompted, twice -and don't forget it!
And lastly, let's configure things so that (a) the GUI Gnome system starts up automatically when we reboot and (b) so that automatica network configuration is done for us:
systemctl enable gdm.service
systemctl enable NetworkManager.service
I'm assuming the VM will acquire an automatically-assigned IP address, via DHCP. If that's not true, you'll have to configure a static IP address later on: it's most easily done once the GUI is up and running, I think. Note, too, that if you were installing KDE instead of Gnome, that first command should not mention enabling 'gdm' (because that's Gnome-specific), but instead read: systemctl enable sddm.service, which is the 'simple desktop manager' that KDE is more tied into.
Now, hard though it may be to believe, but we're actually done at this point! We just need to quit out of our 'mnt appearing as root' system and then reboot the virtual machine to boot up into a pristine, Gnome-based Arch VM:
exit
reboot
Remember to make sure the initial Arch ISO is removed from the VM's 'virtual CD drive' before the VM gets too far in its reboot process, otherwise you'll reboot back into the live system, not the OS you've just painstakingly installed.
4.0 Final Tweaks
If you're doing this in a VirtualBox VM, you'll probably find that your system boots into a quite small 800x600 display. The best way to fix that is to install the VirtualBox Guest Addtions, which I'll come to in just one moment. First, though, see if you can run the Gnome Terminal: click Activities -> Show Applications (the 9-dot grid at the bottom of the vertical dock) -> type 'term' -> click Terminal. For reasons I haven't yet worked out, I often see the terminal start to run, but then it simply never appears and nothing ends up happening. If that happens to you too, it's fixable: Activities -> Show Applications -> type 'sett' -> click Settings. Scroll down the left-hand panel and find Region & Language.
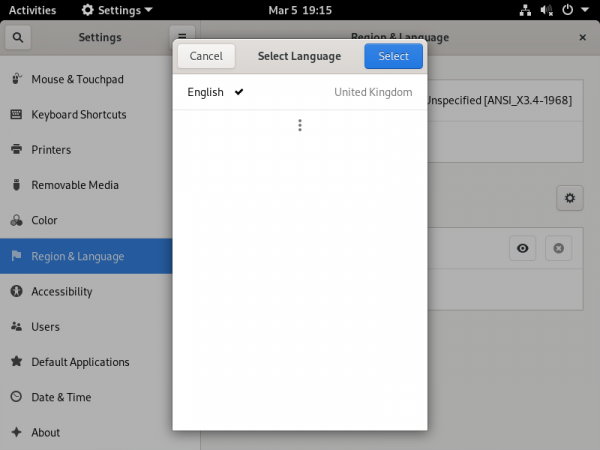
Click on the 'Language' item at the top of the right-hand pane:
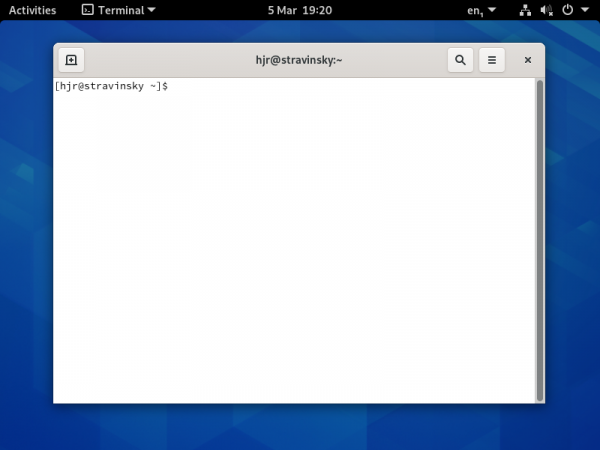
That makes the 'Select language' pop-up appear: click on 'English' so that tick/check-mark appears next to it. In the Input Sources section of the screen too, make sure the correct keyboard is listed. Mine still said 'US', so I clicked the '+', English, and clicked on 'English (UK)', finishing with a click of the [Add] button. I then clicked the 'X' symbol next to 'English (US)' to get rid of it, so that only the UK English keyboard was listed. Shut the Region & Language tool down and then reboot your virtual machine. When it comes back up and you've logged in, try running the Gnome Terminal again: this time, you should have no trouble:
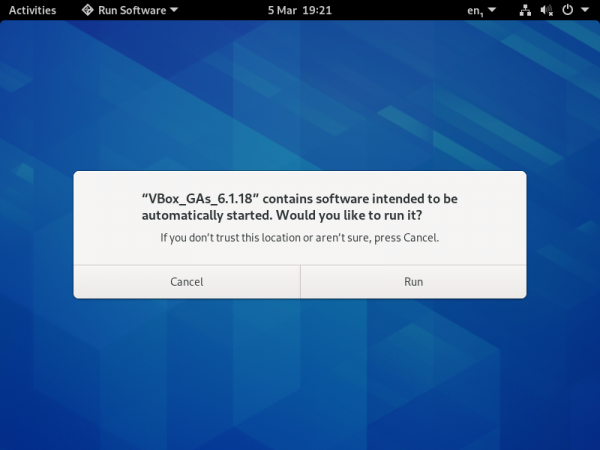
So finally, to fix the screen resolution issue, just click VirtualBox's Devices -> Insert Guest Additions CD Image menu options. Give it a second or two and you should be prompted about running the software found on that CD image:
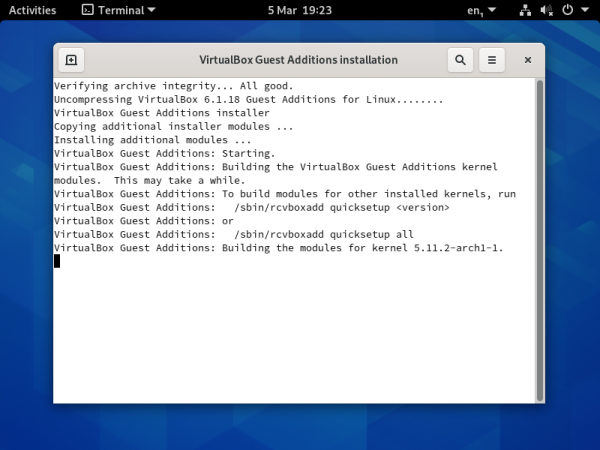
Click [Run] when prompted. You'll then have to supply your non-root user's password to authenticate and the VirtualBox Additions process will then take place automatically:
When the process completes, reboot your VM once more -and now, once you've logged in, you should be able to resize the VM window and have the Gnome session automatically resize itself to fit. At this point, you're pretty well done: further software installations and configuration are really standard Linux admin fare from this point on.
5.0 Conclusion
There are quite a lot of moving parts in an Arch installation, but it's fundamentally not difficult: boot with a live CD; install to a prepared hard disk, install a bootloader, install some software, create a non-root user, reboot. The advice you will always see given (somewhat sniffily, I tend to think!) is: don't read people's articles on how to do it, because they always miss something out. Instead, read the official documentation about how to do it.
Well, be my guest... but personally, I find that documentation incredibly hedged with if-this-then-that-otherwise-not branching that I've rarely enjoyed struggling with it! But yes: that's the 'right' way to do it, and this article merely documents how you can actually do it without all the faff!
I will say that I haven't yet tried any of the above on a physical machine, though I've got a spare laptop lined up for imminent sacrificial duties! But the above certainly worked for me running VirtualBox 6.1 on a Manjaro host. I hope you may find it helpful in starting you on the process of getting to grips with Arch, too: it's a distro that deserves some effort, I think.
