![]() WSL2 is the second iteration of the Windows Subsystem for Linux, a means to install and run an entire Linux virtual machine almost transparently 'within' a standard Windows 10 or 11 system. The Linux environment is accessed by clicking a Start Menu item, just as if it were a game of Solitaire or Microsoft Word. It is an astonishingly good piece of technology that works wonderfully.
WSL2 is the second iteration of the Windows Subsystem for Linux, a means to install and run an entire Linux virtual machine almost transparently 'within' a standard Windows 10 or 11 system. The Linux environment is accessed by clicking a Start Menu item, just as if it were a game of Solitaire or Microsoft Word. It is an astonishingly good piece of technology that works wonderfully.
The only possible drawback with relying on WSL2 capabilities is that whilst Giocoso itself merely sips PC hardware resources, WSL2 is a bit of a resource hog. The sort of virtualisation it's implementing immediately demands a 64-bit operating system and reasonable quantities of memory and CPU grunt -though we are not in ludicrously-overspecc'd monster gaming PC territory! I mentioned my 2012-vintage HP Folio13 onto which I've managed to crow-bar a working version of Windows 11, despite its ancient and unsupported hardware: it manages on 8GB RAM, a 500GB solid state hard disk and a 2nd generation Intel i5, 2-core CPU running at a sedate 1.6GHz. That seems at least adequate. Your BIOS also needs to be set to enable hardware-assisted virtualisation, though since all BIOSes are different, I'm going to have to leave that to you to sort out.
Finally, I'll just mention that WSL2 now runs pretty much identically on Windows 10 and 11: this wasn't always the case, and Windows 10 in particular used to need extra software to make it display graphical Linux applications or to hear sound from Linux audio programs -but those days are now all behind us. The screenshots you see below happen to be from a Windows 10 machine, but the steps mentioned are identical on a Windows 11 one, too.
So, the first thing you have to do is to install WSL2:
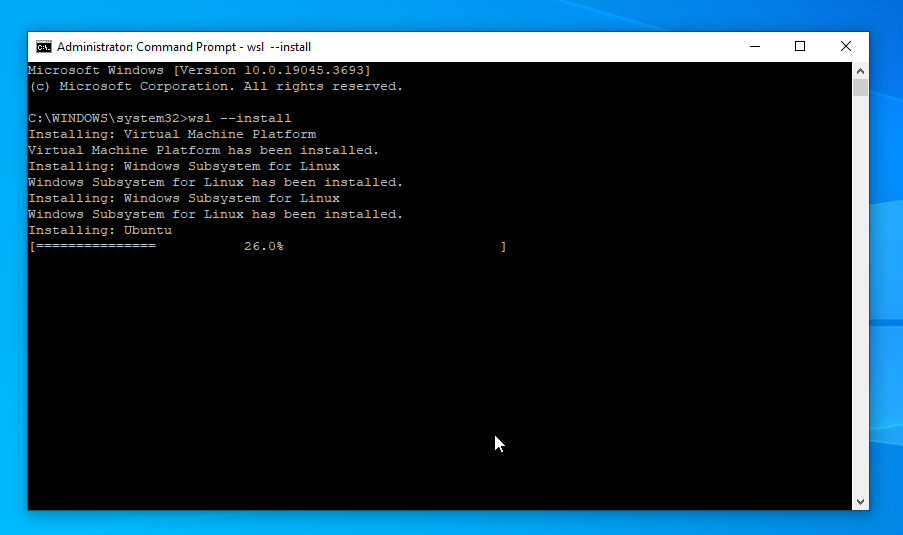
That's done, as you see above, by first opening a command prompt with administrative privileges (so, click Start, search for 'command', then right-click the Command Prompt item and select Run as administrator) and then issuing the command wsl --install. It's really that simple: as you can see above, the command triggers the installation of the Virtual Machine Platform, then the Windows Subsystem for Linux and then, finally, a complete copy of Ubuntu. That lot can take a while to download and install, but once it has:

...you'll see that you are prompted to reboot the Windows PC: 'changes will not be effective...' until you do, as it says. So do that and when the PC comes back up, log in as normal... and then sit and be patient! Do nothing!! Type nothing!!! Just wait and, all by itself, you'll see this happen:
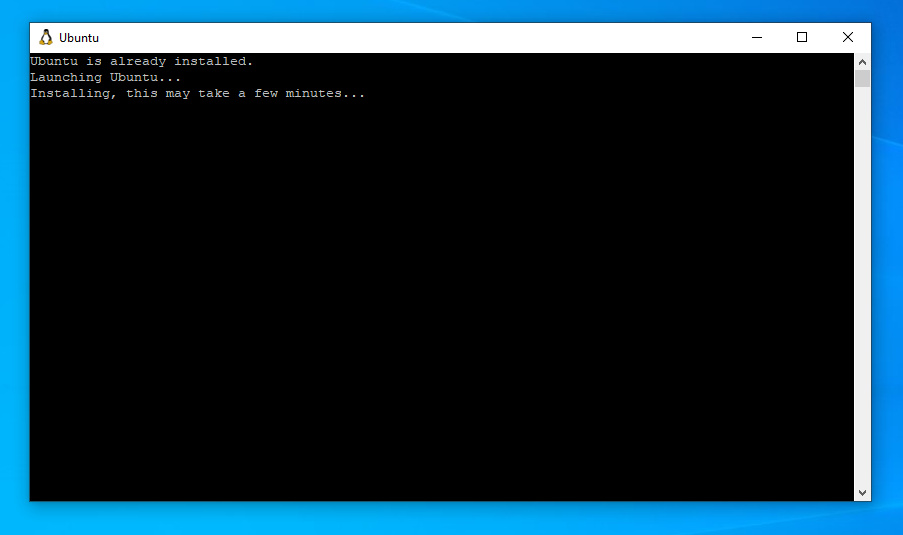
Note the little icon in the top-left of the window's title bar: it's a Linux penguin, not the 'C:\' logo you see in a normal command prompt window. This, plus the fact that it tells you it's launching and installing Ubuntu, is the clue that this is no ordinary command prompt window!
It will take a few minutes to configure the Ubuntu installation correctly, but eventually you'll be prompted as follows:
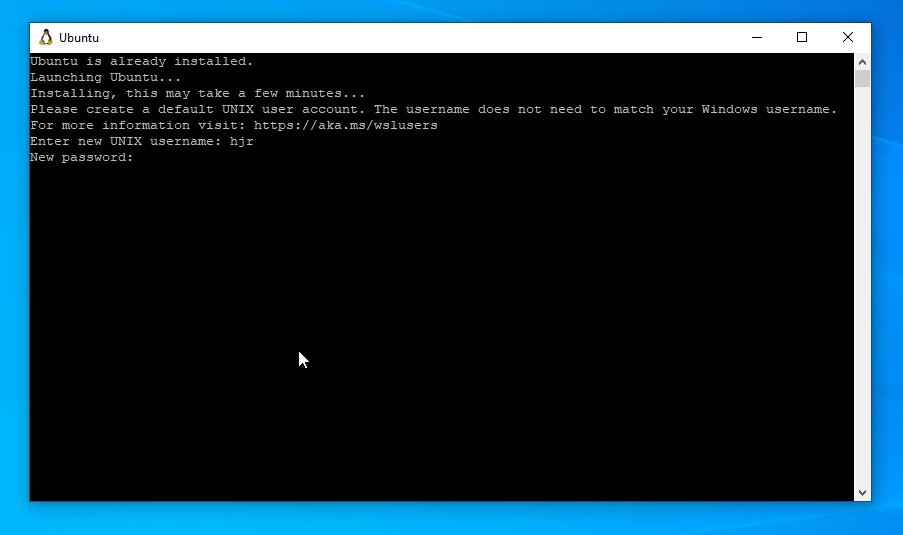
Here, you are being prompted to create a new account for the Linux environment. There is no reason the username/password combo has to be the same as the one you use to log in to Windows... but I generally end up making them identical anyway 🙂 The choice is yours, but the username and password you type in now will be the 'Linux User' going forward. Shortly after this, you'll be logged into the new Ubuntu environment:
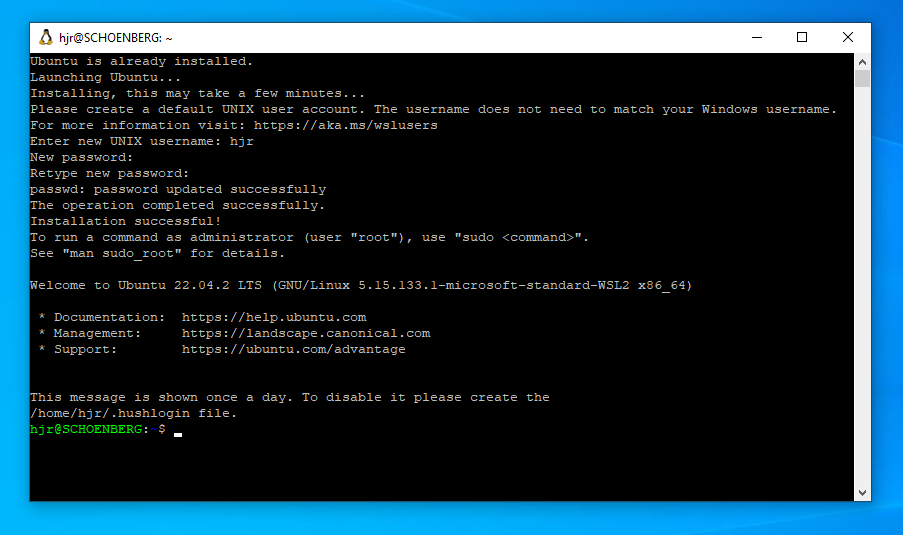
At this point, you're actually done: you've got a fully-functioning Linux environment running under Windows and you can proceed to install Giocoso Version 3 into it, as you would to a 'real' Ubuntu environment... with some Windows-specific quirks which I've described elsewhere.
[ User Manual Home ] | [ Giocoso Installation Home ]