1.0 Introduction
This is the sixth article in my series showing how I would suggest you go about the business of ripping and tagging different CDs of varying configurations. Previously, I’ve discussed various ripping scenarios that all have one thing in common: the work or works being ripped were all supplied on a single CD.
In this article, however, I want to examine how you might go about ripping and tagging the following work:

In case it's not obvious, that's a recording of a three-act opera by Benjamin Britten -and three acts tend not to fit on a single CD! Sure enough, here's the inside of the accompanying booklet:
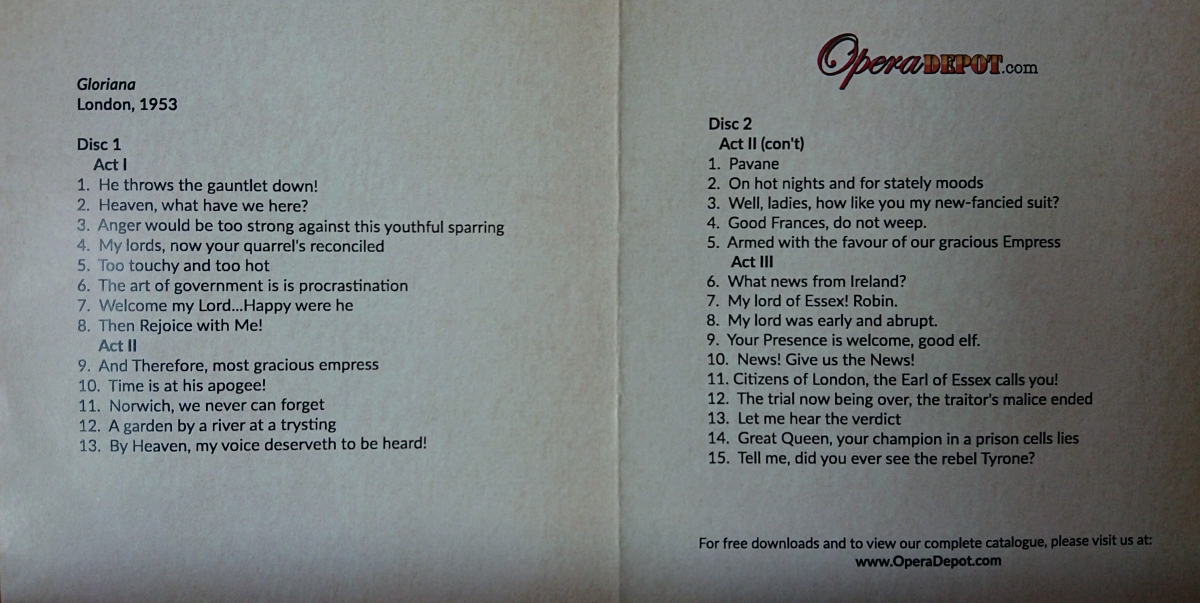
You will notice at once that the piece is supplied as part of a 2-CD set and that Act 2 of the opera is split between CD1 and CD2. When a single work is spread over multiple CDs, special ripping considerations must apply, since if you left the ripper software to its own devices, you'd end up (in this case) with a track called 01-He throws the gauntlet down! and 01-Pavane.
From the perspective of the various Axioms of Classical Music this site advocates, however, that would be quite wrong. This is a single composition and it's irrelevant how many physical CDs it happens to be supplied on. When we finish track 13 at the end of the first CD, we should move straight on into track 14, the pavane that starts CD 2. Only then do we obey Axiom 14, which states that a composition is an album and every album starts with "a" track 1, not two or more of them!
Our task when we rip and tag this opera, then, is to make sure that none of the tracks on CD2 conflict or over-write the tracks we have previously ripped from CD1. Additionally, we need to make the track numbers sequential across all CDs in the set, with none re-initializing the sequence at 1 after the first CD. With those goals in mind, let's see how we'd go about ripping this work.
2.0 The Rip
If you've been following the other articles of this series, you will know that EAC will rip all the tracks from a physical CD into a user-specified directory, resulting in just a 'pile' of music tracks, called things like '01 Track01.flac' and so on. We can still use that approach for the first CD of this opera set: just pop the CD in the drive, fire up EAC and click the 'CMP' button to rip the first CD to disk:
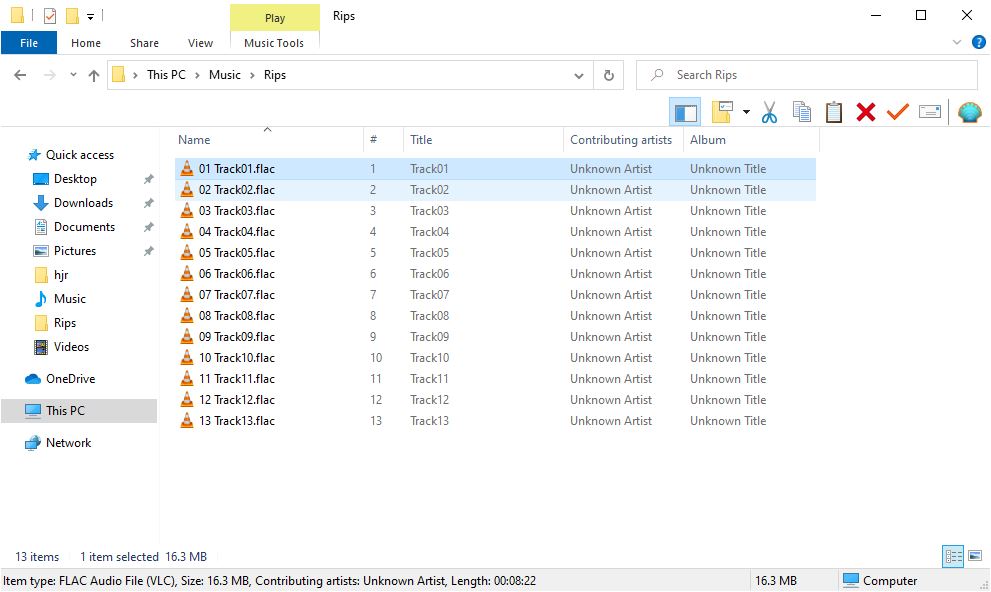
Here you see the resulting 13 tracks that came from the first of the 2-CD set, filed in a fairly undifferentiated mass on the hard disk.
Now, if we did nothing else at this point, we would run into trouble when ripping the second CD -because it also contains a track numbered 1, and it therefore would also produce a file called '01 Track01.flac', which would promptly over-write the contents of the first '01 Track01.flac'. So we can't just leave EAC to do its usual 'thing' for CD2. Somehow we have to intervene to prevent the second set of rips over-writing the first. There are a couple of ways of doing that: the software approach and the file system one. I'll describe each in turn now.
To begin with, here's EAC aware of the contents of the second disk:
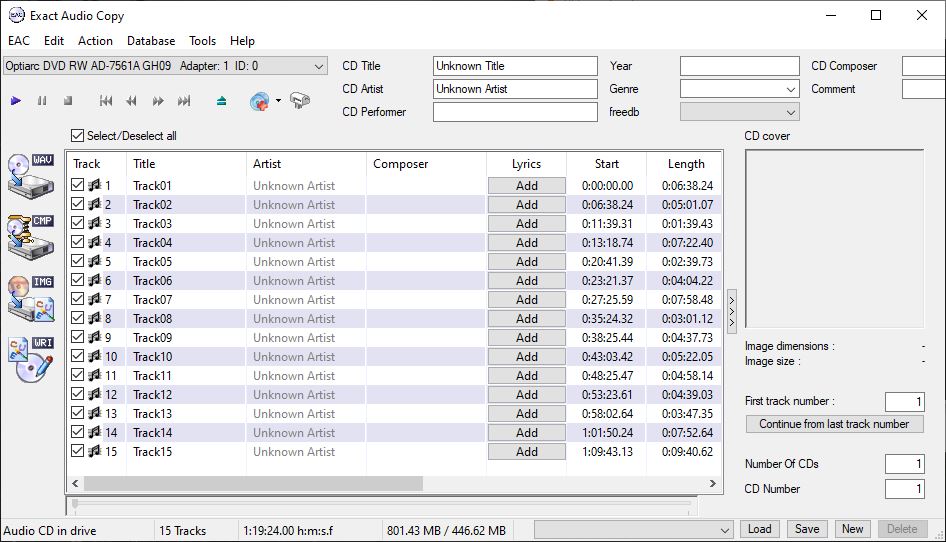
We must not just click the 'CMP' button at this point, for then we would lose our original rips! Instead, turn your eyes to the right-hand side of the main program window. You will notice a text box there labelled 'First track number'. By default, this always starts at '1'... but, on this occasion, we know we want the first track of CD2 to be numbered sequentially from the point the first CD got to when it ended. In other words, we need to start the track numbering for CD2 at 14. Set that now:
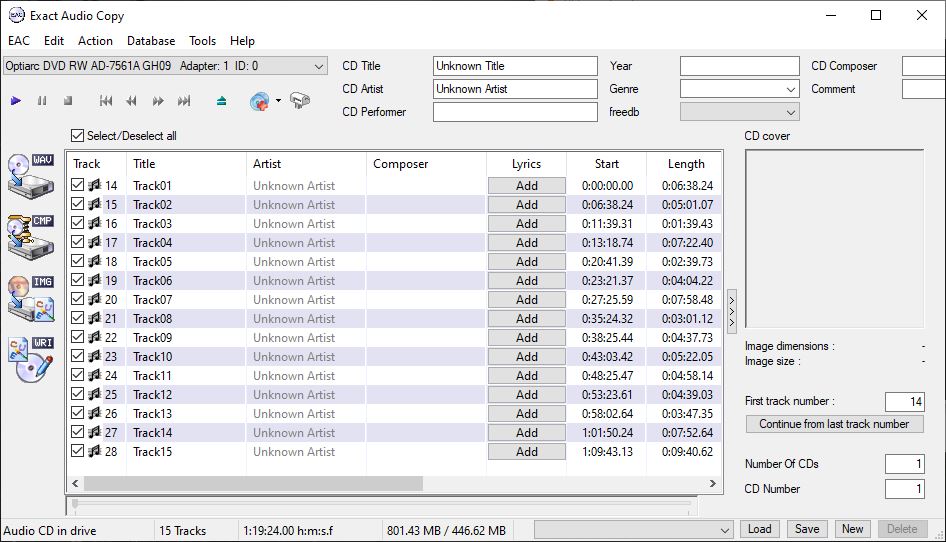
Just type the new starting number and press [Enter]: you can see in the main part of the program window that although the track titles still read 'Track01', 'Track02' and so on, the first column of track numbers now reads '14, 15, 16' and so on. This is enough to make the file names for the tracks from the second CD distinct enough that they won't destroy the tracks already ripped from the first CD. We can see this clearly once the second rip is complete:

As you can see, the track names re-set back to '01' at the point of the CD change (tracks 13 and 14), but the track number component does not, allowing the second group of 15 tracks to be preserved distinct from the first group of 13 and sorted in the correct order. We'll be able to sort the track titles out shortly during the tagging process: the main thing at this point is to be able to create an ordered list of all tracks of the entire CD set, without getting them jumbled up or having a new ripped track over-writing an older one. In this case, we achieved the desired effect by utilizing a functionality feature of the ripping program itself: the ability to specify a non-1 starting track number. So that was software coming to our aid.
But not all CD rippers have that sort of capability. What if you were using one of those programs instead of EAC? Well, I mentioned earlier that you could use a 'file system' approach. By this, I mean simply that you manually create a sub-folder into which you move the tracks ripped from the first CD before you try ripping the tracks from the second CD. This prevents the second CD rip over-writing the files produced by the earlier rip. For example: here's me creating a new sub-folder after the rip of CD1: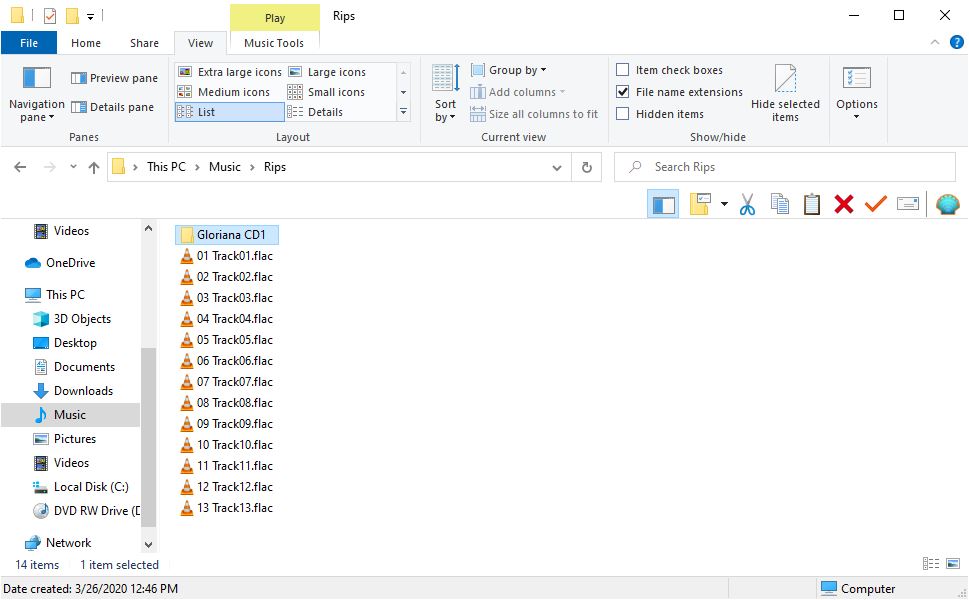
What you call the new sub-folder doesn't really matter too much, but obviously something related to the work in question is a good idea! Now, you just use the Windows file manager to move all the ripped FLAC files into that new directory:
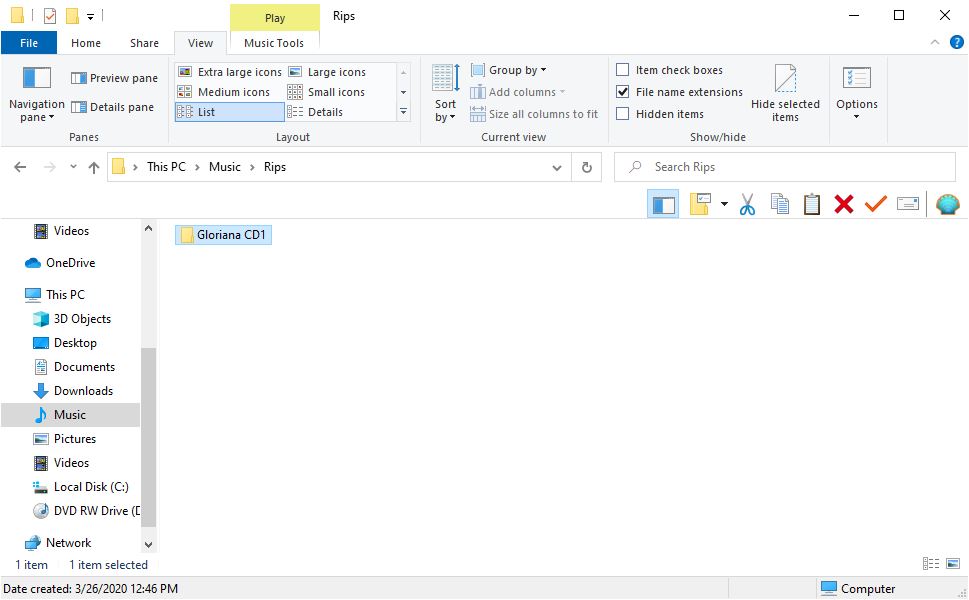
...and that leaves the 'Rip' directory itself clean and clear, ready for the rip of the second CD of the set. Naturally, because we're not using a software capability to make the track numbers rip from 14 upwards, my new set of tracks from CD2 all start back at track 1 again:

But at least the creation of this new set of tracks hasn't disrupted the contents of the new 'Gloriana CD1' sub-folder!
In short, if your ripping software allows you to adjust the track numbers of the second (or subsequent) CDs of a set, use that functionality to make the new batch of tracks numbered in such a way that they cannot over-write or get mixed up amongst the tracks ripped from earlier CDs in the set. But if it doesn't, then use your operating system's file manager to move the tracks ripped from each CD into its own sub-folder, such that subsequently ripped tracks physically cannot over-write or get mixed up with the tracks ripped from earlier CDs in the set.
3.0 The Post-Rip Tagging
With my two distinct rips completed, I can launch MP3tag and begin the process of tagging my new music rips. As usual, we have to concern ourselves with two distinct 'levels' of tag: album-common and track-specific. The approach you take, however, will be significantly different depending on whether you ripped everything to one folder, using software tricks to keep the track numbers distinct; or whether you used the file system technique of creating physical sub-folders to store the first CD's tracks away from those ripped from the second CD.
Let's look at the 'physical separation' approach first.
When you've ripped different CDs to different directories, you may have a shock when you first launch your tagging program:
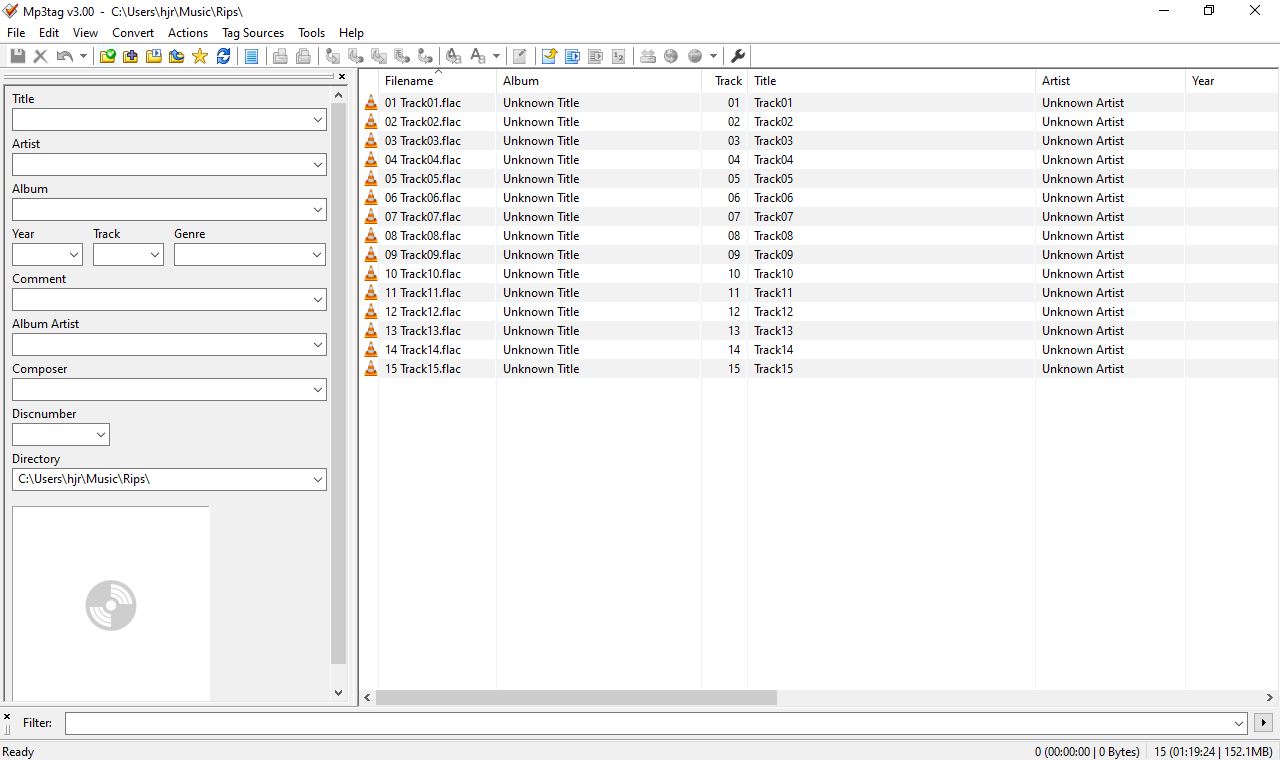
MP3tag, for example, opens by default in the last directory used, which in my case was my Rips directory. That means it's seeing the 15 tracks from CD2 of my opera, because those were the last files saved in that directory. But where are the 13 tracks from the first CD of the set? Well, they are there, but you'll have to point MP3Tag at them separately:
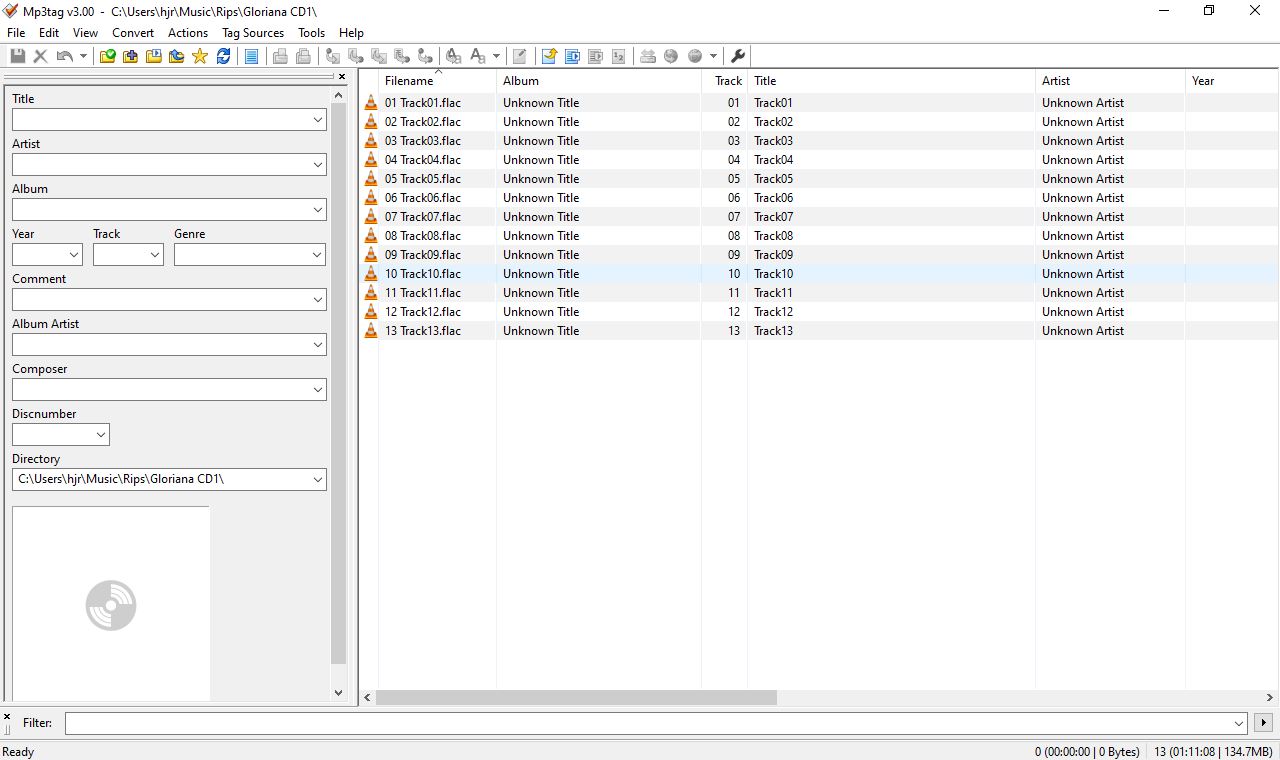
Here, I've clicked File -> Change directory... and pointed to the "Gloriana CD1" sub-folder, and now the program is happily displaying the 13 tracks from that first CD. So, provided you don't mind changing directory as you tag up each component CD's tracks, you can tag up the entire set of 28 tracks without too much difficulty. If you'd used the 'software separation' technique during the rip, of course, all 28 tracks would be listed immediately, correctly sequenced by track number; but with the 'physical separation' ripping method, you have to tackle each component CD's tracks separately, using the 'Change directory' functionality to switch between them.
In either case, we begin by applying the 'common' information to the tracks, as follows:
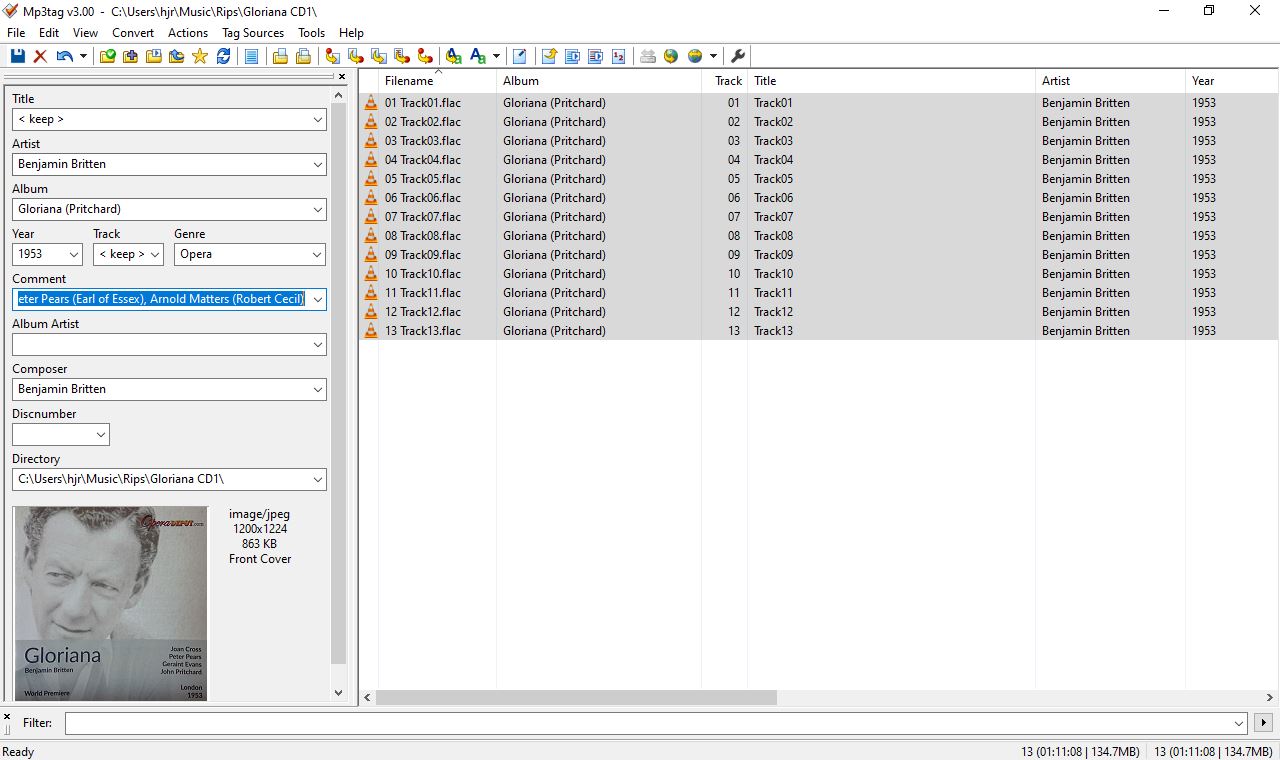
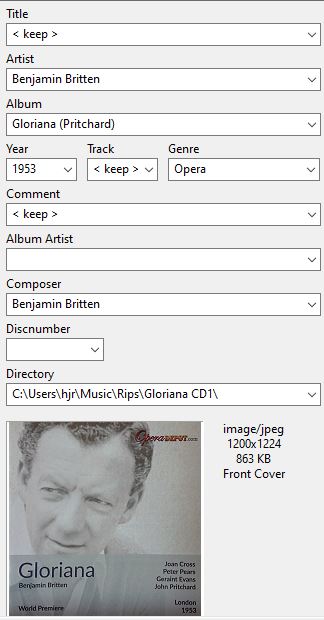
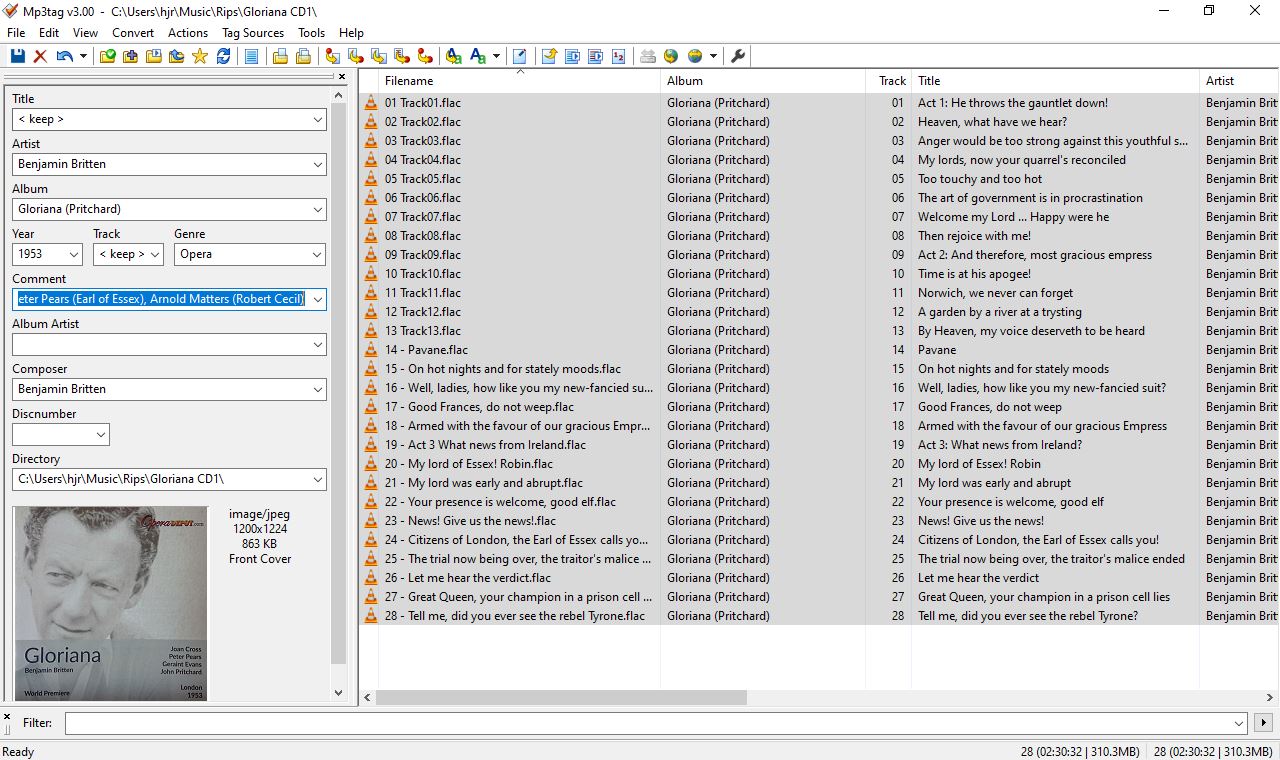
Here, you can see I've supplied album art to all 13 tracks from the first CD of the pair, along with correct ARTIST, COMPOSER and GENRE tags. I've also typed in a lot of the artists performing the work (but not all of them: it's a big-cast opera!) in the COMMENT tag. Finally, the DISCNUMBER tag has been cleared -because we don't think in terms of disks when we are playing digital music files stored en masse on a hard drive!
Now: I'm still dealing with the consequences of the 'physical separation' method of ripping, so whilst I could now switch to the second CD's rips and tag them all up in a similar manner, it makes sense to finish off CD1's tracks in their entirety: they are already loaded into the program, after all. So, I'm going to move straight on to applying the track-specific information to the CD1 files now:
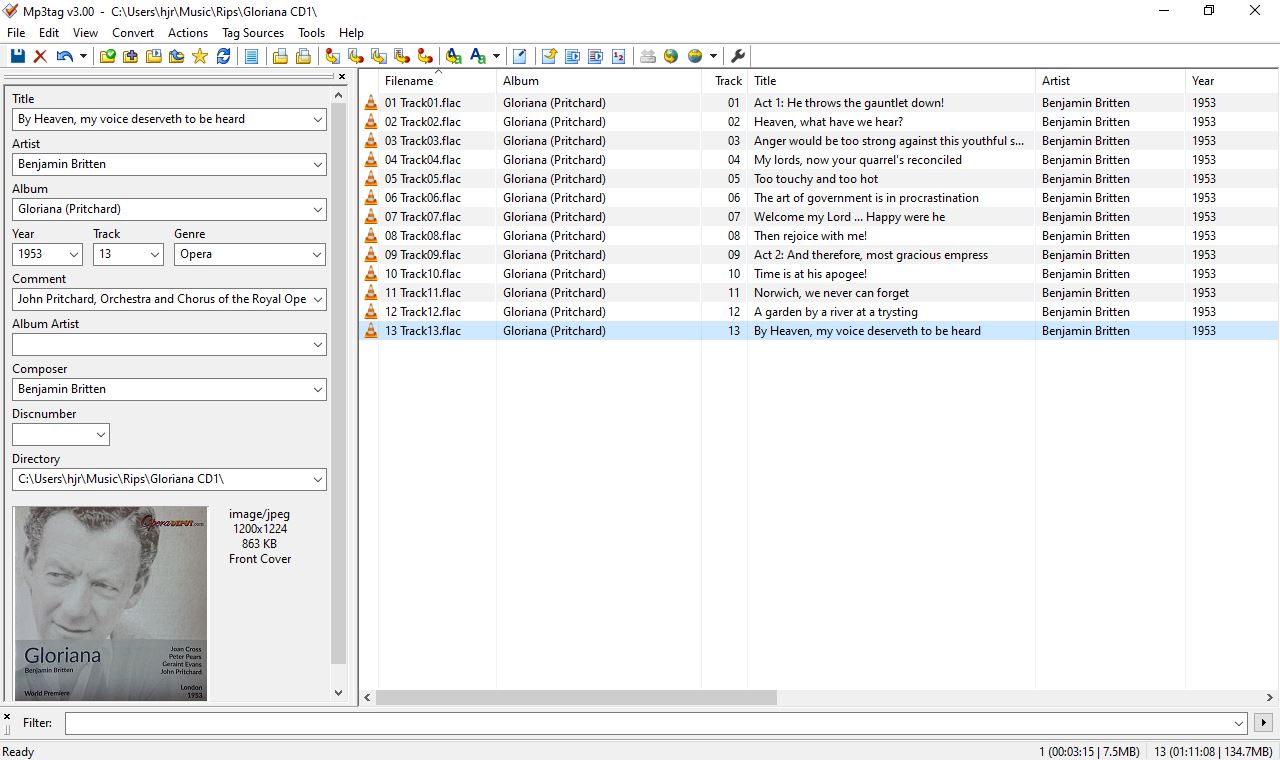
I just use the 'in-place' track title editing technique to whiz down the first 13 tracks and type their titles in (correcting some typos and capitalisation errors that beset the track list supplied with the CD booklet, take note!)
With CD1 done, it's then time to switch to the CD2 directory and tag the files found there with identical common information, and their own unique track titles:
I've actually made a deliberate error on this occasion, tagging up the COMMENTS very slightly differently than I did for CD1's tracks. We'll see what happens when your tagging is not exactly the same across CDs in just a moment.
Now, however, we come to the big issue for CD2 in this 'physical separation' approach: its track numbers are all wrong. How can we fix that easily? Simply by selecting all the second CD's tracks at once (Ctrl+A) and then invoking the auto-number wizard (Ctrl+K):
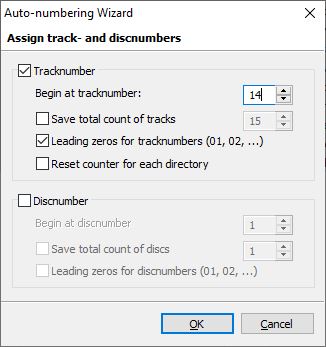
Just fill in the form to instruct the program to auto-number from 14 upwards. Click [OK] and see the difference:

But whilst this gets track numbers correct, the track file names are still '01 Track01.flac' and similar: identical to the file names from the first CD, and thus liable to overwrite those other files if they ever get put together, as they must be eventually. So we need to fix those names up before doing anything else. Time to select all tracks (Ctrl+A) and then click Convert -> Tag - Filename. Whatever is currently displayed as the formatting string, erase it and replace it with just this:
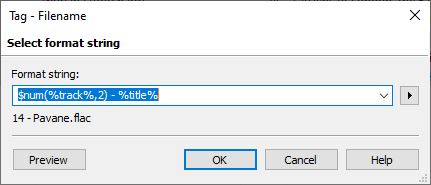
That is an instruction to change the filename to be the track number, padded to two digits; a spaced hyphen; and then whatever the TITLE tag is set to. Click [OK] when that's been set correctly and you'll now see this: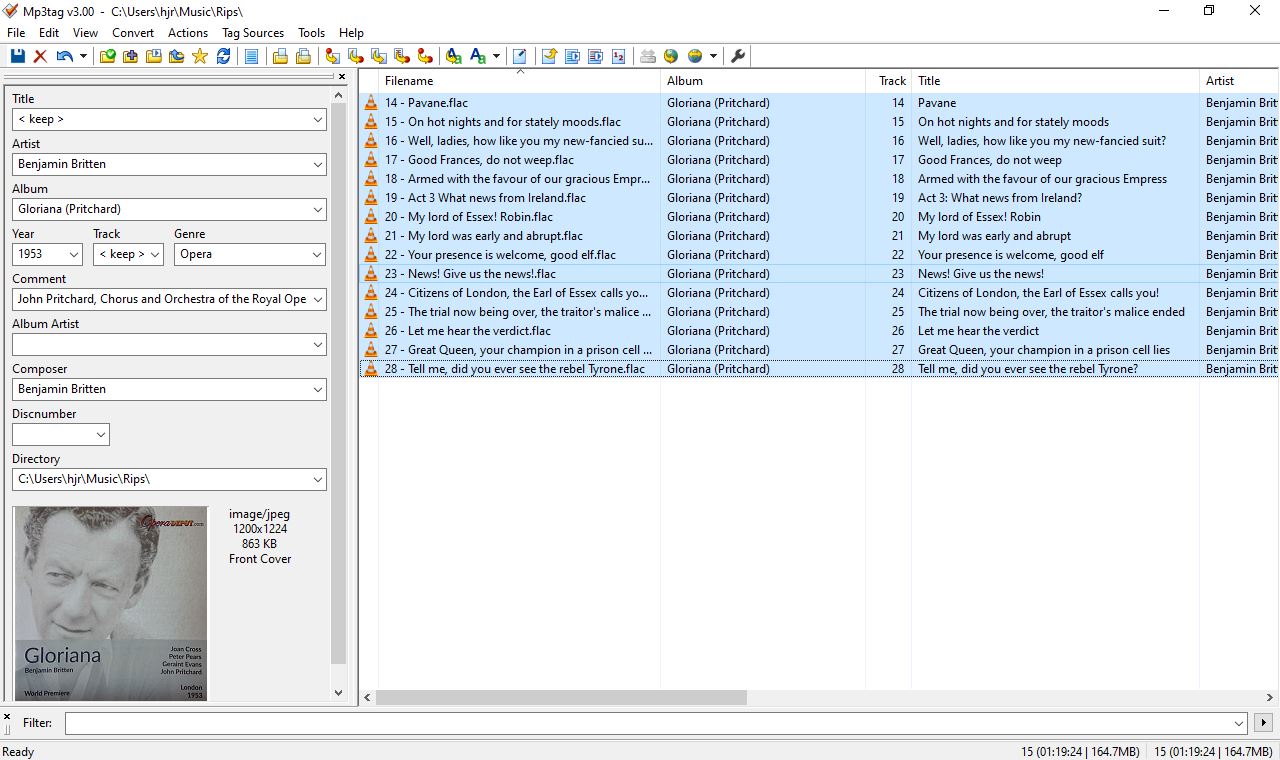
So now the tracks from CD2 have physical names which mean that they cannot possibly do any damage to those from CD1. Once that's achieved, you can use the Windows file manager to move all 28 tracks together into a single directory: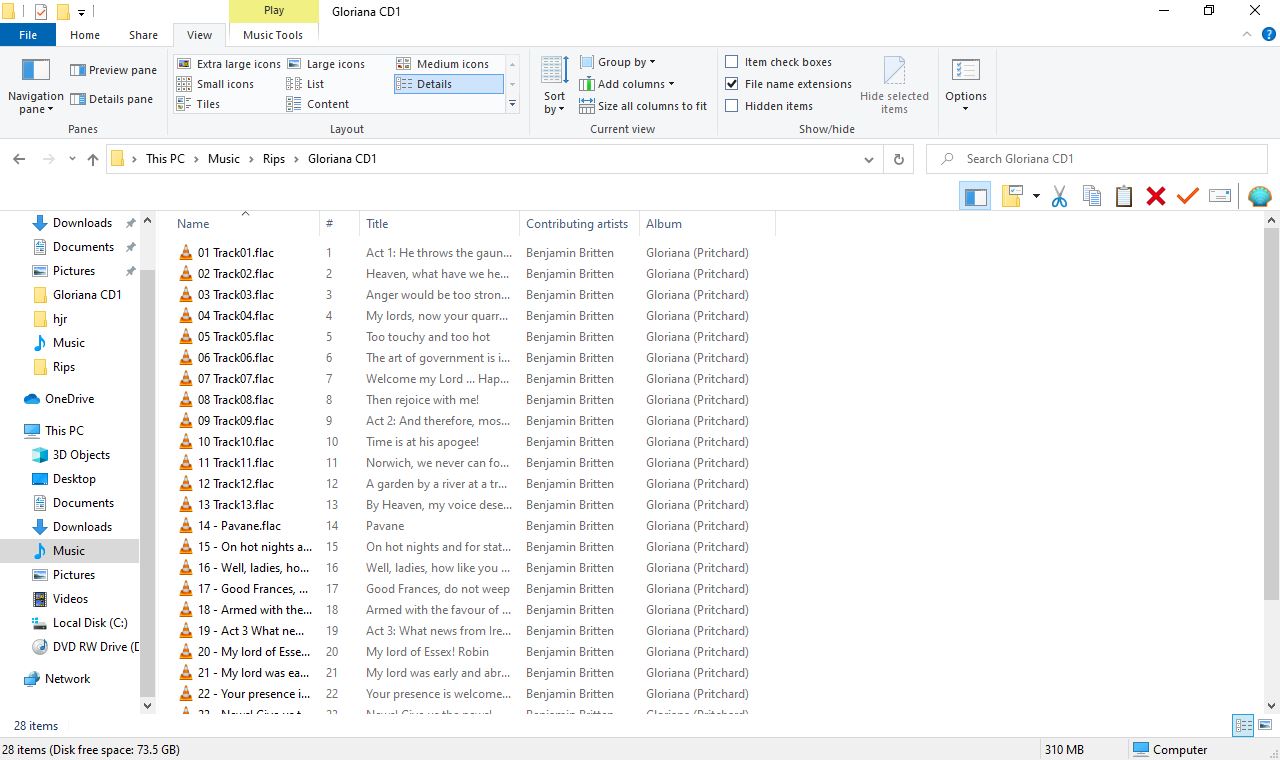
Here you see me sitting in the 'Gloriana CD1' directory, into which I've just moved all the tracks from the CD2 rip (so now the folder name is, strictly speaking, inaccurate... but no matter!) I could equally well have moved the files out of 'Gloriana CD1' into the Rips directory and created the complete set of 28 tracks there: it doesn't really matter in which direction you move things, so long as all the files are stored in the same folder, somewhere. Once that's achieved re-launch MP3tag and point it to whatever folder the complete set of tracks is sitting in and you'll see all 28 tracks listed together for the first time:
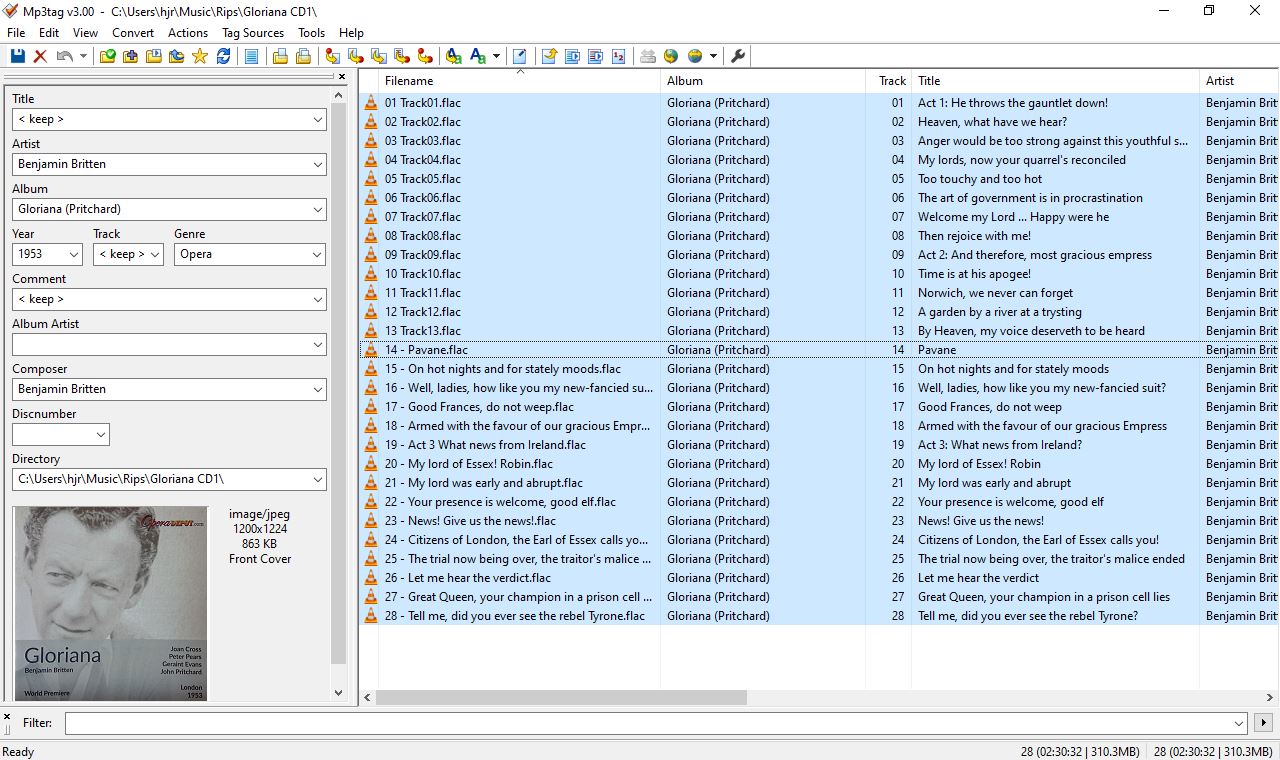
Visually, it's perhaps a little complicated! You can see that the tracks all fit together nicely in one coherent numbered list, 1 to 28. But the tracks from the first CD weren't renamed, so they retain their '01 Track01.flac'-style names. Only tracks 14 onwards have 'proper-looking' names, because we used the tag-to-filename utility to get them renamed earlier. That's not a problem.
More of an issue is what happens when, as in that previous screenshot, you select all the tracks at once (Ctrl+A). Notice anything wrong in the tag panel at the left?:
Well, the Artist and Composer tags are showing up fine; so is the Album tag... but what's that '< keep >' that's displayed for the Comments? What happened to my list of performers?! Well, the 'keep' display is what happens in MP3tag when a tag is not identical for all of the selected tracks. So that tells me that I must have tagged CD1's tracks with a COMMENT that is not identical with that I must have used for CD2's tracks. (Remember, though: I did the different tagging deliberately!!) If you click the little down-arrow shown at the end of the Comment drop-down window, you'll see this sort of thing:

And now you can see all the different values supplied for the Comment tag across all selected tracks in one drop-down list. In my case, there are only two variants -one that has 'Orchestra and Chorus' and one that has 'Chorus and Orchestra'. If you select one of those values from the displayed list and then click the Save button (the floppy disk icon), that one value will now become the Comments tag for all selected tracks:
So now the 'Orchestra and Chorus' version of the tag is displayed, rather than 'keep' as previously, because that tag value has now been written to all 28 tracks, identically.
The general principle I'm trying to get at here is that if, for whatever reason, you've had to rip separate CDs into separate physical locations on hard disk, you are going to have to do something to allow the separate track sets to be recombined (which is what the auto-numbering and track-renaming functionality is for). You are then also going to have to make sure that you correctly tagged all the files from every CD identically for information which ought to be common across the whole set of them: slight typing differences when tagging each CD separately will mean the tagger will display 'keep' when it ought to be displaying a real value that is consistent for all tracks when those tracks are finally brought together in a single, shared location on disk.
4.0 Finishing Things Off
All my common tag data is now shared by all tracks across both CDs of the original set. All my track-specific data has been set correctly, too: the track numbers start at 1 and increment to 28, neatly ignoring the original division between physical CDs. My track titles are also correct for every track. The only thing remaining is to apply the track titles back to the physical file names, for all tracks, not just those from CD2 (which are already correct, of course).
So, Ctrl+A to select all tracks and then click Convert -> Tag - Filename. This time, the format string should read as follows:
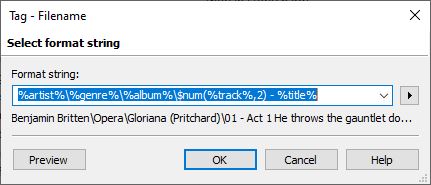
This is the long-form formatting string we've used in all the previous articles of this series: it will not only re-name the tracks, but it will also move them into a folder/sub-folder hierarchy which uses the ARTIST tag to supply the top-level directory; the GENRE tag to supply the next-level sub-directory; the ALBUM tag to supply the third-level sub-directory and finally number and name all the tracks in the 'padded(tracknumber) - title' form. Once your formatting string is correct, click [OK]. As usual, the effect on the file system is quite dramatic:
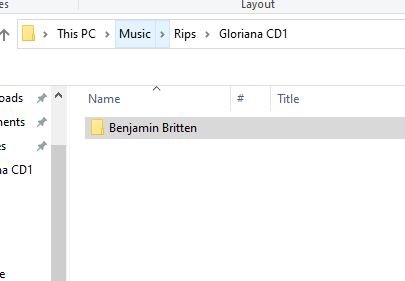
Here I am in my old 'Gloriana CD1' folder -and all the music has disappeared. In its place is a Benjamin Britten sub-directory. Click into that and you'll find an 'Opera' directory; click into that and you'll see a 'Gloriana (Pritchard)' directory. Click into that, and you'll see all your music files once again:

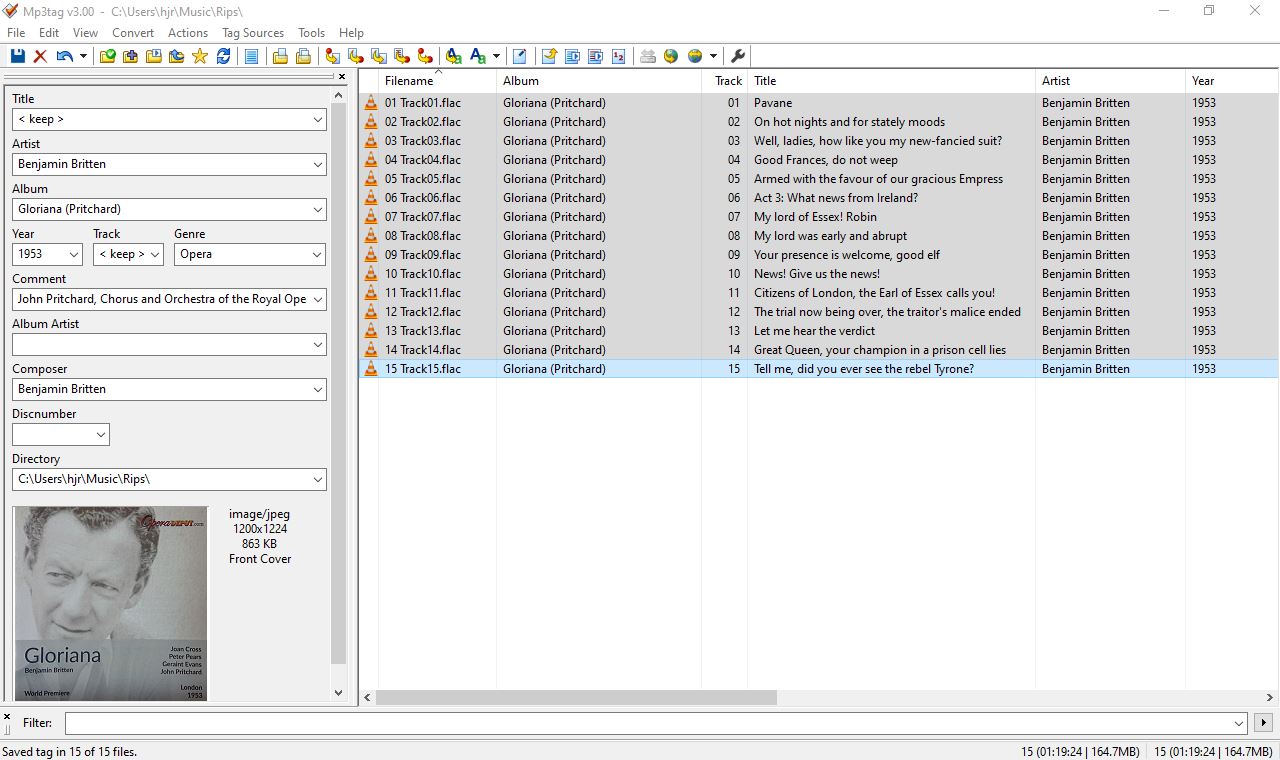
Finally, we see all 28 tracks correctly numbered and named, representing an entire opera, rather than physical CDs.
As usual at this point, I'd check the overall effect of my tagging work by checking thing out in my media player/manager, once I've persuaded it to notice that a new 'album' has been added to my collection:

That seems a reasonably neat outcome to me: it is correctly catalogued as 1 of 2 works by Britten; the album art is clear enough; you'd never guess that anything 'odd' happened between tracks 13 and 14... Axiom 1 has neatly been complied with!
5.0 Conclusion
Ripping a single work that's been split across multiple CDs is not exactly hard, but it's certainly a bit fiddlier than doing single-CD rips. The main principle to operate by is: don't let one CDs tracks be over-written or mixed up with another's. Either use a track re-numbering facility at the rip stage to achieve that, or use the rip-move to sub-folder-rip approach to keep things physically distinct. If you use this approach, you'll still need to get the track numbering and naming working 'across' CDs eventually, but you'll use tagger software functionality to do that job instead of the ripping software.
If you use the physical separation approach, you will eventually need to bring the two sets of files back together into a single physical folder. At that point, you can exploit your tagger software's capabilities to make sure that tags which ought to be identical across the complete set of tracks really are identical and not ever-so-slightly different!
Once you've got a coherent set of tracks correctly numbered, named and tagged, use your tagger's automatic file renaming capabilities to make sure that the new, single 'virtual album' gets stored in an appropriate Composer -> Genre -> Album physical storage hierarchy.
Fundamentally, the issues you face with multi-CD rips are not particularly unusual or unique: you'll have confronted many of them when doing single-CD rips before. But the requirement to make sure separate sets of tracks don't get mixed up with -or overwrite- each other adds an extra level of complexity to proceedings. Keep a clear head and take things step by step, however, and that's not an insuperable obstacle to overcome.
Back to the Master Index of the Guides to Ripping and Tagging