1.0 Introduction
By way of a whirlwind tour of how you go about installing then using Niente Version 4, the following article documents a typical 'workflow'. It assumes only that you've taken care of letting your PC 'see' your music collection already. If it's stored locally, that's fine. If it's stored on a remote server, it needs to be made accessible to the PC running Niente somehow, whether that's via a mounted NFS or Samba share. On my own Niente server, for example, I have this line in its /etc/fstab:
192.168.1.64:/mnt/bulkdata/music /sourcedata/music nfs rw,hard,intr,rsize=8192,wsize=8192,timeo=14 0 0
...meaning that the 'source of music' is a remote server with an IP address of 192.168.1.64. It stores its music files in a folder called /mnt/bulkdata/music and I'm mapping a folder on my Niente PC, called /sourcedata/music to that remote server store, using NFS, and with a bunch of option switches to make the 'mapped network drive' read-write, a network timeout of 1.4 seconds, performing reads and writes over the network in 8K chunks, and so on. My Niente PC is thus given full access to my complete classical music collection, and by pointing Niente at /sourcedata/music, it's able to see all of it at once.
2.0 Installation
Installing Niente involves opening a terminal and typing the following commands:
cd
wget doco.absolutelybaching.com/neninst
bash neninst
The installation scripts requires an initial confirmation that you want to proceed:
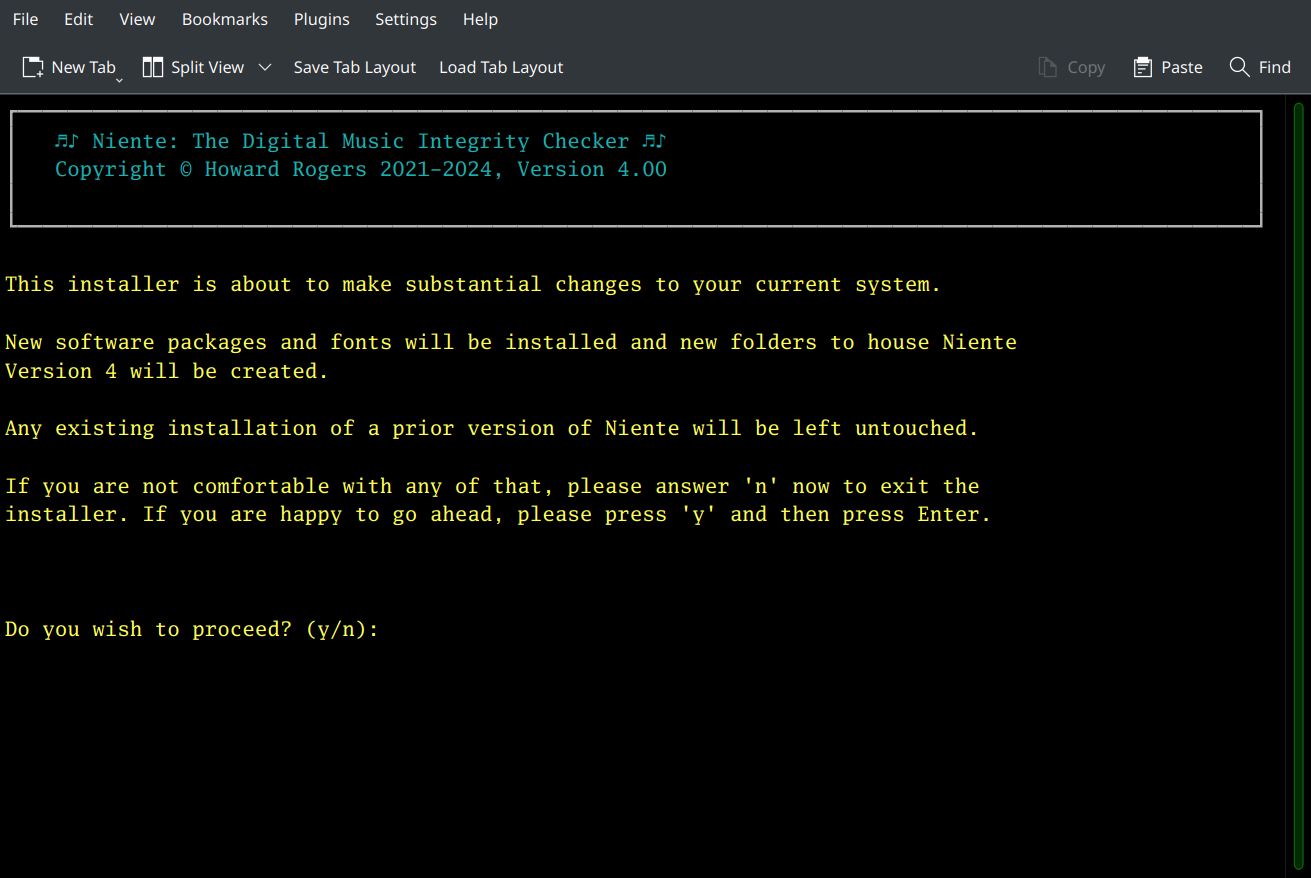
The installer is going to create a set of new folders within your $HOME folder (for example, $HOME/.local/share/niente4/bin, $HOME/.local/share/niente4/txt and some others), and it will also potentially install a bunch of dependent software packages if it finds them missing from your system, so this screen is warning you about that and asking for your permission to proceed. Type 'y' to go ahead. You'll have to supply the sudo password at this point, because the installer also needs to create some files in /usr/bin, which requires root privileges. That done (which might take a few minutes to complete), the installer then pulls down the Niente program itself and verifies it for accuracy once it's done so. That usually only takes a few seconds to complete, and then it's all over!
What you'll usually find at the end of the installation process (though it depends on what sort of desktop environment you're running) is that a desktop icon now exists that can be used to launch Niente (though you may need to right-click it and select a context menu choice to 'trust' or execute the shortcut before it will actually run, since the Desktop is considered an insecure location for launching executables on many distros). You should also find a program launcher in the normal start menu: this will usually be under the 'Multimedia' menu or, on some distros, the Sound & Video menu. Here's my Debian start menu, for example:
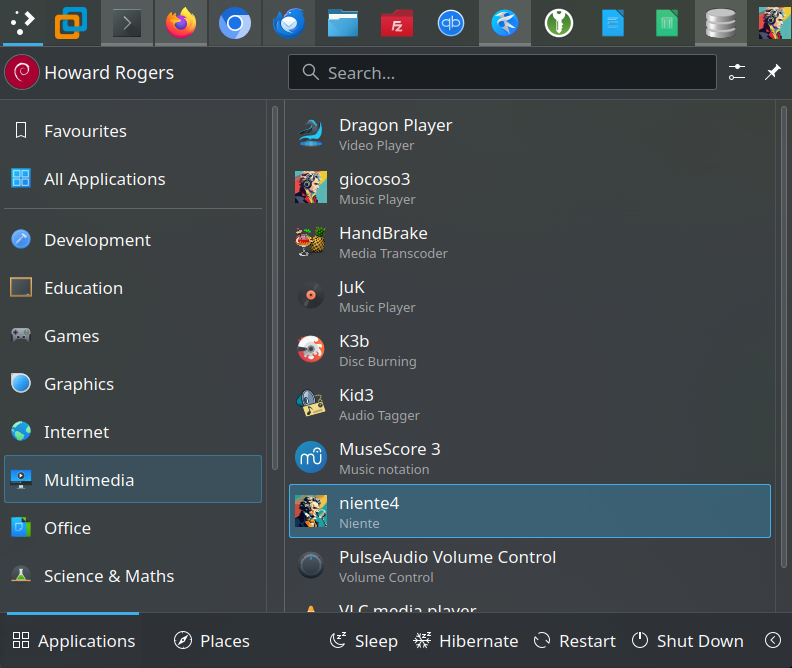
If there's a launcher in your start menu, you can just click it to start the program without having to confirm or approve it first: the start menu is usually a trusted location for executables.
3.0 First Run
The first time you launch the Niente program, you'll be met with this message:

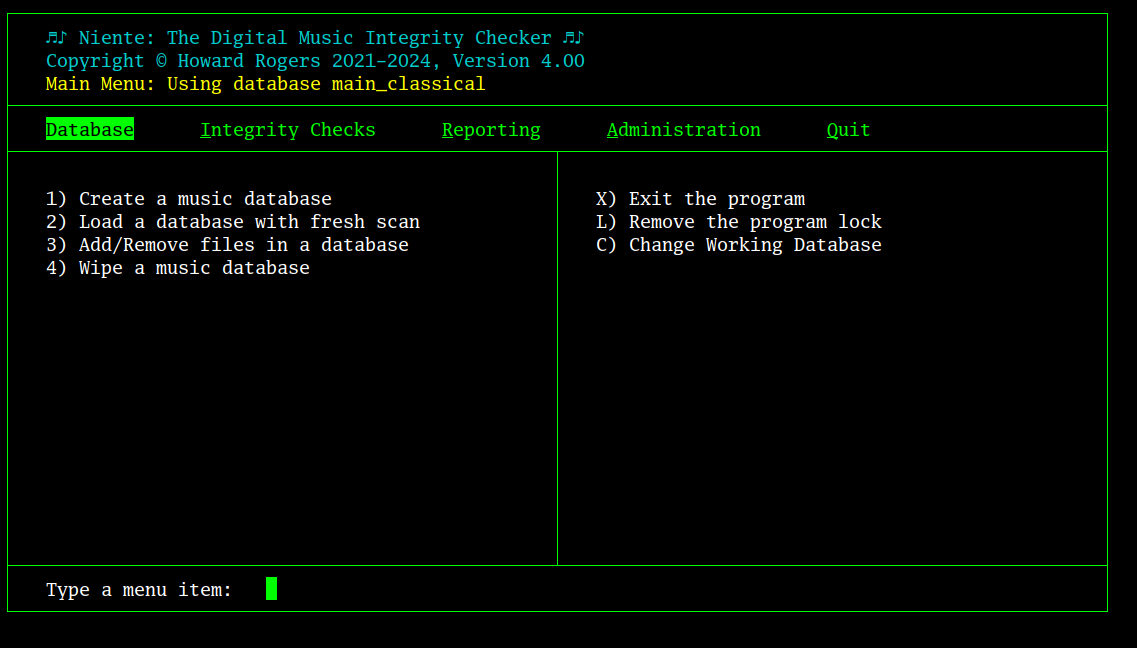
Niente is a database-driven program. On first launch, of course, you won't have a database, so this message appears, warning that you'll need to create a database before Niente can be used to do anything productive. Click [OK] to proceed at this point and you'll be taken to Niente's main program area:

You'll see that the program has four main menu 'areas': Database, Integrity Checks, Reporting and Administration. You use the right- and left-arrow cursor keys to scroll around that top menu bar in either direction. You can also tap the initial letters of each menu item to jump directly to it: R (or lower-case r) will take you to 'Reporting' and 'D' (or 'd') will take you back to 'Database', for example.
Whenever you launch Niente Version 4, you always start off at the 'Database' menu item.
Bearing in mind the warning you received when launching the program, your next step should be obvious: tap '1' when sitting in the Database menu to 'create a music database'. Without doing that, Niente can be used for nothing!
3.1 Create a Database
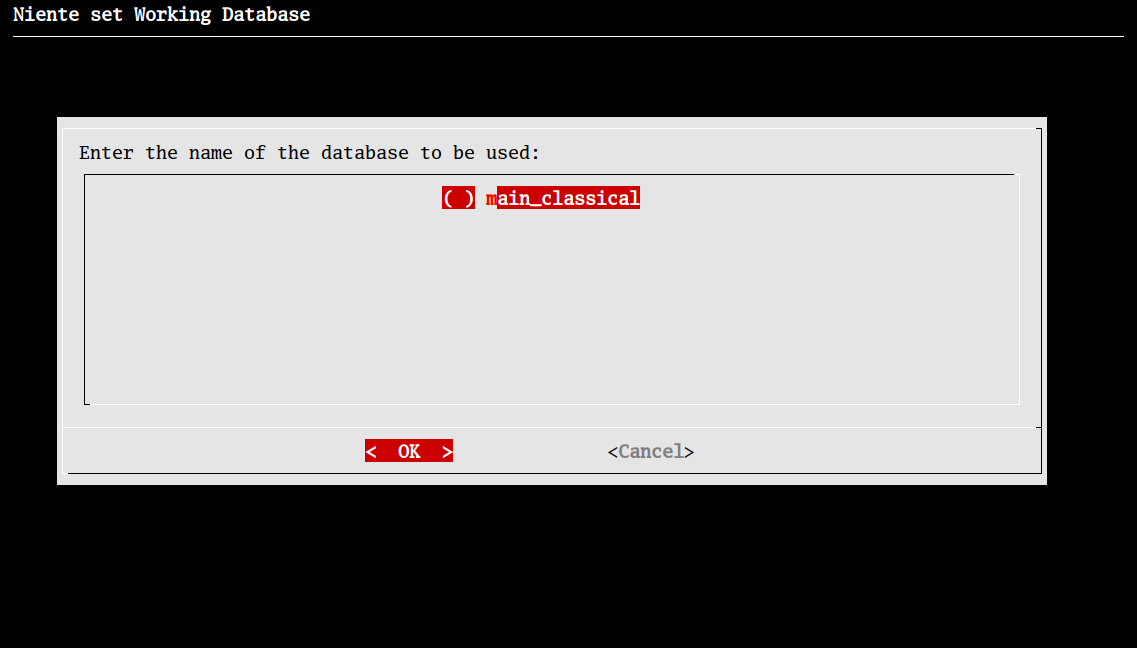
Taking the 'Create a music database' option brings up this screen:
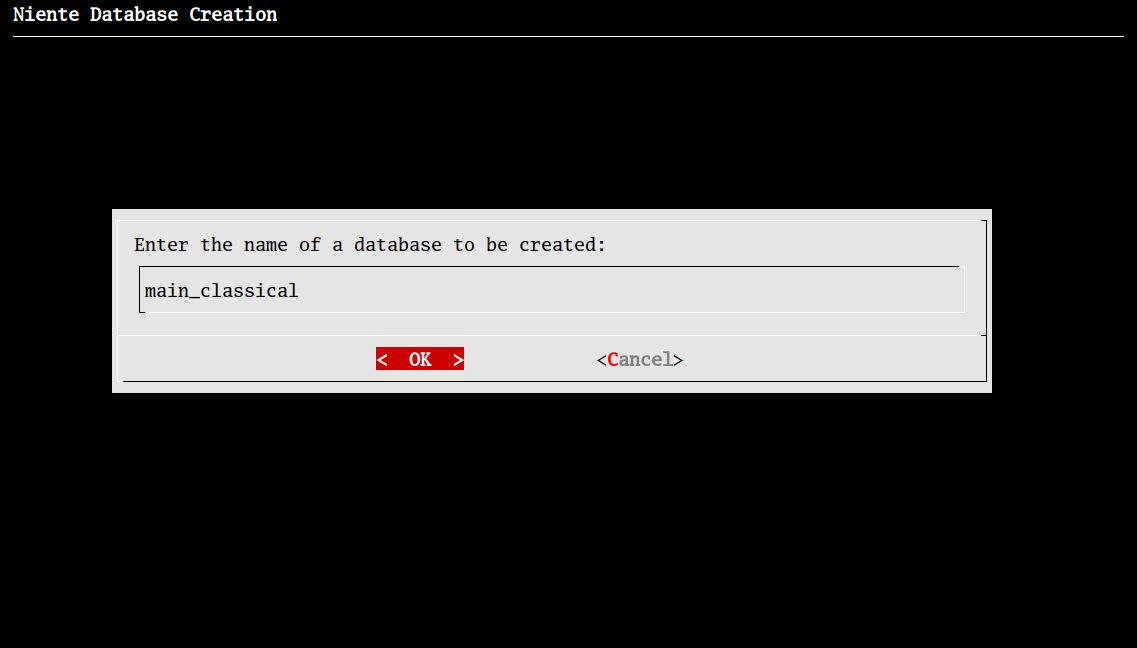
You are asked to supply a database name. The name can be anything you like -but I'd recommend keeping it relatively short (say, under 15 characters) and without spaces, though those are not hard-and-fast requirements. Here, you see me suggesting 'main_classical' as a name and using an underscore to replace the space that would naturally be there. Press [OK] (or click on it with your mouse: either keyboard or mouse work just fine on these sorts of screens) to proceed.
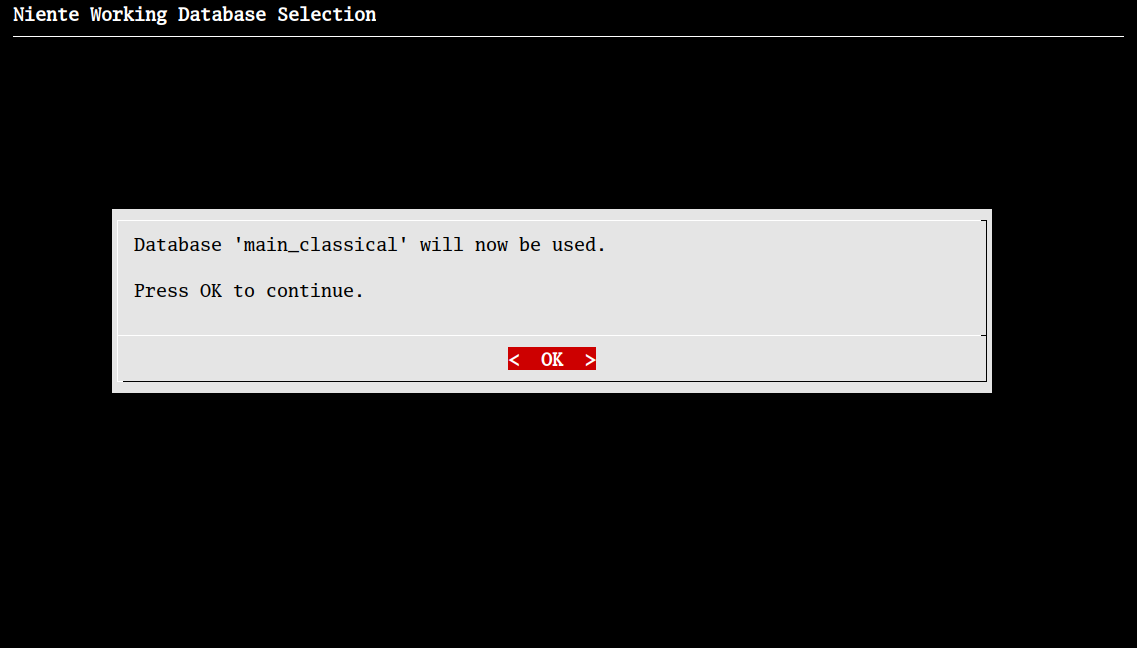
The screen will change to this:
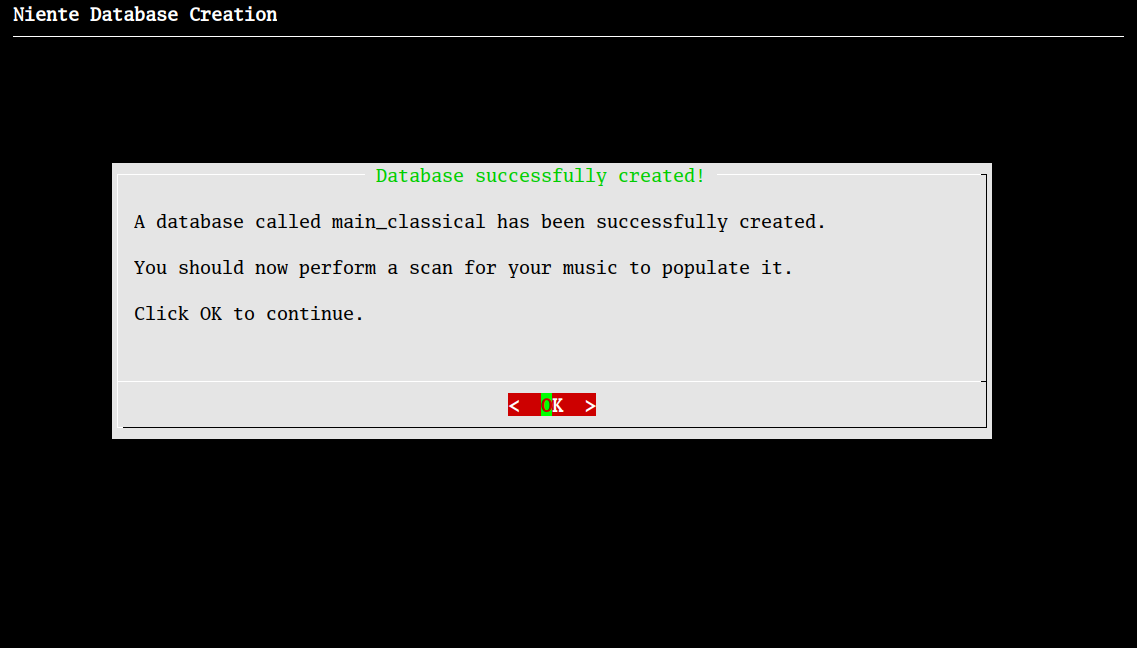
The database creation process takes hardly any time at all, so you'll see this confirmation message appear almost immediately you click [OK]. As the message tries to point out, however, you've just created a completely empty database: it has no data in it, regarding your music collection, so you'll need to perform a scan of music to populate it. We'll come on to doing that in just a second: for now, click [OK] (or press [Enter]) to dismiss the confirmation message.
3.2 Populate a Database
Your next task is therefore to scan for music and have the details regarding that music added to your new database. This is a relatively quick thing to do, because Niente only populates the database with details of what FLAC files exist: it doesn't attempt to learn anything about those files, other than their mere existence. It's not going to read tags, or check album art, or work out whether they are corrupt or not, for example.
So, take Option 2 to 'Load a database with fresh scan' and you'll see this:

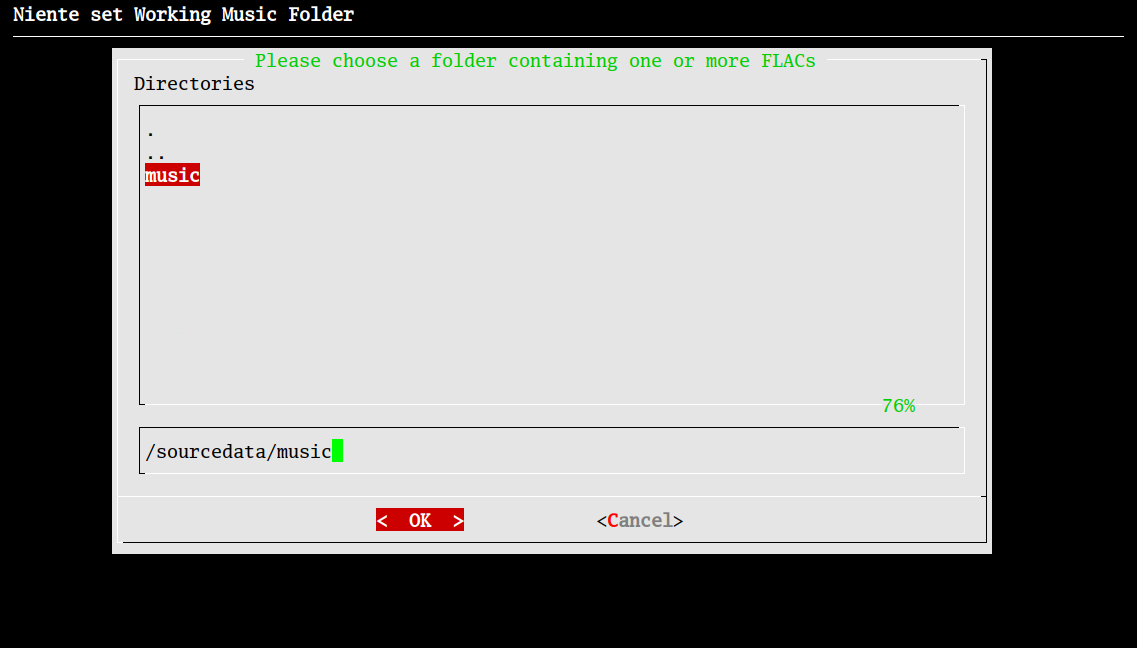
This folder selection dialogue always starts off pointing at your $HOME folder (in my case, /home/hjr). You can use the top pane to navigate around your file system (the '..' double dot entry allows you to go 'up' a folder level, so highlighting it and pressing the space bar would take me to /home). You can also tab down to the second pane (the one displaying '/home/hjr') in that screenshot and simply start typing the correct path: the top pane will change its contents to match whatever you've typed. Here, for example, I've manually typed '/sourcedata/music and the top pane has changed itself so that the /music subfolder is highlighted:
Use whatever file/folder navigation technique you prefer to move to the correct location, therefore. Just be warned of a little quirk with this sort of form: though the second pane lists '/sourcedata/music', I haven't actually 'gone into' the music sub-folder. The top pane tells me I'm looking at it, but I haven't actually descended into it. If I were to press OK at this point, then I'd actually have selected the /sourcedata folder as my music folder. So, make sure you press the spacebar to go into the folder you want. In my case, I actually want /sourcedata/music/classical, so my form needs to show this sort of thing:
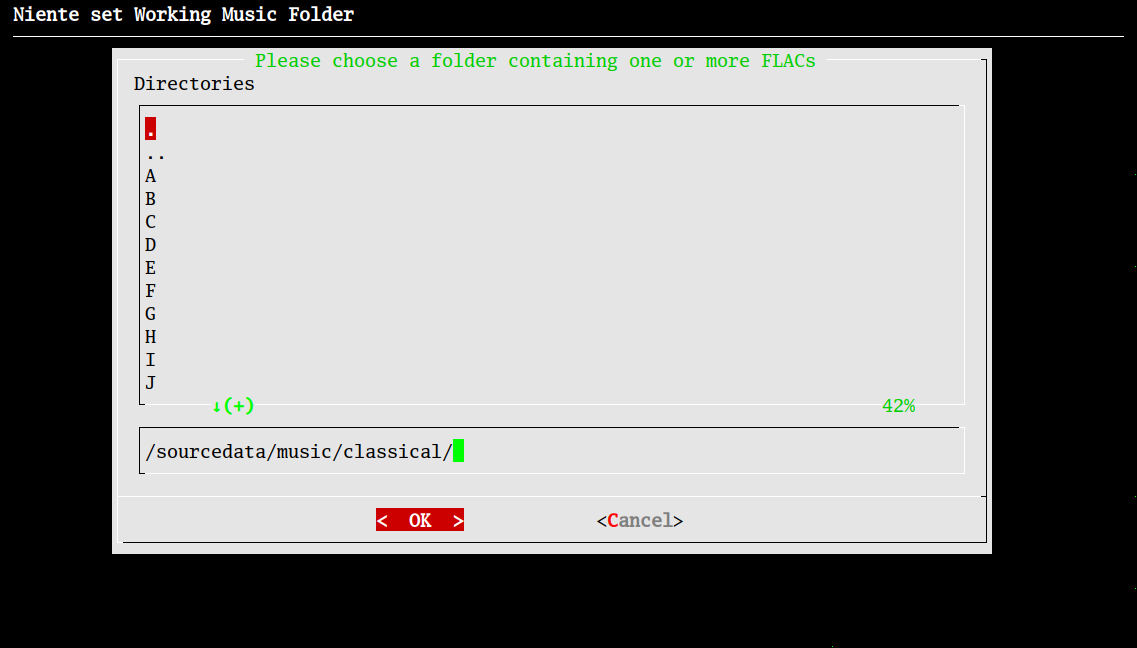
Here, I'm actually 'in' /sourcedata/music/classical and looking at the various sub-sub-folders that are within that sub-folder, which is correct for me. I can now click [OK] (or press [Enter]).
This triggers Niente's scan of that folder for music files (FLACs):
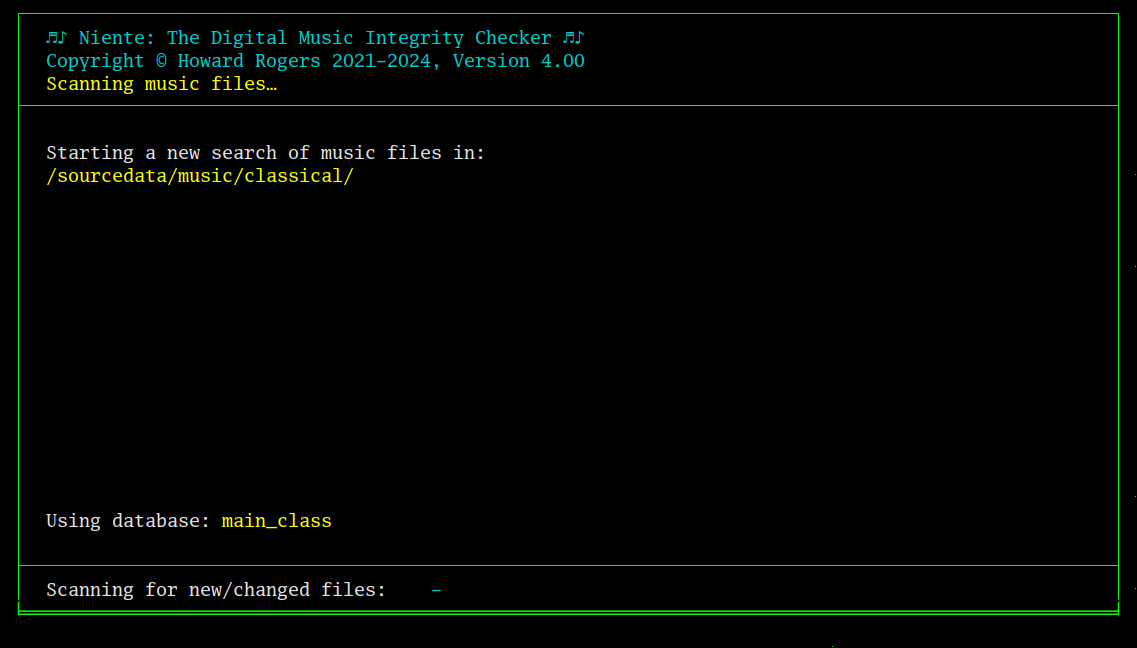
You can see the path that Niente is searching toward the top of the screen. The scan shouldn't take long to complete, even for a very large music collection. My 15,701 FLACs were all scanned in about 30 seconds:
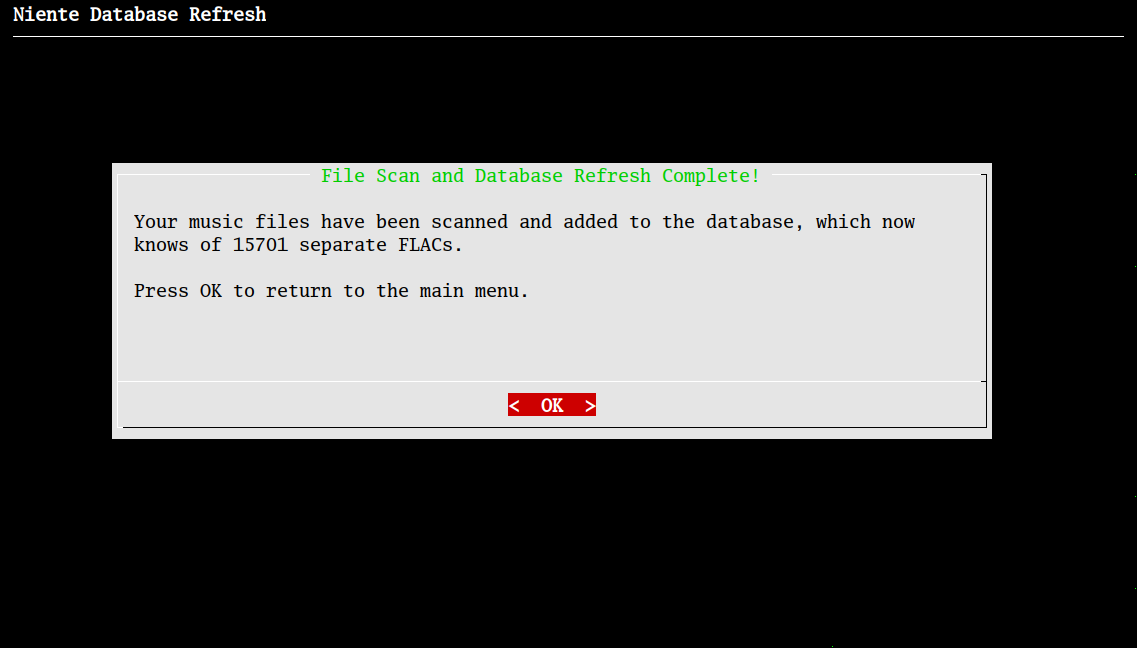
When the scan is complete, you'll be told how many FLACs were found. Click [OK] to return to the main menu.
3.3 What a freshly-populated database looks like
It's worth pausing at this point to have a quick look at what this database 'population' process has actually done. For this, I'll use a tool called sqlitebrowser, which you are certainly under no obligation to install or use. It's just handy to see 'inside' the sort of database Niente creates at this point:
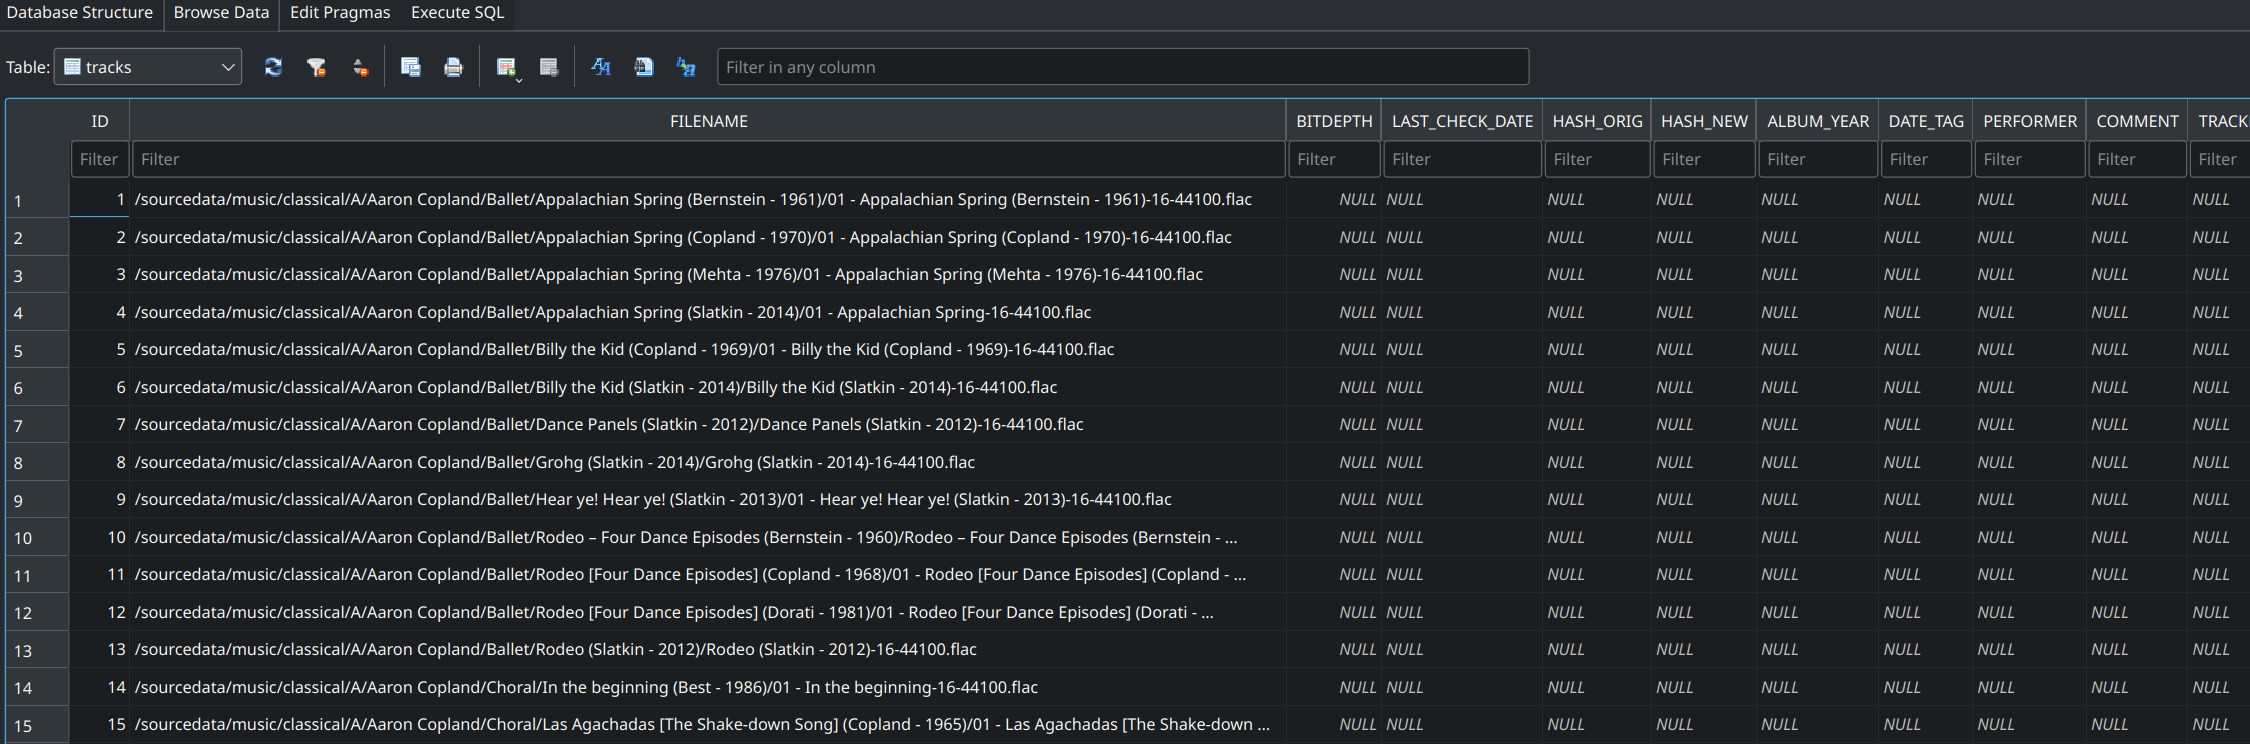
What you'll see with this sort of tool is that Niente's database consists of just a handful of tables, one of which is called 'tracks'... and the above screenshot shows you that the tracks table is now full of data. 15701 rows, in fact, one row per FLAC file found.
But you'll notice on the right of that screenshot are a pile of columns called things like 'HASH_NEW' and 'PERFORMER' and 'COMMENT' which are obviously intended to contain data about the FLAC whose full path and filename are listed in the FILENAME column... and that every single one of those columns is currently set to a value of "NULL", which is techie talk for 'empty'.
Filling up those columns with meaningful data is what an 'integrity check' is for -and therefore, that's the next step in this quick getting started guide. (Just as an aside, for the purposes of writing documentation quickly, I should mention that I've manually deleted all but 412 of the rows in this table, so Niente won't have to work so hard before completing its work. In real life, you should not attempt to manipulate the Niente database directly like that, though!)
3.4 Perform an Integrity Check
So we've created a database and loaded it with data: now we need to populate the multiple columns for each row of data. We do that by tapping the letter 'I' (or 'i') or arrowing across to the 'Integrity Checks' menu: when we get there, we take Option 1: Perform a full integrity check.
You'll note that there are two other integrity checks we could perform on this menu, though: Option 2 is a 'differential check' and Option 3 is a 'fast check'. What's the difference?
In a nutshell, a full integrity check goes through every row in that TRACKS table and analyses each FLAC mentioned there for both physical and logical corruption. The differential integrity check goes through only rows which are already known to have physical or logical corruption and re-checks them. The fast integrity check only goes through rows which are already known to have logical corruption only and re-checks them. So you'd use the differential or fast checks once you've been using Niente for some time: you start off by doing a full check and from that you learn that one file is physically corrupt, so you restore that one file from backup. Now you want to check just that one file to ensure it's free from corruption: and that's what a differential check would do for you.
At this point during your first 'getting started' run, in fact, it doesn't really matter which integrity check you go for, since every row is considered physically and logically suspect. Without any data in those NULL columns, they all look corrupt at this point. So even if you opted to do a differential check, you'd end up checking every row anyway. That wouldn't be true after you've been using Niente for a while, however.
Anyway: let me take Option 1 and perform a full integrity check:
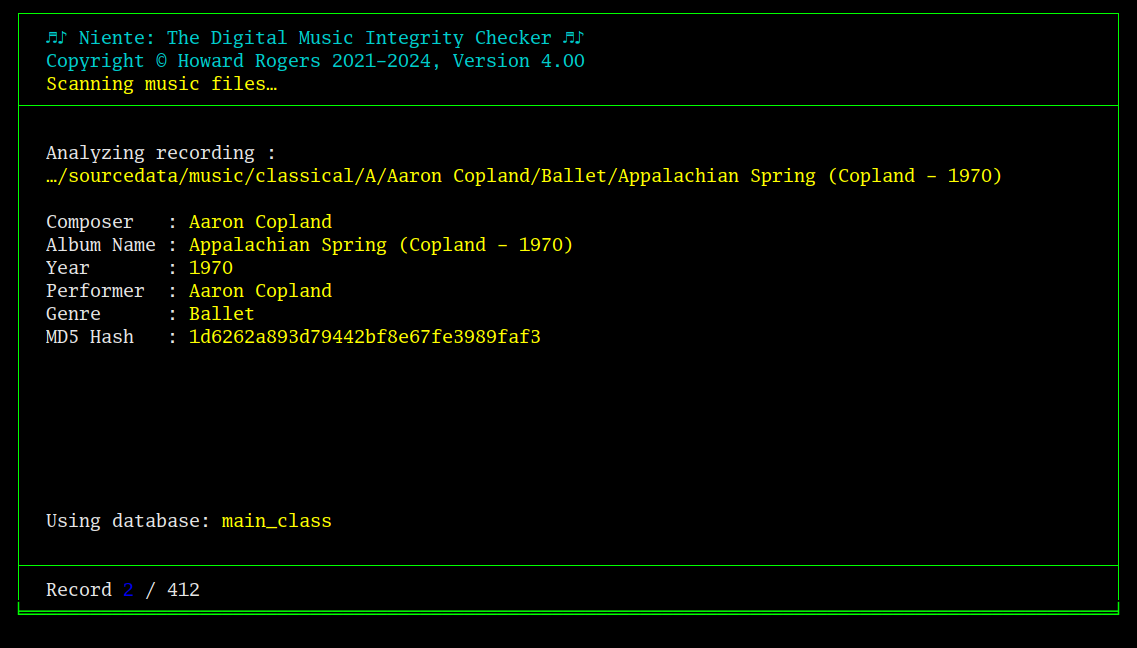
Immediately the integrity check starts, the name of the file being analysed is displayed, along with all sorts of information gleaned by reading the file's internals and its metadata tags. The information read is displayed in the main part of the screen. A counter will show you how far along the integrity check has progressed: here, I'm only reading the 2nd out of 412 files needing to be read.
Integrity checks are slow. There is a lot of work involved in reading metadata tags from hundreds or thousands of FLACs. There's even more work (CPU intensive work!) involved in re-computing the MD5 hash 'digital fingerprints' that tell us whether a FLAC file is physically corrupt or not. So, you have to be patient at this point: this is where all Niente's efforts are employed!
When the integrity check completes, you are unceremoniously dumped back at the 'Integrity Checks' menu. If we were now to look inside Niente's TRACKS table at this point, we'd now see this sort of thing:
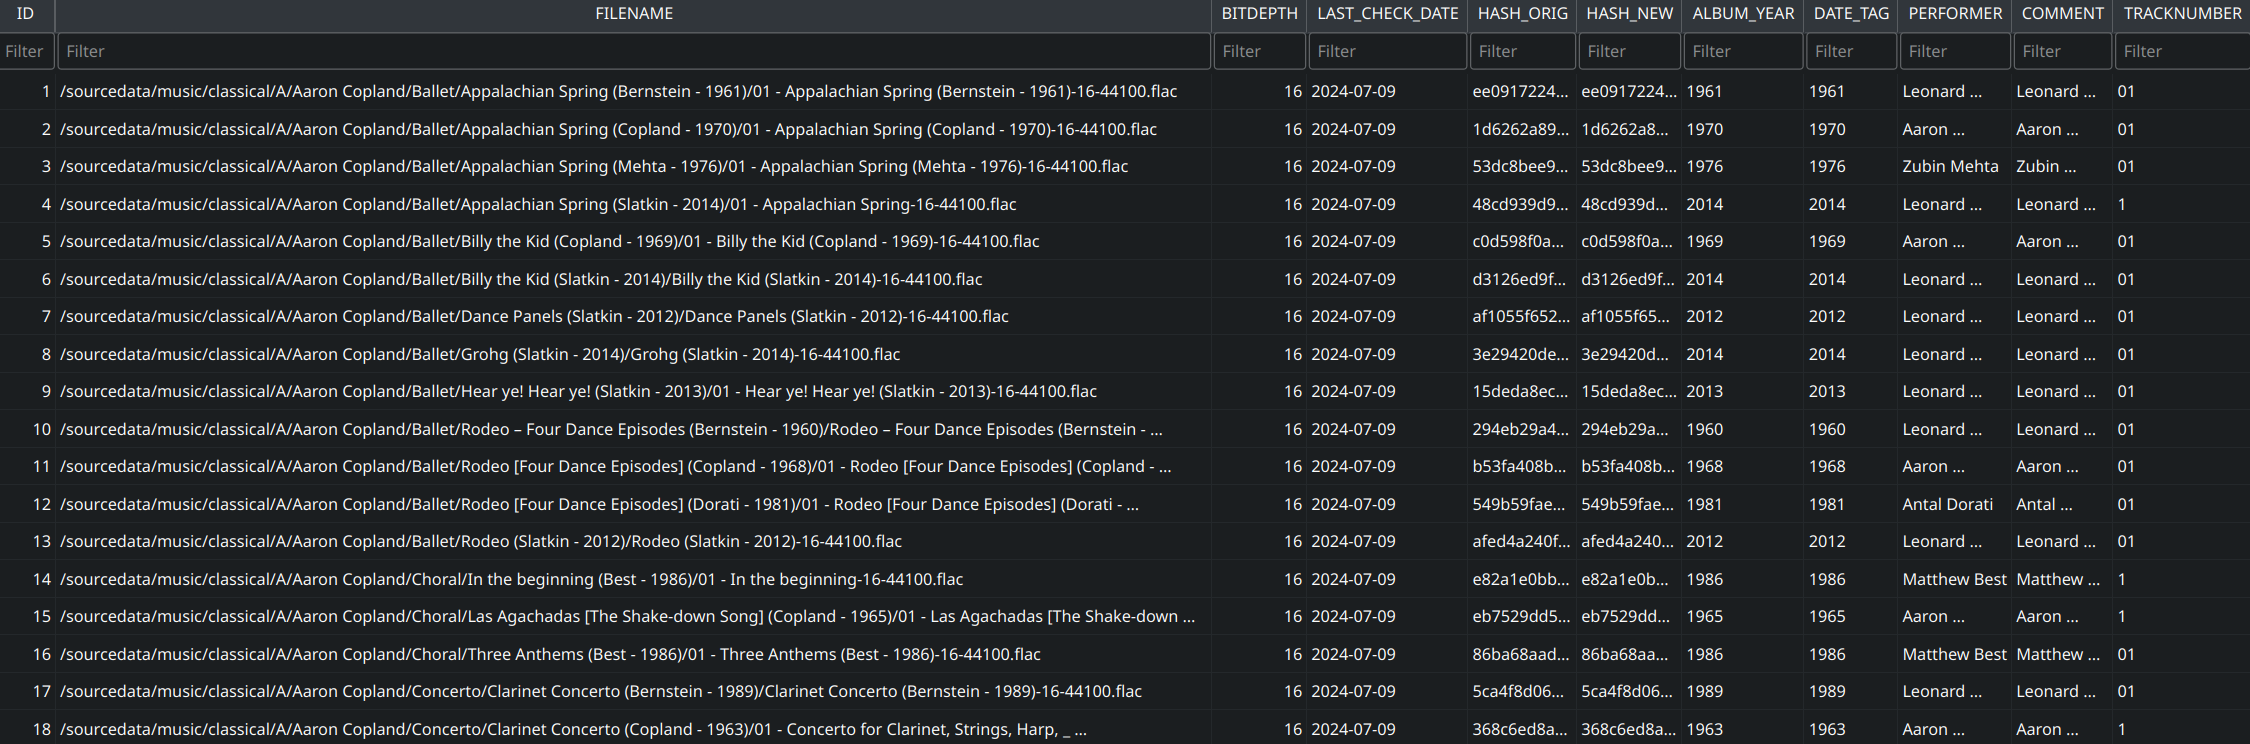
Compare this to the equivalent, earlier screenshot and you'll notice that all the previously-NULL columns now have meaningful data in them. That data is what now allows us to query the database and create meaningful reports: what rows in the table, for example, have MD5 Hashes that don't match, or whose PERFORMER tag isn't mentioned in the ALBUM tag.
So: a database creation populates TRACKS with rows. An integrity check populates the various columns of those rows with data. Only once the Niente database contains rows with a full complement of column-based data can you query the database to create reports.
3.5 Further Integrity Checks
Before we start producing reports, however, there are two other types of integrity check I'll bring to your attention: album art scans and potential volume boosts. These test, respectively, whether each FLAC has embedded album art and what its dimensions are if so; and whether or not a FLAC's peak volume level is well below what it could be before distortion is introduced. This sort of data is not collected as part of the 'ordinary' integrity check we've just completed, because it requires extra effort to collect and not everyone cares about it. Audiophiles won't go near mucking about with a FLAC's volume level; some music fans like their album art to consist of standalone files contained within the music folder, not embedded within the FLAC itself, for example.
If you were interested in this sort of information, though, you'd manually have to take options 4 (or 5) and 6 (or 7) to have your new data in the TRACKS table analysed for these sorts of issues. Options 5 and 7 do partial art or volume scans, finding rows in the TRACKS table that currently lack album art or volume boost data; options 4 and 6 do full scans of every row in the TRACKS, regardless of their current art or volume boost status.
The album art scan is relatively quick,:
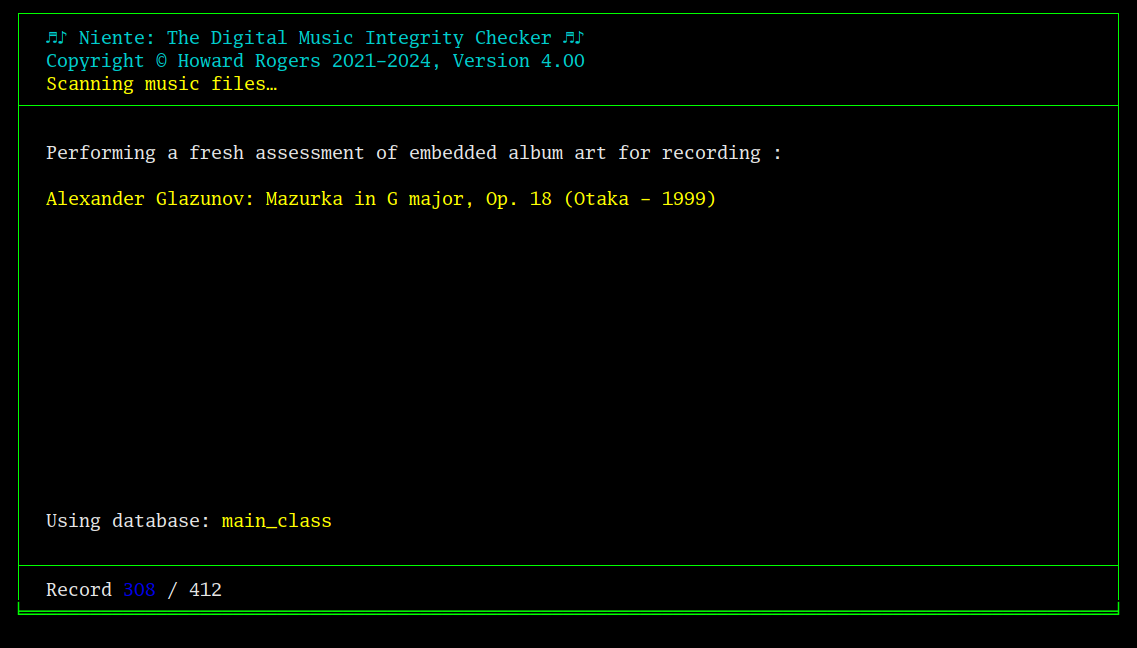
...and you can see that the display as it progresses is fairly basic, with just an indication of where the scan has reached at any given point. When it concludes:
...you get a simple confirmation message. Click OK to return to the main program menu. This scan populates a special table in Niente's database called ALBUMART:
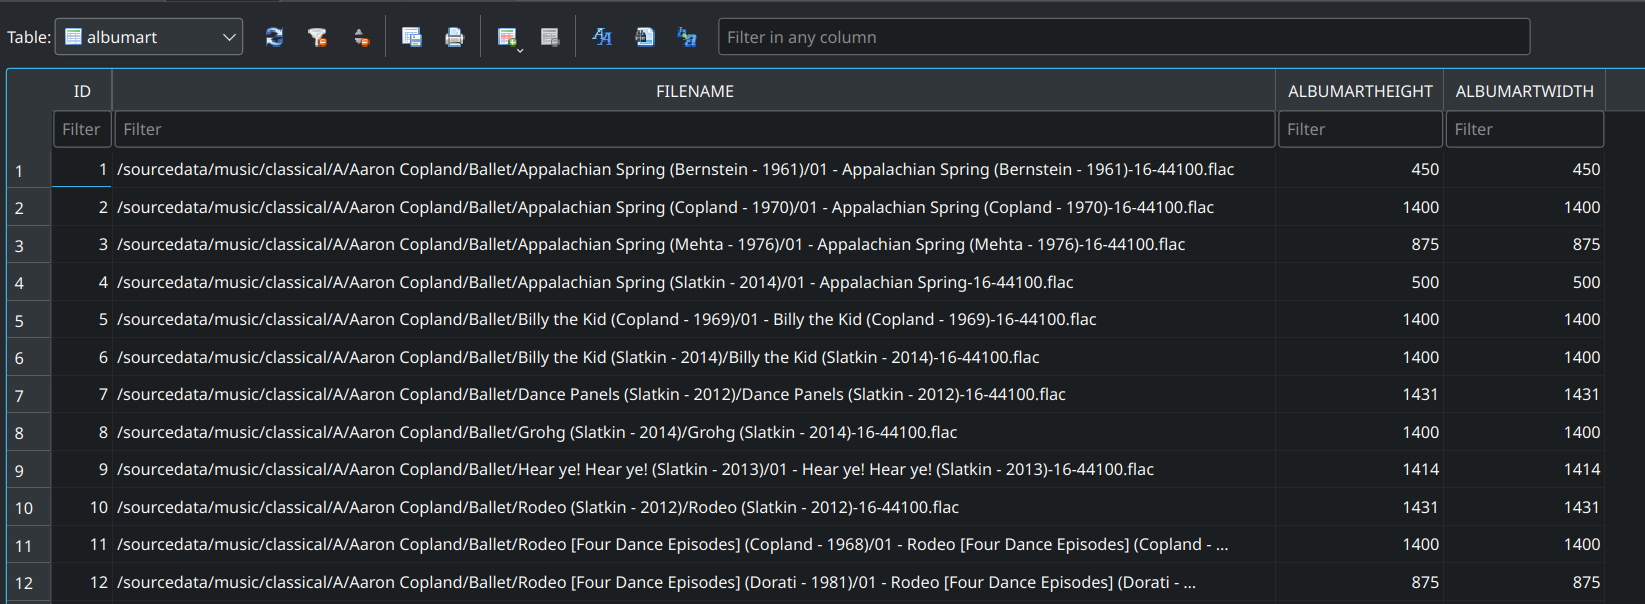
That table contains the full path and filename of each FLAC and, as you can see in the columns at the right, works out for each of them what the height and width of its embedded album art is (in pixels).
The volume scan is much harder work:
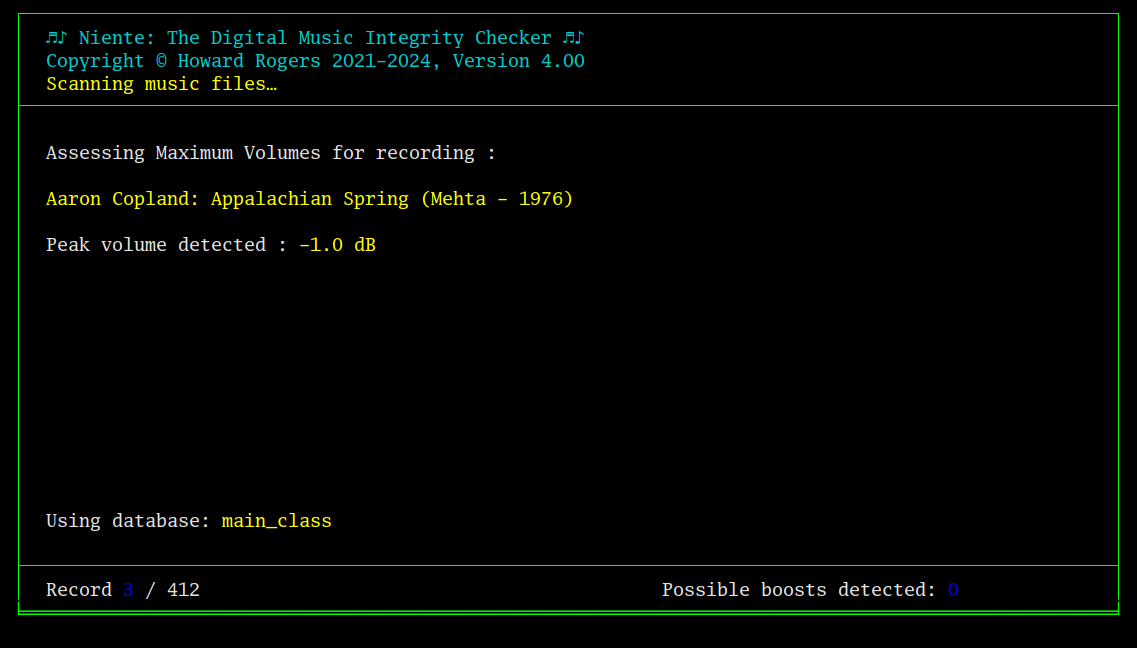
Niente visits each row in the TRACKS table in turn and literally works out the loudest volume each file gets to (where 0 decibels is the loudest, non-distorting volume you can have). In the screenshot, for example, my Appalachian Spring recording has a peak volume of -1dB, so it's just a little quieter than it absolutely could be, but it's probably close enough to not be worth worrying about. That's why you see that 'Possible boosts detected' counter at the bottom of the screen is stuck at 0: though this is a file that could technically be volume-boosted, it's close enough to maximum loudness that it's not worth bothering about.
On the other hand, here Niente's detected a significantly-quieter-than-it-could-be recording:
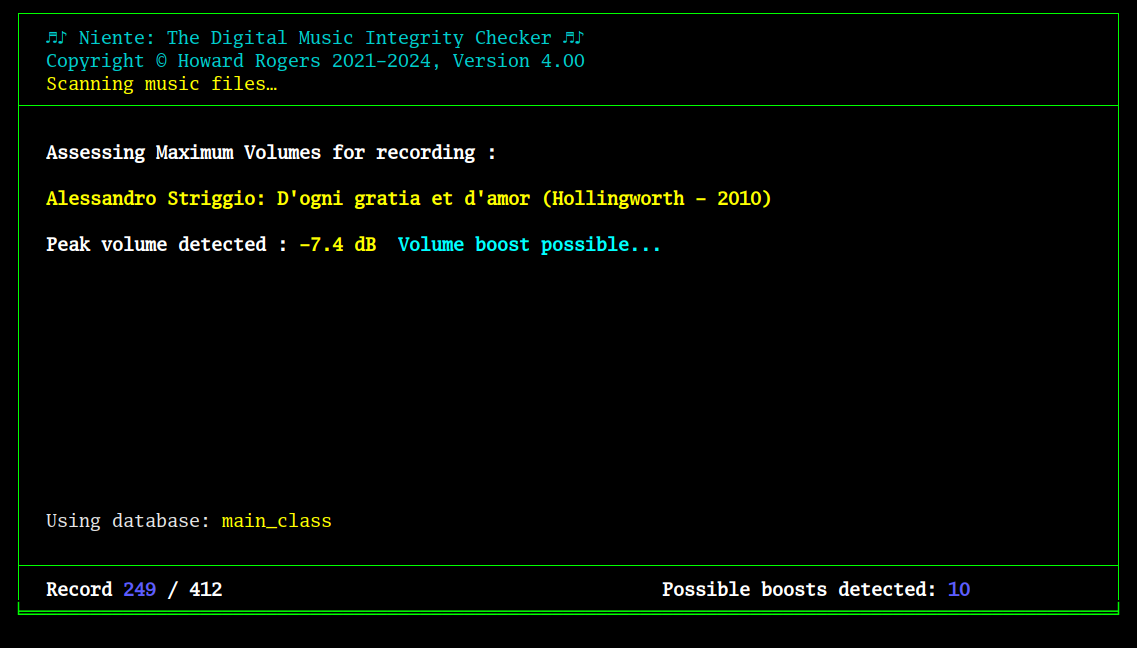
Here, the file is 7.4dB quieter than as-loud-as-possible, so it is counted as a possible volume boost. Niente's default threshold for whether something counts as 'too quiet' or not is 2dB, though you can adjust that in the persistent configuration file if you like.
When the volume scan completes, you are told of the fact:
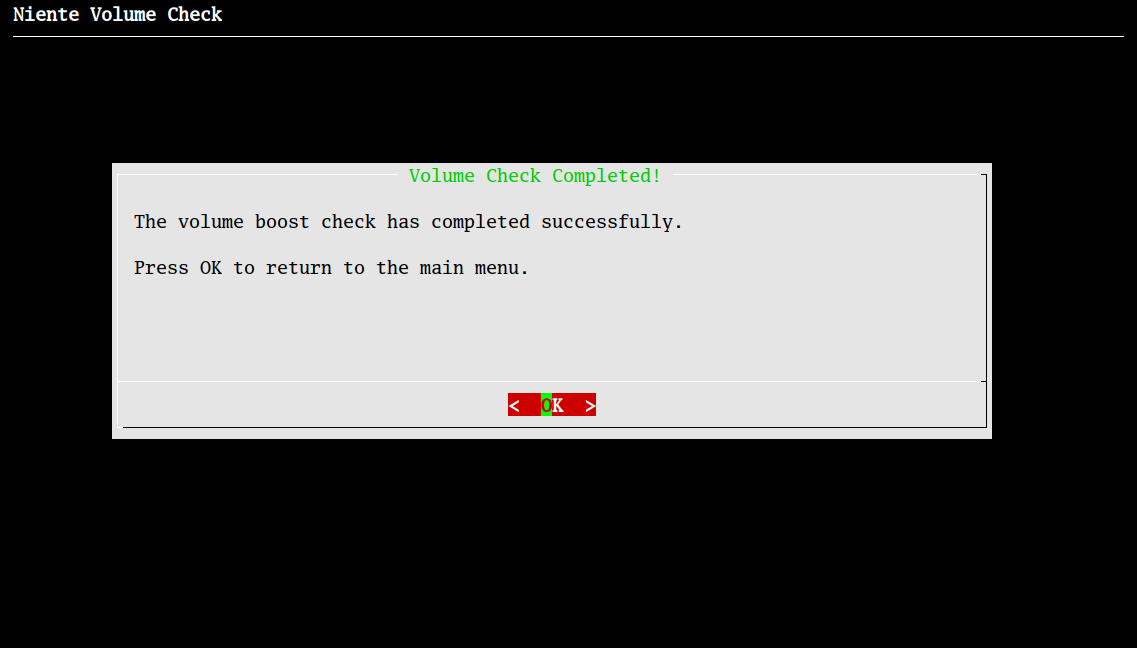
Click OK to get back to the main menu. The volume check populates a new table in Niente's database, called MAXVOLUMES:
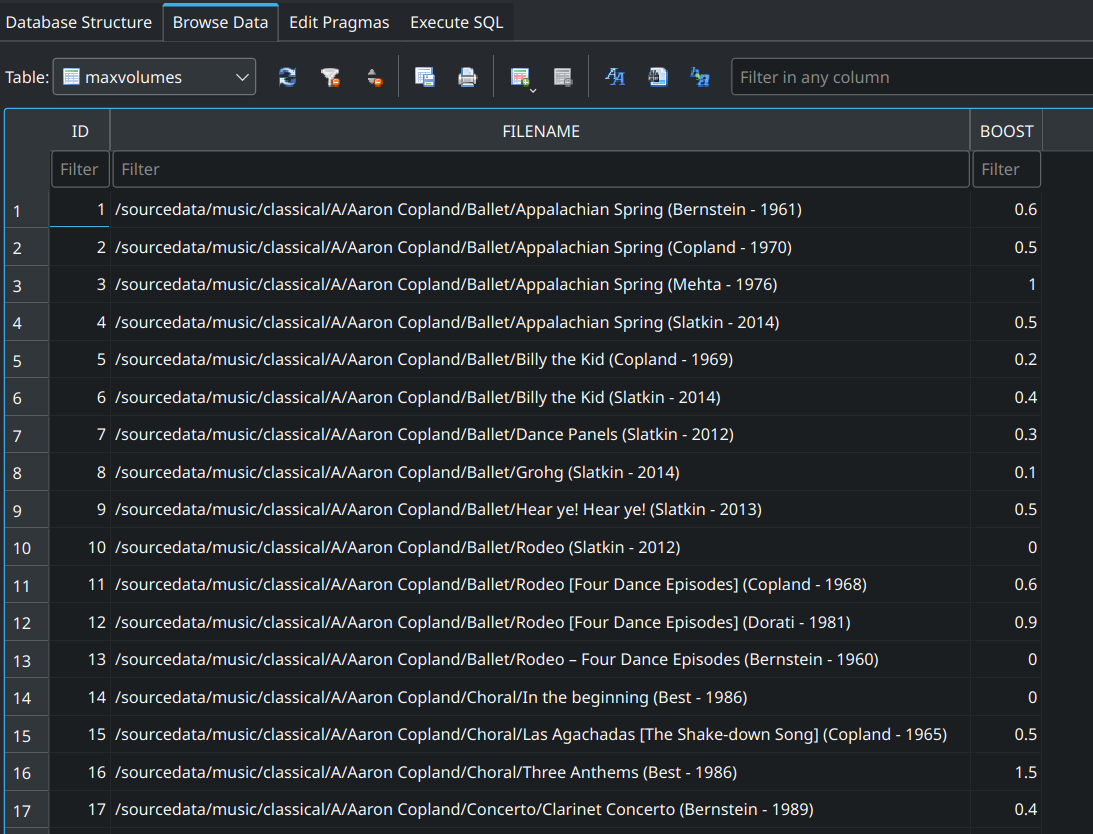
Each row represents a folder of FLACs, and the maximum possible volume boost (measured in decibels) that could be applied to that folder without making the loudest FLAC in it distort.
In case it isn't clear, at no point during these checks is Niente modifying your FLACs. No album art is being adjusted, no volume levels are being boosted. All Niente integrity checks simply read the FLACs listed in the TRACKS table and work out things about those files. Niente never writes back to FLACs, and thus never adjusts anything about them.
3.6 Reporting
Once all necessary integrity checks have been performed, you can select the Reporting menu and start getting information out of Niente, rather than loading data into it. Your first port of call should probably be the Aggregate Statistics report, which is generated by taking Reporting -> General Reports -> Option 1:
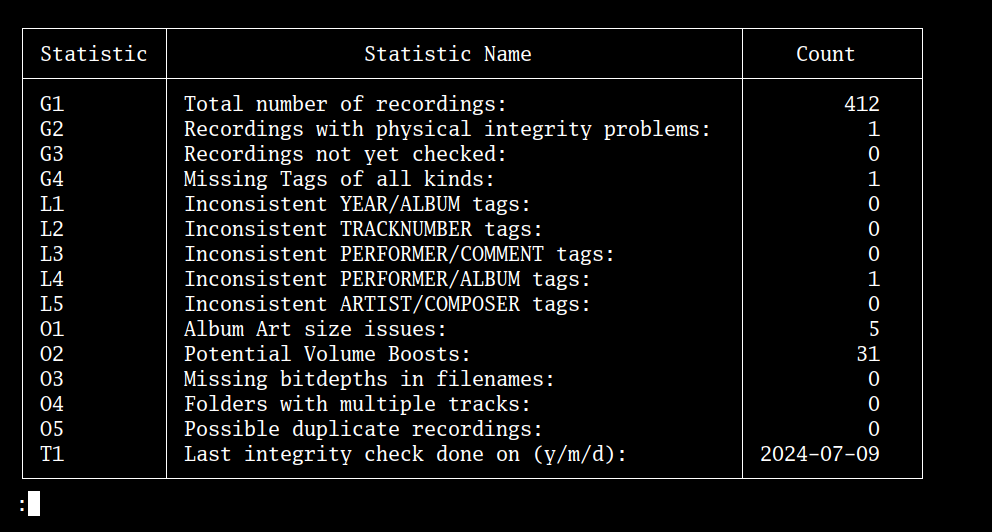
From this, I can see that of my 412 recordings, 1 might be physically corrupt (statistic G2), 1 has missing tags (G4), 1 has logically inconsistent PERFORMER and ALBUM tags (L4), 5 have album art problems (O1) and 31 have volume boost potential (O2).
Responding to this report, it's important to get physical corruption sorted first. Often, you'll find that physical corruption makes it impossible to read tags correctly: My G2 and G4 issues, for example, might very well apply to the one FLAC. Fix the physical corruption (by re-ripping or restoring from a backup) and you may well fix the missing tag issue too.
Of course, you'll need to know which files are affected by these problems. That's why the statistic identifier is included in the aggregate report: G2 means 'take the General Reports, Option 2 to produce the detailed report for this problem', which will list every file affected individually. Here's the G2 report, therefore:

And here's the G4 one:

So, on this occasion, the missing PERFORMER tag affects a file which isn't the one that's corrupt. I bet it's the same file as is causing the L4 PERFORMER/ALBUM tag inconsistency, though! Here's the L4 report:

And sure enough, it's the The Heiress Suite FLAC that's responsible for both statistics -and the reason is evidently that the PERFORMER tag is empty for this FLAC, so naturally it doesn't match the ALBUM tag's version of the data.
You get the idea, I hope: the Aggregate Statistic report gives you a nice overview of where physical and logical issues exists; the various detailed reports allow you to pin down where and what is causing the problem.
Fixing up any of this stuff is down to you: Niente never writes back to FLACs and therefore is not capable of fixing up any of these issues. Its job is to tell you that issues exist, not to rectify them. How you rectify them is also down to you: physical corruption might need re-ripping or restoring from backup; a logical tagging problem, such as the missing PERFORMER tag, can simply be fixed by editing the tags associated with a FLAC (using a tool such as my own Semplice tag editor, for example).
But any way: that's the end of our 'first run' with Niente. By way of recap:
- Create a database
- Populate the database by quick scanning for the existence of music files
- Interrogate those music files for metadata and physical characteristics with an integrity check
- Perform optional extra checks on album art and/or volume levels
- Report on the state of your music collection and use Niente's reports to pin down what FLACs have which logical or physical problems
At this point, you can quit out of Niente altogether: tap the letter 'Q' from the main menu and press [Enter] (or type 1).
4.0 Second Run: Setting Defaults
If you were to re-launch Niente at this point, this would happen:
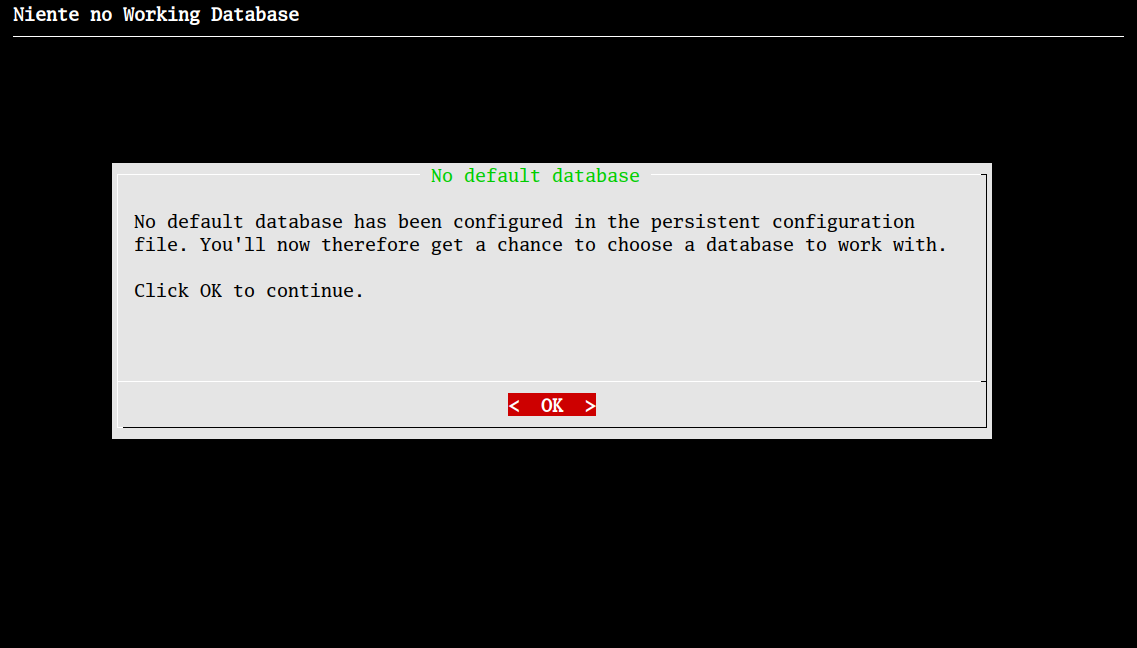
Niente needs a database to do anything useful. That you previously created one makes no difference to it: it doesn't know to use it as its working database for this second and subsequent session. However, rather than get told 'you need to create one' as happened on the first run (see Section 3.0, the first screenshot), this time Niente is at least smart enough to know that usable databases do exist: so it's now telling you that you'll have to pick one, once you click [OK]:
Here, Niente is listing all the *.db files it knows about in the $HOME/.local/share/niente4/db folder and letting you select the one you want to work with. The form works the same way, whether it's listing just one file (as here) or several: your job is to highlight the database you want to work with for the session and press the Space Bar to select it. An asterisk will appear next to the chosen database name and then you can click OK to submit the choice:
A confirmation message appears and if you click OK on that, you'll finally be taken to the main menu:
The third line of text at the top of the screen confirms that Niente is now 'Using database main_classical', meaning the choice has taken effect.
A similar issue arises if you were to want to add a bunch of new recordings to Niente's database. You've got a working database now, but take Database menu, Option 3 to add new files to it and this happens:

Niente has no memory of where you last looked for music files, so it has to start out prompting you for a music folder, from scratch, assuming that it should at least start in your $HOME folder.
Which is all well and good if you like having to spell things out every time you run a program! Surely a more convenient thing would be to tell Niente to open a particular database or use a particular music folder by default?
And that's precisely what the Administration menu, Option 1 is for:
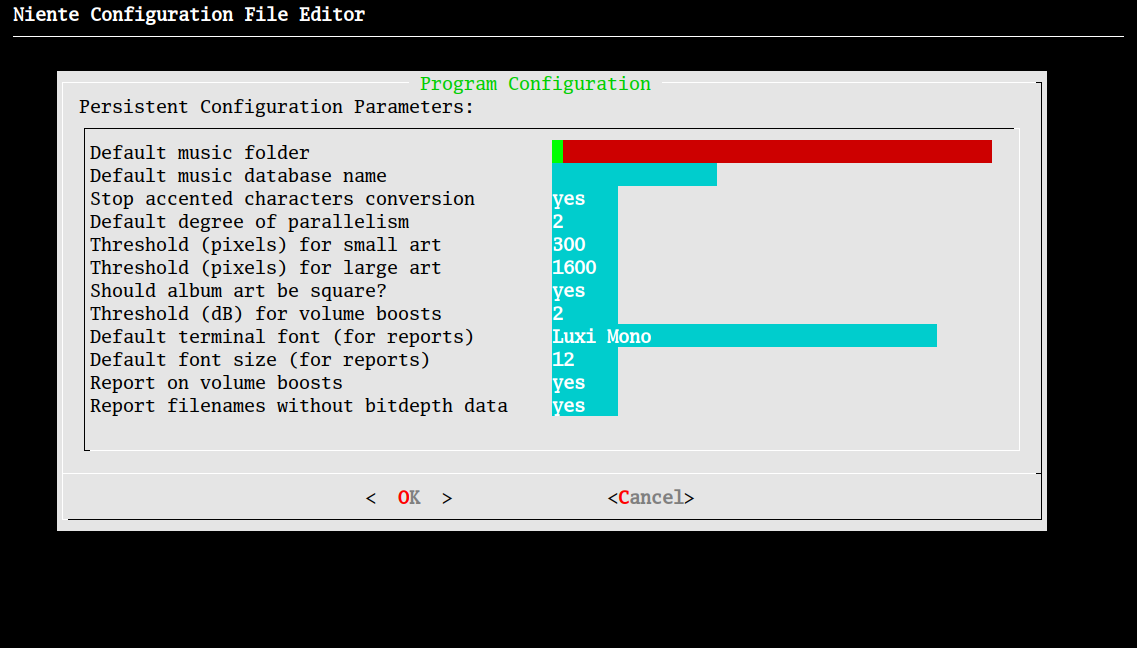
You'll note the top two options here are currently blank: they determine what database Niente opens by default whenever it's launched and what music folder it will scan automatically without prompting. It's the default blankness of both parameters that trigger Niente's 'let's ask every time we're invoked' behaviour. A sensible approach is therefore, immediately after you've created a database and scanned a music folder to populate it, is to edit these configuration parameters and set sensible defaults, which is what you see me doing here:
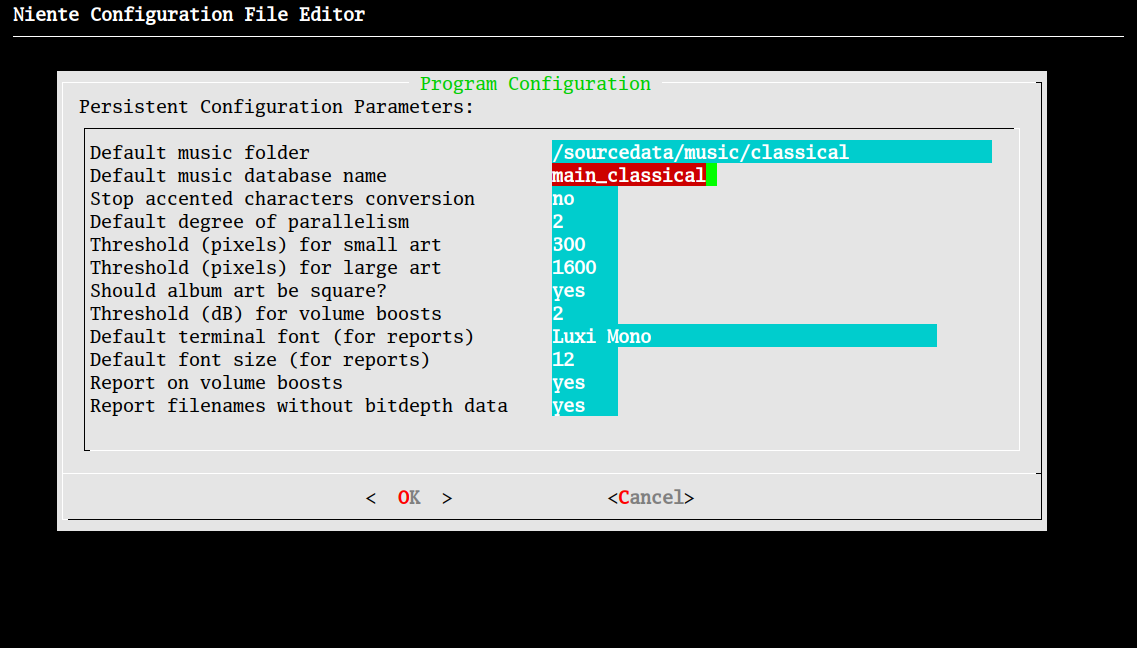
There are, of course, lots of other parameters here whose settings can have interesting effects on the way Niente works... but the top two are the most important to set, unless you like being prompted all the time to re-specify the two most crucial bits of information Niente needs to work properly.
5.0 Temporarily Changing Defaults
Given that you will now have set default working databases and music folders, suppose you suddenly want to use a different database or scan a different, non-default music folder?
- Changing the working database is easy: with the Database menu selected, tap the letter 'C' and follow the prompts to pick a database from the list of .db files that are known to exist in $HOME/.local/share/niente4.
- Changing the working music folder is also just as easy: again, once the Database menu has been selected, tap the letter 'F' and use the usual folder-selection form to pick a new working music folder.
Once a new database has been selected any integrity checks you perform, or reports you produce, will use that new database's TRACKS table to determine what files to scan or what data to report on. The change in 'source' of data is immediate.
For example, suppose this is my initial state when launching Niente:
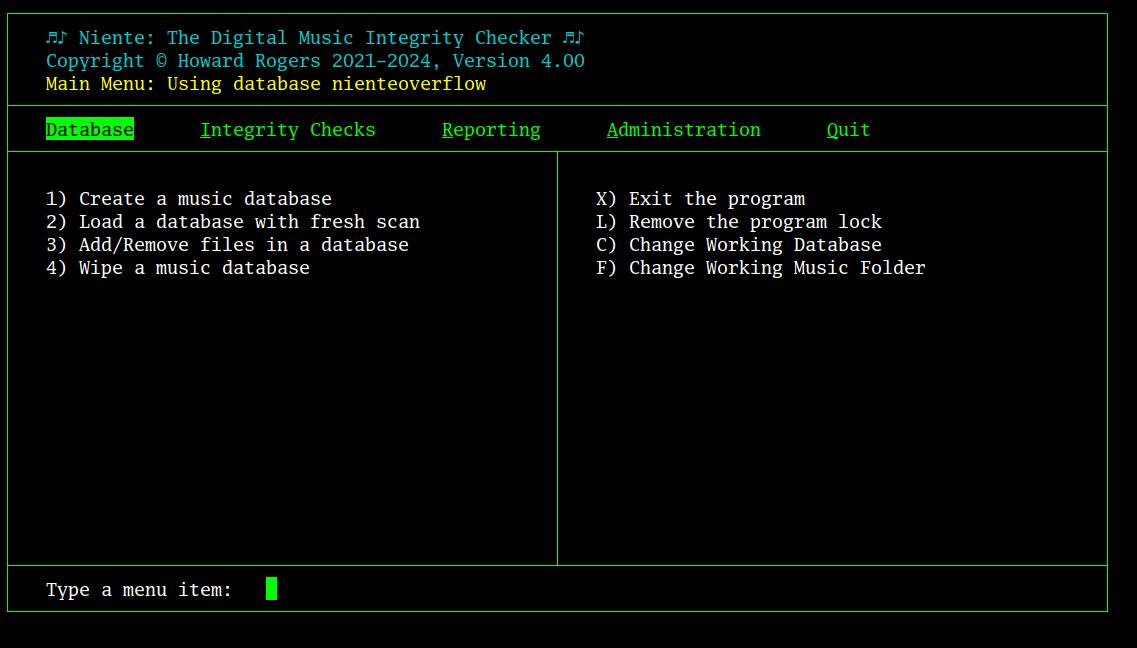
From the third row of text, in yellow, you can see I've obviously set the default database to be 'nienteoverflow'. Fine: I run my Aggregate Statistics report and see this:

The overflow database knows of just five recordings, all in good shape. Now I return to the Database menu and tap 'C':
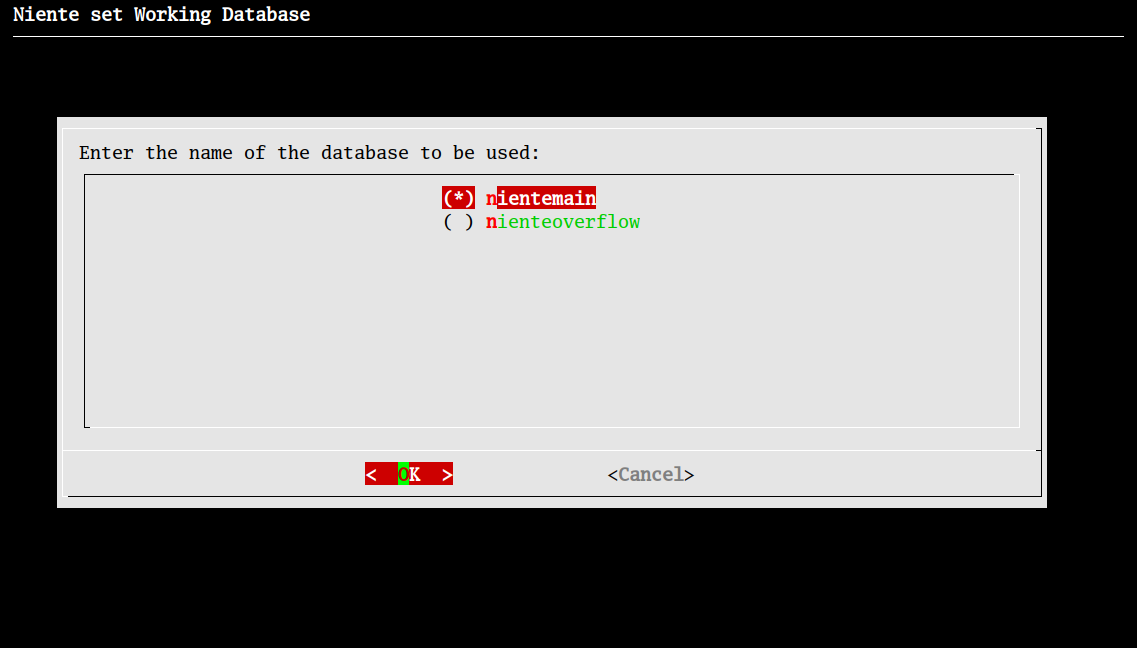
Here, I've selected 'nientemain' as the new working database... and I immediately re-run the Aggregate Statistics report:
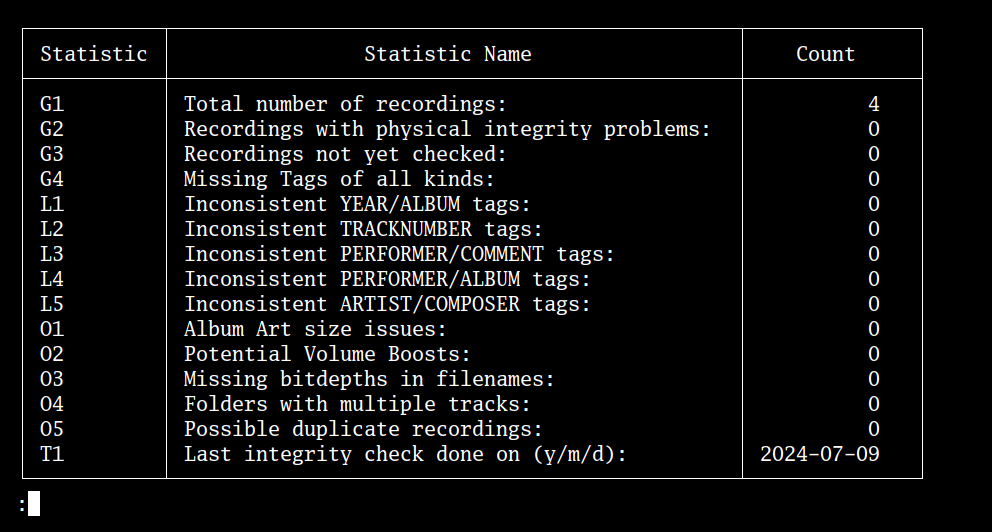
This time, the report is on just four recordings, not five. Clearly, a new source database lies behind this report compared to the original one.
So, switching databases is simple and quick to do, and doesn't require a lot of thinking about: it merely means that what gets read when you do a new integrity check, or what gets reported on if you run a fresh report, will be immediately different than before.
Switching music folders is slightly more troublesome, however, and you need to be careful about doing it. When Niente adds the results of a new file scan to a database, it also deletes from the database any files that are no longer on disk within the currently-active working folder. In other words, say you have this situation:
- /music/classical -> 15,000 files
- /music/overflow -> 3,000 files
You create a database called "main" with /music/classical as the working music folder: the database will immediately be populated with 15,000 files.
You then tap 'F' and select the /music/overflow folder and then take Database menu, Option 3: your intent is to add the 3,000 overflow files to the same database as already houses the 15,000 files. This is not what will happen, however. The new file scan will certainly add the 3,000 overflow files into the database, but it will then note that none of the existing 15,000 rows in the database represent files which can be found on disk in the /music/overflow folder, so will delete them. Your database will now contain only 3,000 rows of data from the /overflow folder structure.
Were you to tap 'F' and switch back to /music/classical and again take Database menu, Option 3, your database would once more contain 15,000 rows of data ...but nothing relating to files in the /music/overflow folder would remain.
In other words, a Niente database can only hold data from one folder structure at a time. Changing the working folder and then using Database menu Option 3 to scan the new folder will always obliterate the data that was sourced from the original folder used to perform the earlier scan.
In this scenario, you should really create two separate databases (one called 'main', another called 'overflow', for example) and use the 'F' key to override the configuration file's default music folder setting when working with one or other other. But you cannot ever load into a single database the contents of two distinct music folder 'trees'. Your only other option, if you really wanted a single database to contain data about all 18,000 files, is to change the working folder to /music and perform a fresh scan: given that both /classical and /overflow are sub-folders within the /music folder, pointing Niente to the root of both will allow the files in both sub-folders to be scanned in a single operation.
Also bear in mind that selecting a new working music folder is different from asking Niente to scan it: you have to do both things, separately. Merely selecting a working folder doesn't trigger an automatic scan of that folder for FLACs -precisely because an automatic scan on a working folder change would result in mass data deletion from the working database.
6.0 Adding New Recordings
The commentary in Section 5 above might make you wary of ever using Database menu Option 3 to re-scan your music files, but it shouldn't! A re-scan can only remove data from a database if the folder tree being scanned is new. If the folder tree is the same one as the database was previously populated with then recordings that still exist in the locations Niente expects to find them won't be removed from the database.
Meanwhile, a re-scan will pick up on new recordings that have been added into the same folder tree. It will also delete from the database any recordings that are now not in the same folder tree they used to be in.
For example, say I've created a database called 'main', using music folder /music/classical. Perhaps an Aggregate Statistics report says I have 1000 recordings in my collection.
I now rip a new CD and store it in folder /music/classical/Benjamin Britten/Peter Grimes (Pears - 1958). When I take Database menu Option 3, the scan will spot the new arrival and, since it's still within the same overall folder structure, it will add it to the existing recordings. I will now have 1001 recordings in my collection.
Then I notice that I forgot to store the new recording in an 'opera' genre sub-folder, so I use my operating system's file manager to cut-and-paste the previous recording into /music/classical/Benjamin Britten/opera/Peter Grimes (Pears - 1958). If I now do a Database menu Option 3 re-scan, Niente will note the arrival of a new recording in the .../opera/... sub-folder, and add it to its database: temporarily, I'll have 1002 recordings in my collection. Almost immediately, however, Niente will also spot that the original .../Benjamin Britten/Peter Grimes... folder no longer exists, so it will delete it from its database. I will therefore be back to having 1001 recordings in my collection, though the location of one of them will appear to have changed.
In other words, regular re-scans pick up new recordings and the deletion/movement/change in name of existing recordings, provided everything relates to the same music folder tree as was used to populate the database last time round.
7.0 Update the Software Periodically
The last thing to mention on this quick tour of starting to use Niente is: how to make sure you're using the latest version of Niente. I'll update the software periodically to add new features or to fix up bugs in the coding of old ones... and you'll therefore want to make sure you're using the latest version of the Niente software.
That's done by a visit to the Administration menu and taking Option 5, Check for software updates.
The moment you select that option, Niente will start checking its own existing files and compare them with what equivalent files are available on this server:
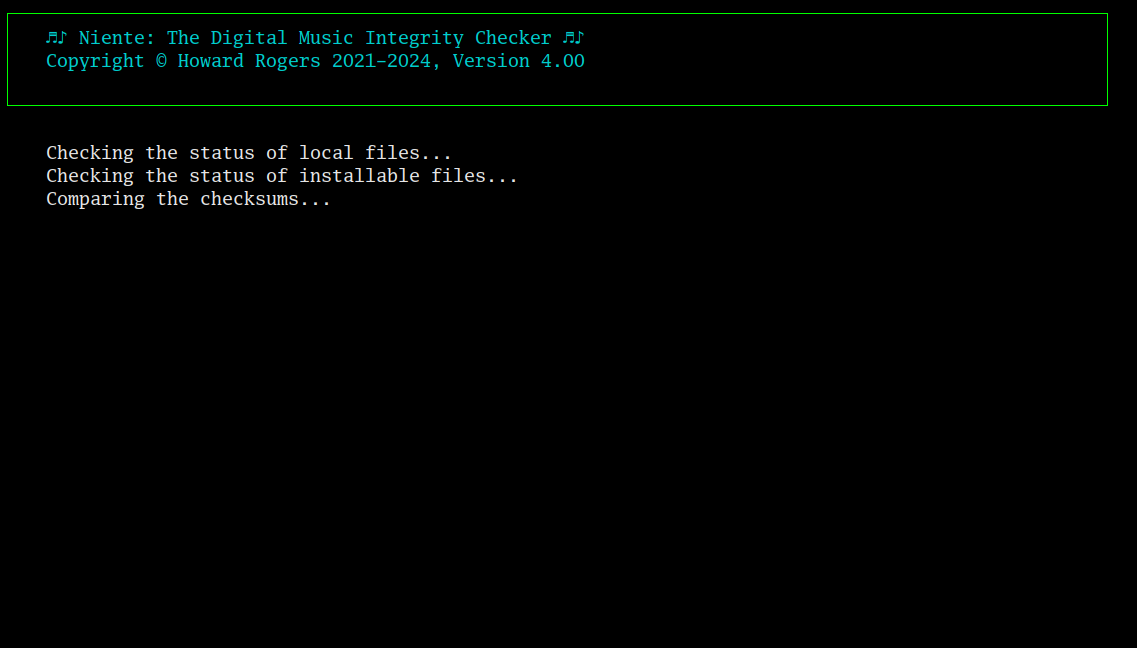
It's not exciting to look at and in any case only takes a few seconds to complete, so you might not see any of that output anyway. At the end of the process, you might see this message displayed:
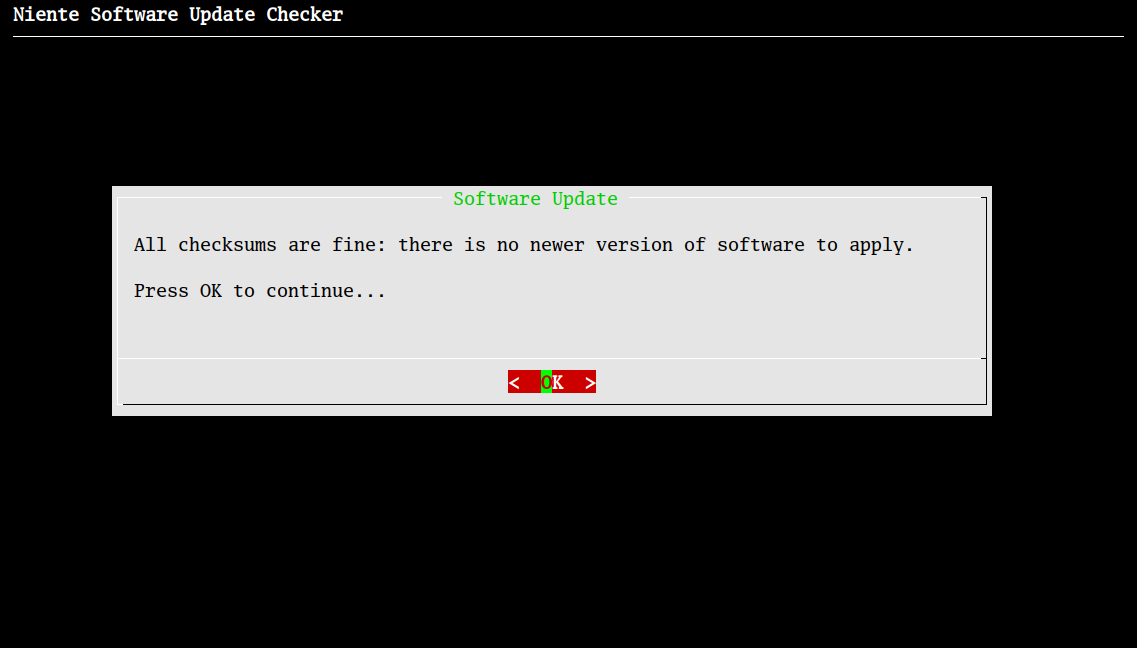
This is the message you see when the version of Niente's files on your PC matches those of the files on this server exactly: no harm has been done, nothing has been altered, there's nothing to see here!
But, you might also see this message:
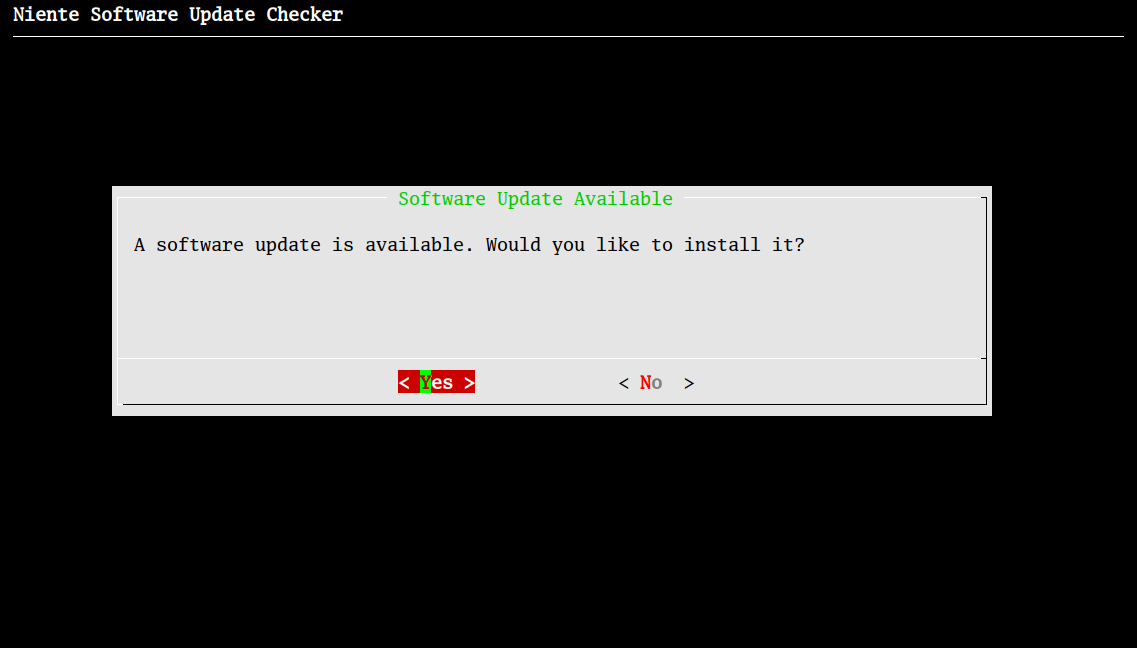
That tells you something in one or more of Niente's program files has changed and that the version on this server differs from that on your PC. You would be well-advised at this point to click 'Yes' (or just press [Enter] which amounts to the same thing in this context) and, if you do, the screen will change to this:
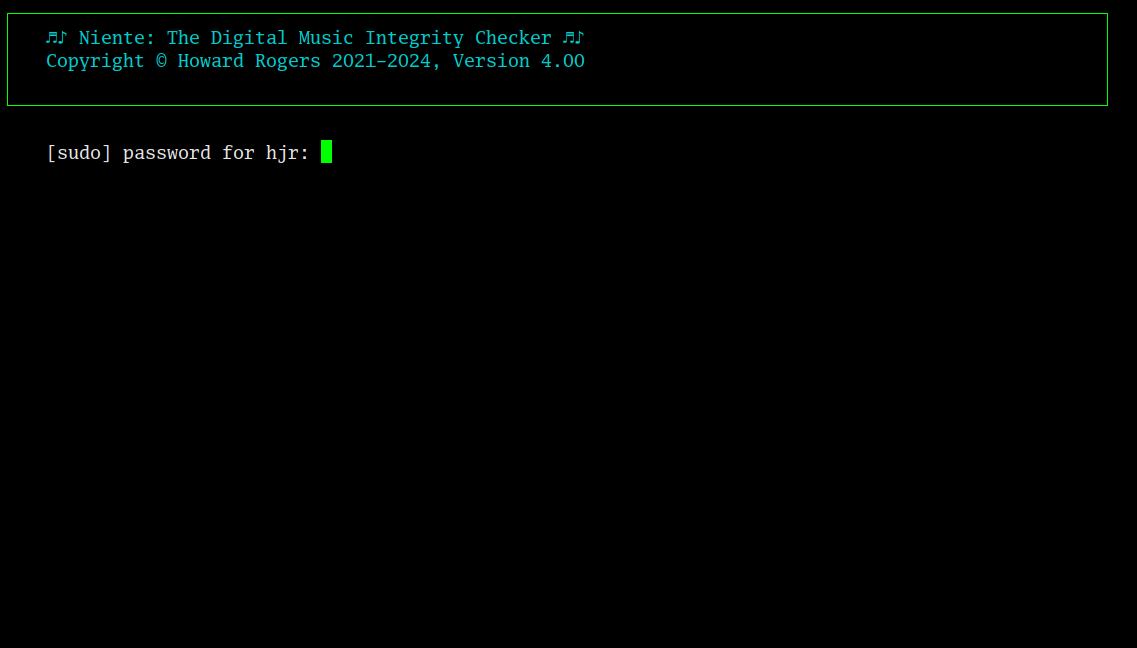
It's just a standard prompt to supply your sudo password to acquire root permissions: Niente is going to copy files to /usr/bin and needs elevated privileges to be able to do so. Type in the correct password and this will happen:
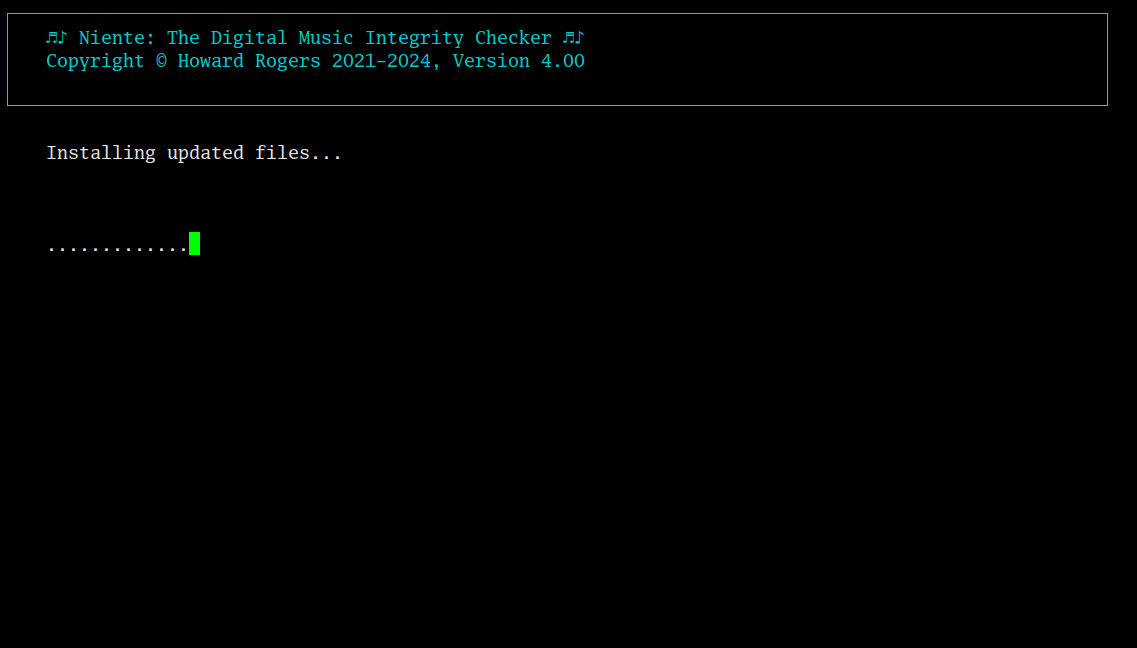
Each dot that now appears represents a fresh download of a Niente executable file. When all files have been downloaded, the screen will tell you the process is complete:
Click OK at this point and you'll be returned to the main menu. It's then rather important to quit Niente and re-launch it in order to get the changes just downloaded to be applied to the running software. As you quit, you may see error messages displayed on-screen: this is quite normal. The program being quit has just had the executables that define it changed whilst it was running and therefore, it's liable to get a bit confused when it exits, expecting to find the program ending at one point but the new executable ending at another. Any errors on quitting the program can therefore be ignored: just re-launch Niente and carry on from where you got to.
My recommendation would be to run a quick check on possible software updates once a month or so. Additionally, keep an eye on the blog page of this website: I announce all new versions there as they are released.
8.0 Conclusion
There is always the danger in articles like this that in seeking to explain, I merely confuse! Though there are many subtleties to the way Niente can work with multiple databases and multiple different music folders, it's very straightforward if all your music is found within a single tree structure and you run Niente with a single database. If you keep it that simple, the Niente 'workflow' is simply:
- Create the database
- Run a file scan to populate it
- Run a full integrity check
- Optionally, run an album art check
- Optionally, run a volume boost check
- Run reports when needed
- Periodically run a re-scan to pick up file additions and changes
- Periodically, run a differential integrity check
- Periodically, check for software updates
Use Niente to tell you when your tagging has gone astray, or when your file system has let you down and allowed files to become corrupted. Use it, too, in conjunction with Semplice to re-tag troublesome files or to re-rip physically corrupt FLACs. Above all, use it to gain peace of mind that your digital music assets are in good shape, physically and logically.