1.0 Introduction
I've written a number of scripts for 'audio management' which are freely available from this site. It doesn't happen often these days, but occasionally I still use an old laptop or PC with Windows 10 on it. When I do, I'd prefer to use my own open-source scripts with which I'm familiar than closed-source (even if zero cost) proprietary software.
How, then, can Windows 10 be turned into a platform that permits the running of Linux scripts? In this article, I'll explain how to install Cygwin and get it capable of running any of my scripts.
2.0 Introducing Cygwin
It's been possible for many, many years to run Unix-y programs on Windows by installing Cygwin. Cygwin is a Linux compatibility layer for Windows, much as Wine is a Windows compatibility layer for Linux. You install it, then you can download and compile all sorts of Linux-native programs and have them run 'within' the Cygwin environment, yet still inside your Windows operating system and able to access the files and folders that your Windows PC thinks belong to 'it'.
You might well ask: surely, there are lots of ways of running Linux on Windows? For example, install VirtualBox, define a virtual machine, install Ubuntu (or whatever distro floats your boat!): da-da! Linux on Windows!! Well, sort of. What you'd actually end up with is a complete Linux environment running on top of, but outside of, Windows. A file on your C: drive will be invisible to the Linux environment, because they are two completely separate, distinct environments. Running a VM on Windows also requires a lot of CPU and RAM.
What about the new(ish) Windows Subsystem for Linux (WSL)? Wouldn't that achieve the requirement? Well, it might -but there are already 2 distinct versions of WSL which makes recommending it problematic. Version 1 was very much like Cygwin: it intercepted Linux software's kernel calls in real time and translated them into something the Windows kernel could handle. That resulted in a lightweight, unified environment in which Linux and Windows really did seem to cohabit nicely... but version 2 is a very different beast and is, essentially, a virtual machine running Linux. It does so more transparently than, say, VirtualBox, but the result is basically the same: you still need lots of RAM and lots of CPU.
Cygwin, however, provides a thin, mostly transparent way of running Linux software on Windows, without major virtualization taking place. It's free, like WSL; it's lightweight, like WSL v1, but unlike VirtualBox; it gets the job done. So that's why I'll be showing you how to install Cygwin and get it to run my various audio management scripts now.
3.0 Installing Cygwin
3.1 Download and Install
So, first visit the Cygwin download page. Click on the link that says, "Install Cygwin by running setup-x86_64.exe": there is also a link to a 32-bit version of Cygwin's setup.exe, but I've not used that and therefore haven't tested it. Stick to the 64-bit version (assuming you are running a 64-bit version of Windows, of course!)
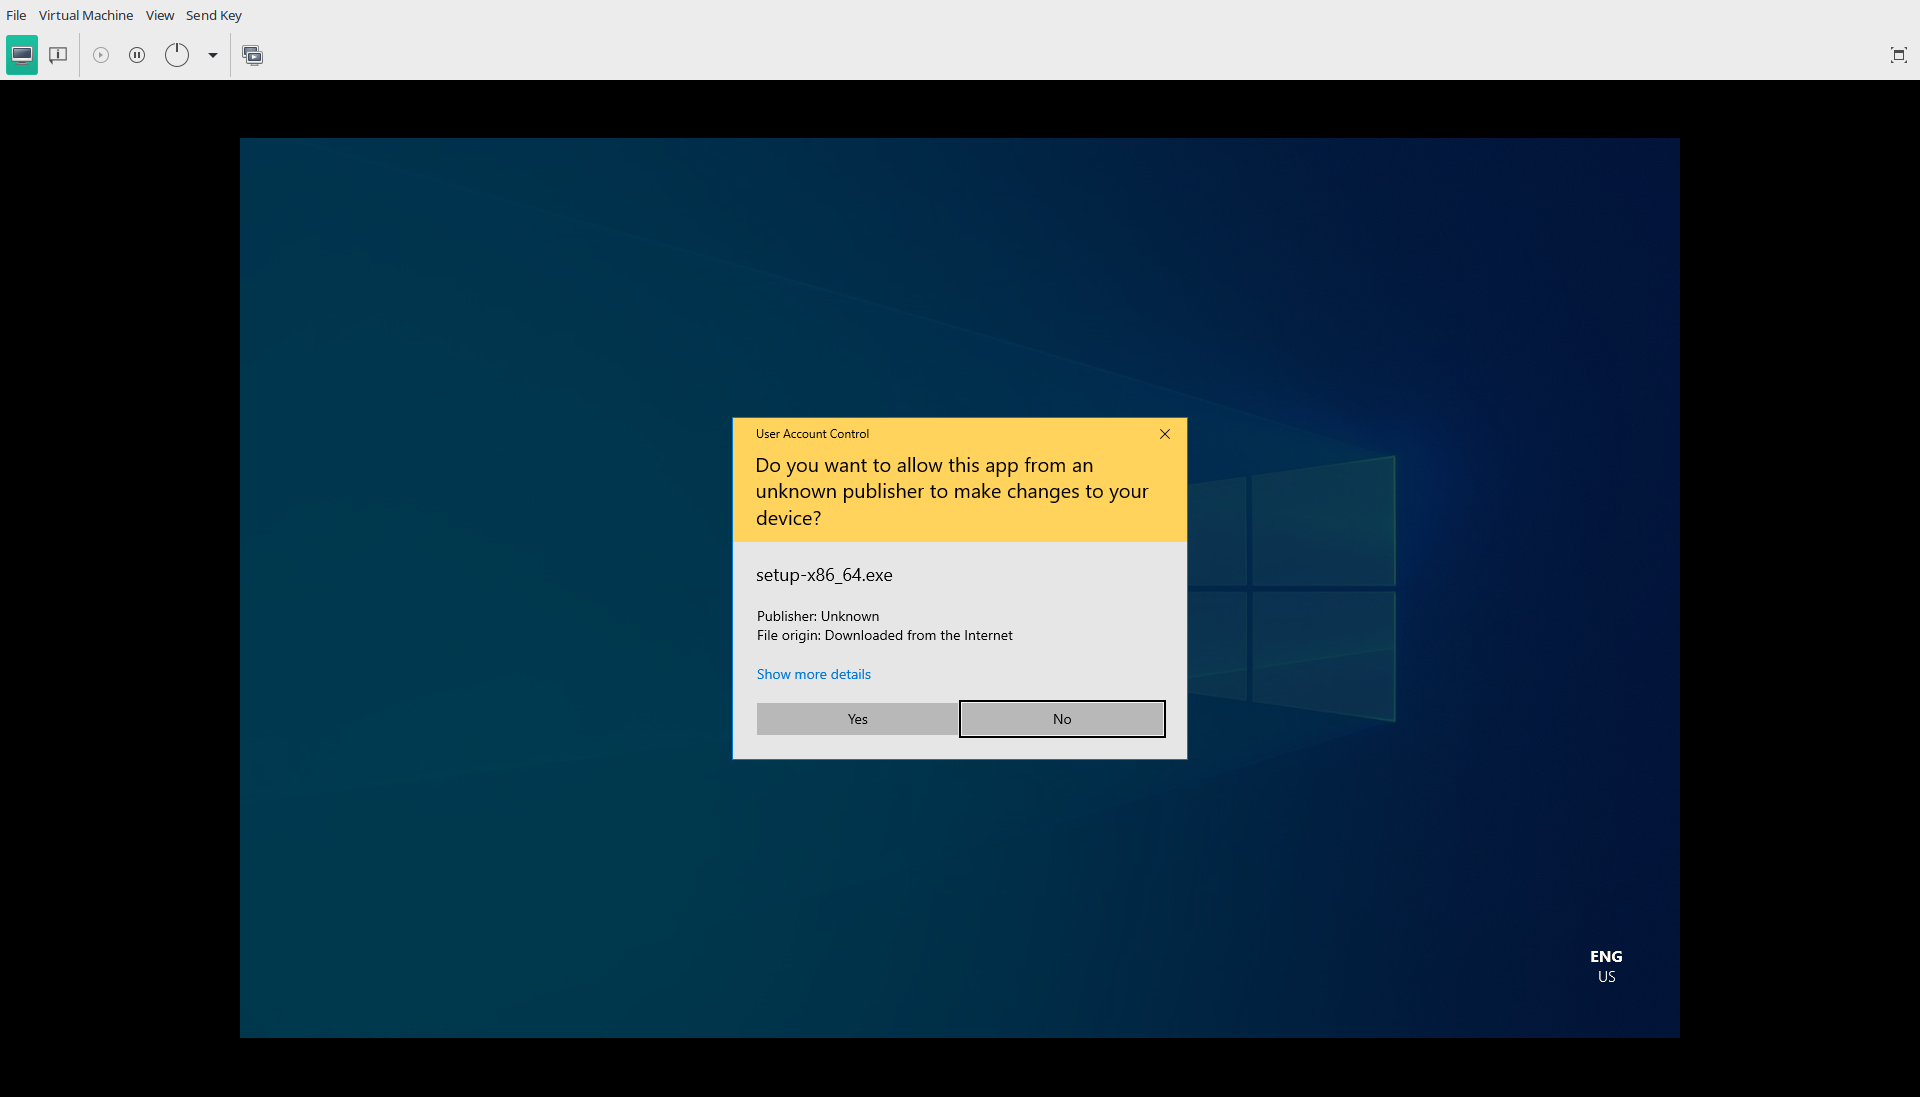
Save the setup-x86_64.exe file somewhere on your Windows' hard drive (I'm going to store it in my Downloads folder for the purposes of what follows). In Windows Explorer, double-click the setup program when it's fully downloaded and confirm you want to run it, if asked. Depending on your Windows version, you may get a pop-up asking if you 'want to allow this app from an unknown publisher to make changes to your device': answer [Yes] if so.
A fairly standard installation wizard then appears:
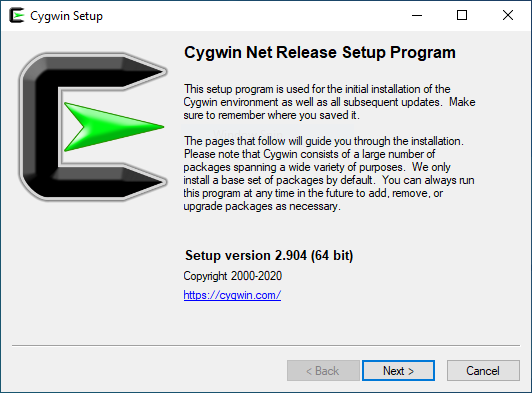
Click [Next] to start things off.
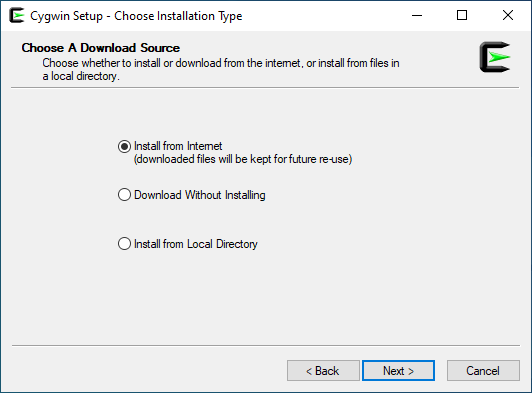
You are first asked where you will source Cygwin's software packages from: if this is your first time running Cygwin, you're going to be pulling everything from the Internet (so a fast Internet connection is very desirable at this point!). That 'from the Internet' option is the default option, so just check it's selected and then click [Next] once more.
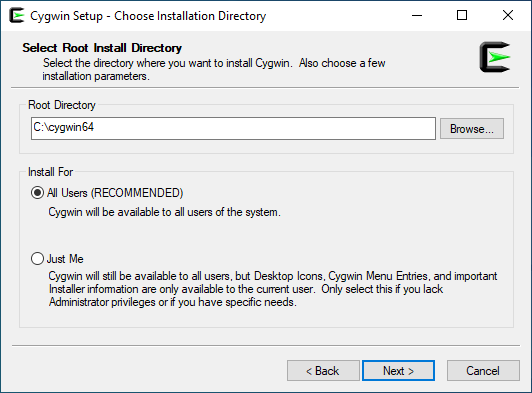
Now you are asked where, on your local PC, you want to store all the software packages that Cygwin will download from the Internet. It will suggest a 'C:\Cygwin64' directory by default and you can accept that, plus all the other option defaults on this screen, without drama. On the next screen, you are asked where to save the packages that you'll shortly be pulling from the Internet:
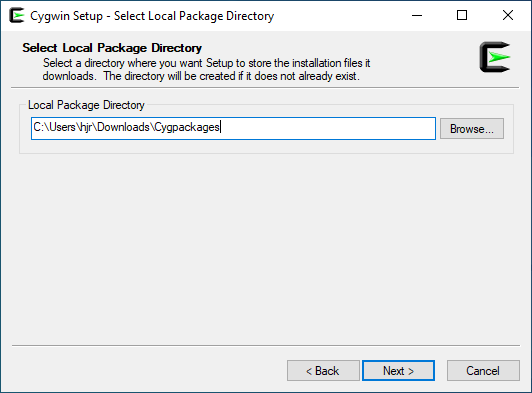
The default suggestion in this case is to tick everything in your Downloads folder. That will work fine, but I tend to want to clear out my own Downloads folder from time to time (it's strictly a temporary thing for me). Thus, I've altered the defaults as shown. The packages will still get stored in Downloads -but within their own folder, so they remain distinct from everything else (and my periodic housecleans of my C: drive will thus not delete things by accident).
If you specify a folder to store things in which doesn't actually exist, you get this prompt when clicking [Next]:
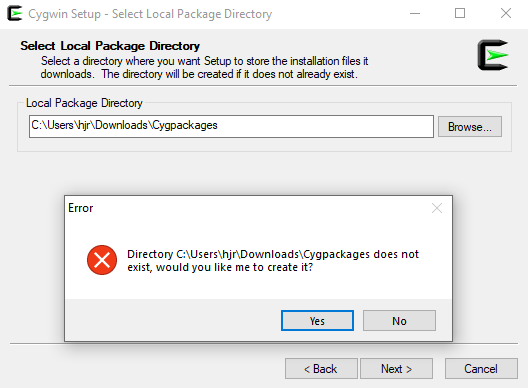
That's the installer realising the altered downloads directory doesn't actually exist, so it has to ask you if it's OK to create it. Go ahead and tell it to do so.
Now, you told Cygwin earlier to download its software from the Internet. It will now therefore ask you how it should connect to the Internet:
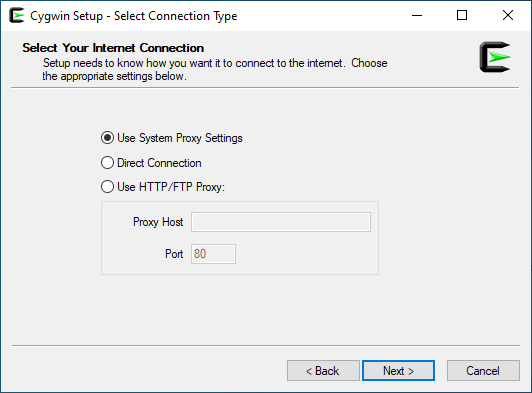
You can probably accept the default option here (to "use system proxy"), because that will either work if you are actually using a proxy server to connect to the Internet, or it will work because you don't use a proxy server at all! Provided your PC is able to connect to the Internet in a browser, say, then the 'System Proxy' option here will work fine for Cygwin's purposes too.
Now Cygwin will fetch a list of 'software mirrors' and offer it to you to select one from as the server you'll use to download the various software packages:
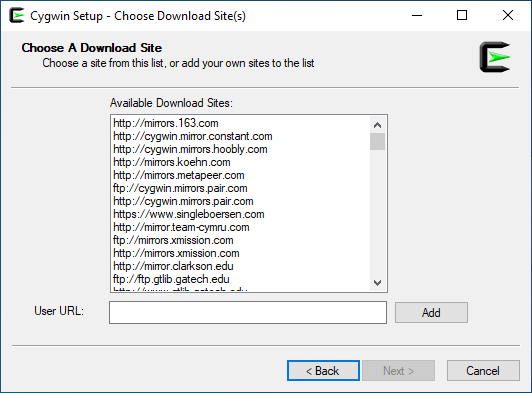
You could scan through this list carefully, if you like, looking for a server that is geographically close to you (to make the software download stage go quickly). Or you can just pick whatever server takes your fancy, if your Internet speeds are fast enough so that you don't need to worry about geographical proximity!
Once a server is selected and you click [Next], a quick download of a catalogue of software will take place and then you'll be presented with this:
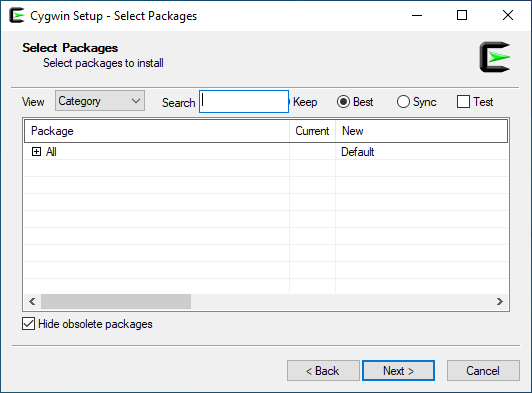
This is where you're meant to select packages to install into the Cygwin environment -but the interface is really clunky and awkward to use, so I'm not going to select anything at all here and will instead just click [Next] -and I suggest you do too! We will need extra software, of course, but I'll show you a much better mechanism for installing it shortly.
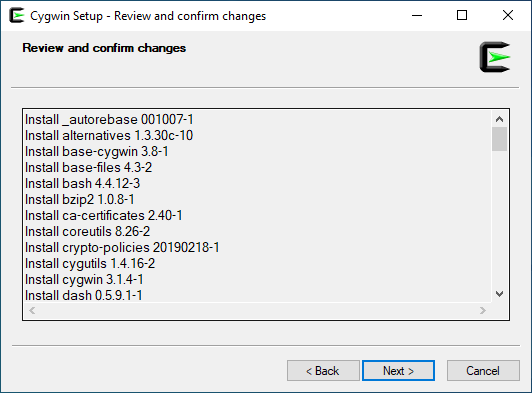
Even though I didn't select extra packages to install, Cygwin still has to install its 'base' build packages, so those are displayed to you now. Just click [Next] to start the installation process.
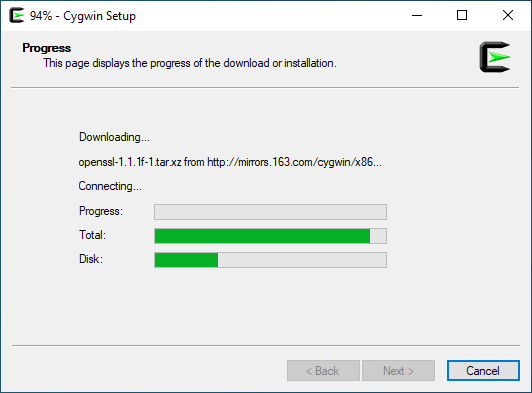
How long you see this dialogue box for will depend entirely on how fast your Internet connection is! The various packages which make up Cygwin are being downloaded and then compiled and installed to create a functional Unix-y environment on top of your Windows PC.
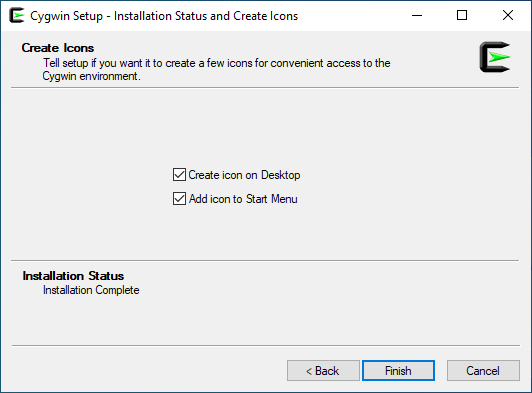
Once the installation process completes, you get this fairly standard dialogue that offers to add icons to your desktop and Start Menu. You can select or deselect them as you prefer, but I think leaving them both switched on makes sense to begin with.
And that's Cygwin installed! You launch it by double-clicking on the icon on your desktop (assuming you asked for one to be created) or by clicking Start -> Cygwin64 Terminal. The results will, in either event, not look entirely impressive!
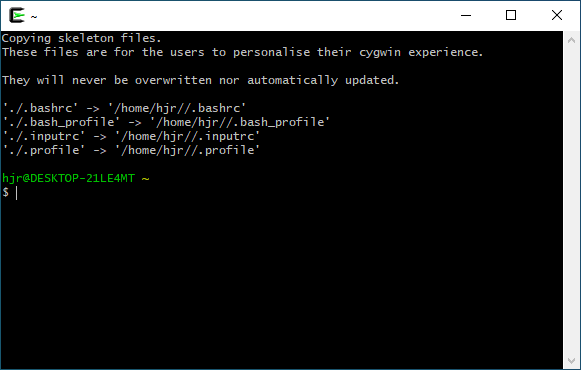
Fundamentally, it's a command prompt type environment: lots of text and no graphics ! You can see that the first time it is run, some shortcuts are created (linking bashrc, bash_profile and so on to more fully-formed directory locations), but that only happens once. After that, you're 'Unix' environment is set up permanently.
You can customise the look-and-feel of it a bit, by clicking on the Cygwin icon in the top-left of the title bar and then selecting 'Options':
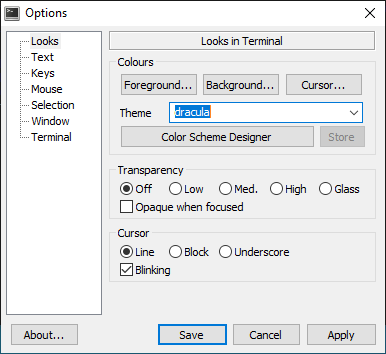
You can see I've elected to use the built-in 'Dracula' theme. I've also clicked on the 'Window' item on the left and set my default size to 132 columns and 34 rows: the default 80 x 24 is a bit small for my tastes. Changes you make to the look/feel and size of the terminal won't actually take effect until you then close and restart Cygwin.
Click around and make yourself comfortable with your new Cygwin environment!
3.2 Understanding Cygwin v. Windows
If you've never used Cygwin before, it can be a bit confusing as to exactly what Cygwin is and does and what relationship it has with the Windows system it's running on. Let's see if I can help explain this a bit for you now.
For starters, open Cygwin and type the following commands:
cd /cygdrive/c
ls
You should see output similar to this:
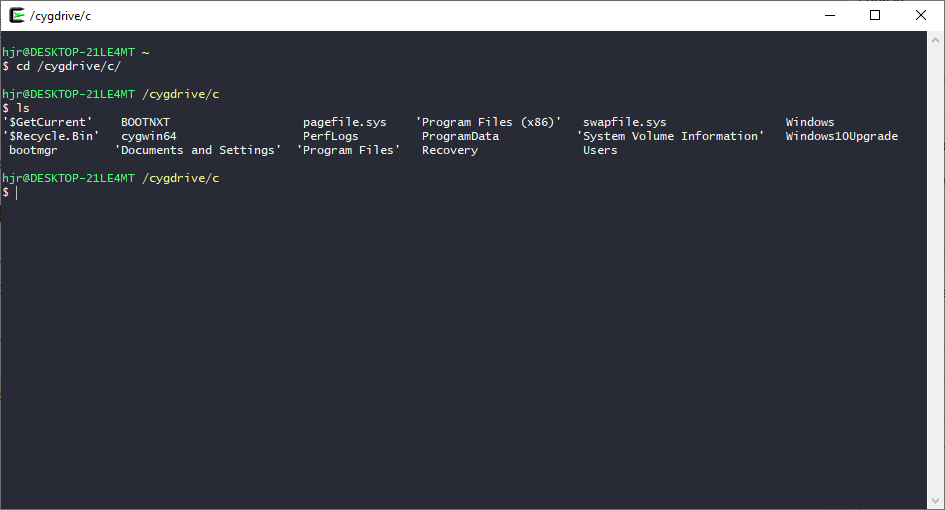
That looks ...er, perhaps a little confusing? Well, if we now open Windows Explorer (Windows' own file manager) and navigate to the root of your C: drive
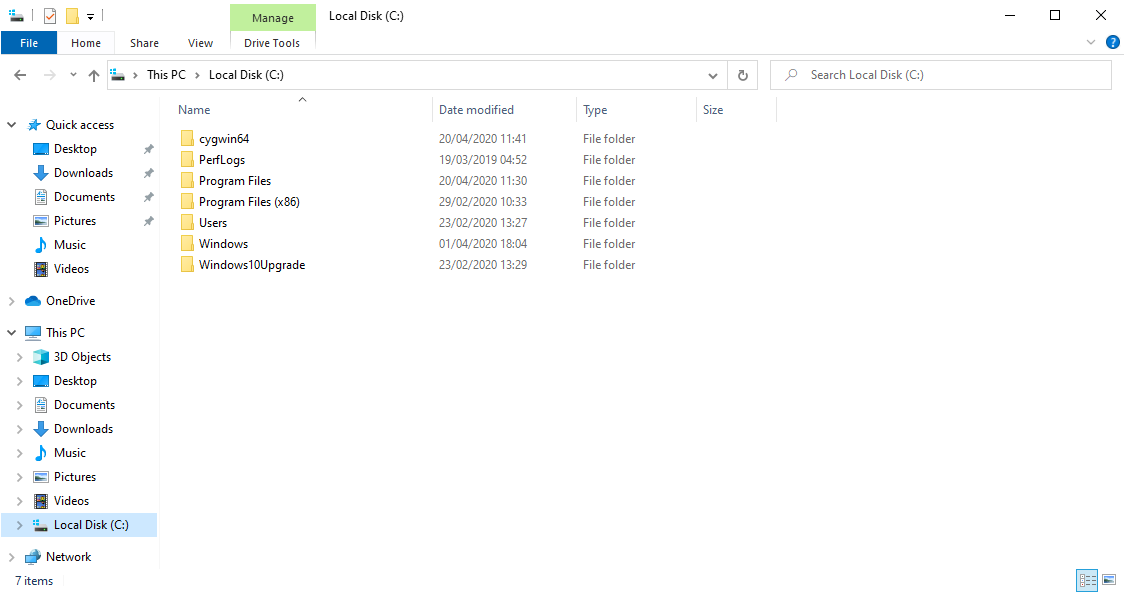
Spot any similarities? Obviously, the displays look wildly different (since Explorer is a GUI program and Cygwin definitely isn't!). But look more closely. Cygwin64 is present in both displays. So are Windows, Users, Program Files and Windows10Upgrade. Sure, Cygwin shows some 'weird' entries such as '$Recyle.Bin' which Explorer doesn't display usually, but all the main suspects are listed by both. In other words, the environments are actually the same: what exists on Windows is visible to Cygwin. The reverse is also true.
Specifically, when you are in Cygwin, everything stored in /cygdrive/c is what you would find in Explorer for the C: drive. And what you see in Cygwin as /home is actually a folder stored within C:\cygwin64\home. You don't really have two separate 'systems' running on the one PC, in other words. What Windows stores, Cygwin sees, though only by sticking '/cygdrive/c' on the front of the path that Windows would know it by. Similarly, anything Cygwin stores can be found by Explorer somewhere in the C:\cygwin\home folder.
This isn't like running a virtual machine, in other words. In VMWare or Virtualbox, what your Linux VM 'sees' is an entirely independent system from the host machine it's running on. But with Cygwin, you're looking at your Windows PC directly, just with forward-slashes not your usual back-slashes!
That's an important point to get under your belt, really. You now have two ways of working on the one PC: one uses Windows commands and conventions; the other uses Linux commands and conventions... but it's the one PC just the same.
3.3 Installing a Package Manager
Once you've got a basic Cygwin installation working, you need to add extra software to it -but as I've already mentioned, the 'official' way of doing that (by using the setup program you've already run) is cumbersome and awkward. So here's how I would do it.
First, open a Windows command prompt and cd to wherever you stored that initial Cygwin setup executable that you downloaded at step 3.1 above. I'm assuming that you stored it in your Downloads folder, which is what most browsers seem to do by default. Once there, run the following command:
setup-x86_64.exe -q -P wget,tar,qawk,bzip2,subversion,nano,lynx
That's just a Windows command to re-run the setup program and to automatically install the programs wget, tar, qawk, bzip2 and so on. Here's me doing that:
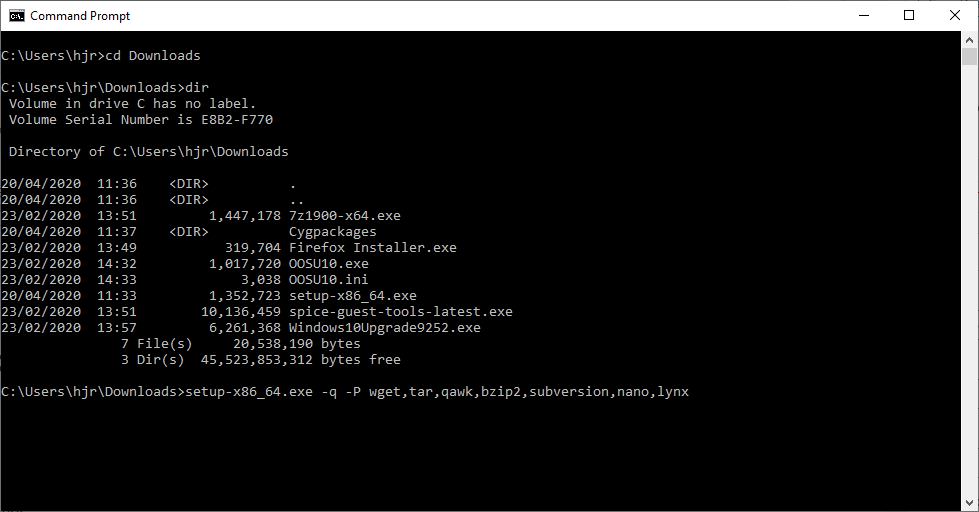
Note again that this is Windows' own command prompt (run by clicking Start, then typing cmd, then pressing [Enter]). I've navigated to the Downloads directory, produced a directory listing (so I can be certain that the setup-x86_64.exe program is still there) and then typed the command I showed you earlier. When you submit that command, a security prompt is initially displayed:
You should select [Yes] at this point to allow the setup program to run, and then you'll see something like this:

That's the same sort of progress indicator you saw when first installing Cygwin, so you should be reasonably familiar with the way it works. When it has installed all those pieces of software, it should just disappear altogether and you'll be left looking at your original Windows command prompt once more. You can then just close that down, because we won't be needing it again.
Now, finally, you open up a new Cygwin session and type these commands, one at a time:
lynx -source https://raw.githubusercontent.com/transcode-open/apt-cyg/master/apt-cyg > apt-cyg
install apt-cyg /bin
Here's me doing that:
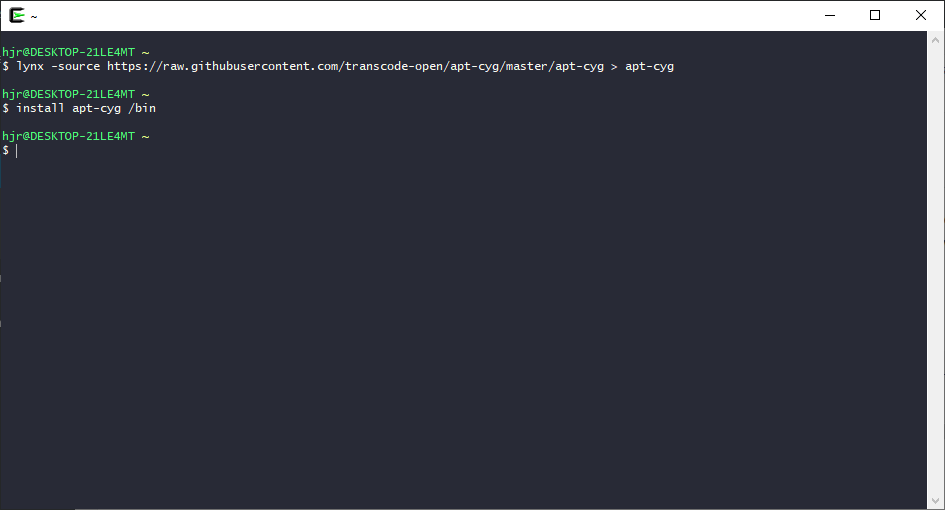
First thing to note, this is a Cygwin session, not a Windows Command Prompt session: you can tell that from that 'C-with-a-green-arrow' icon in the top left-hand corner. The second thing to note is that you have now installed a proper package manager on Cygwin: in future, all software can be installed in Cygwin by doing apt-cyg install <package-name>, a one-line command which makes life very easy!
3.4 Installing initial Linux Packages
So now we are in a position to install software packages in a simple way. It's just a question of which packages to install -and the choices vary, depending on which of my audio management scripts you want to install. All of them, however, depend on the presence of a package called ffmpeg, which is a hugely capable multimedia manipulator. Without it, nothing will work.
Unfortunately, because ffmpeg works with a vast array of multimedia formats and codecs, some of which might reasonably be considered 'patent-encumbered', the Cygwin developers do not provide a package of ffmpeg which can be installed with one command. We instead have to compile it from source (which sounds a hell of a lot more complicated than it is, to be fair). So, at this point, we're going to use our new apt-cyg package manager to install only those things needed to get us to the point of compiling ffmpeg.
In a new Cygwin session, therefore, type this command:
apt-cyg install xclip xorg-server flac lame vorbis-tools binutils gcc-core libpng12 \
git make mingw64-i686-runtime yasm texi2html dos2unix curl xinit zlib libpng-tools
That can all go on one line: I've just broken it up with a continuation character ('\' ) here, for formatting neatness. Here's me doing that:
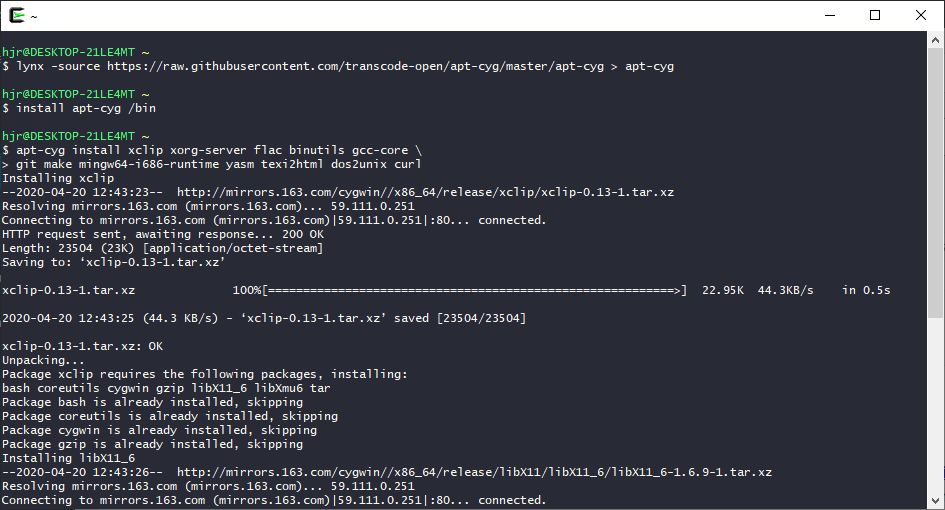
You can see that quite a lot of 'noisy' output is generated by the package manager: most of it can be ignored, provided no catastrophic errors appear in any of it!
The software installation can take quite a few minutes, depending on the speed of your Internet connection. Wait until everything has been declared to be installed correctly before proceeding.
3.5 Installing FFMPEG
With those packages installed, we're now ready to download the ffmpeg source code and compile it into a working executable.
In a Cygwin session, you type all of these commands, one at a time, as follows:
cd
git clone git://source.ffmpeg.org/ffmpeg.git ffmpeg
cd ffmpeg
dos2unix configure
make distclean
./configure --enable-shared --disable-static --enable-gpl --enable-version3
The make distclean command will probably produce something that looks like an error, with a message that there's 'no rule to make target...'. The command clears out previous runs of the make command (if there's been any), but if it's the first time you're running these instructions, there won't be anything to clean out -and hence the error. Even if it produces an error, though, no harm is done: we're only issuing it as a precaution anyway.
The “./configure...” command will take a good while before it returns any feedback to the screen (give it several minutes!) and it may end up with a warning about not being able to detect libraries correctly: ignore it if that happens, as all will be fine in the end.
At this point, you need to do a short edit of a configuration file (otherwise what we do next will fail). So, in the same terminal session as you're already in, issue this command:
nano /usr/include/w32api/strsafe.h
...and in the top section of '#include' statements, add one extra:
#include <wchar.h>
It doesn't particularly matter in what order the include statements go, but tacking the new one onto the end of the existing ones is probably easiest. Mine ended up looking like this:

The red arrow is to point out the new addition!
Once that's added, press Ctrl+X to save and tap 'Y' to confirm when prompted. Once that's done, you're ready to resume building ffmpeg. Back in the same terminal session as before, and still sitting in the ffmpeg folder, issue these commands:
make
make install
cd
rm -rf ffmpeg
Unfortunately, the “make” command (second from the bottom) will take an extremely long time to complete (over 20 minutes on my i7 laptop; practically half a day on my ancient i5 laptop). You really Just have to be very patient with it: go have a cup of tea and an evening meal or something: it will get there, in the end!
I wouldn't worry about trying to interpret any of the output that the make command produces. There will be screenful after screenful of it -and it's all mostly complete gobbledygook. Just let it stream away to the screen as it pleases and get on with compiling itself, which it should do without a problem in the end. Don't forget the make install command at the end, which will actually copy the compiled executable into all the right places so it can actually be run.
When the ffmpeg installation has completed, you will have most of the software necessary to run nearly any of the audio management scripts made available on this site.
Edited to add (February 16th, 2021): I have recently re-verified these instructions using a Windows 10 PC, updated to version 2H20 and Cygwin version 2.905. The instructions still work as originally written.
Before we proceed to make any of them functional, however, there is one extremely important configuration issue that you need to sort out before you do anything else.
3.6 Configuring File Security
Left to its own devices, Cygwin tries to use a Linux-like security model for files on a hard disk that is different from that which Windows uses natively. The incompatibilities between the two can cause problems, such as files becoming inaccessible to Windows when accessbile from Cygwin (or vice versa). In the worst case, it can appear to corrupt the metadata in your music files to the point of wiping it all out!
So, to stop that happening, you should configure Cygwin to not use its own security model for any directories that you intend to use from a Cygwin environment. Specifically, since we're talking about manipulating audio files, we want to make sure that Cygwin doesn't apply its security model to the folder where, on Windows, you store your music.
Now, on Windows, you might store your music files in a folder called something like C:\Users\hjr\Music. That's a fairly common folder to use for the purpose (though yours won't literally be called 'hjr', of course: that's just me and my username: substitute your own in to get the idea!)
What we need to do is to create a new folder in a Cygwin environment which we'll then "map" to the Windows folder. Let's call this new folder just "music".
So, to get started, open a Cygwin session and type this command:
mkdir /music
The file which tells Cygwin what Windows folders map to folders it knows about in its own environment is called fstab (file system table). We need to edit this to tell it that our new /music folder should map to c:\Users\hjr\Music.
So now, in the same Cygwin session as before, type:
nano /etc/fstab
Nano being a simple text editor, this will open the fstab file. It will have some comments at the top (lines starting with "#" are non-functional comments) and then one functional line that probably reads something like:
none /cygdrive cygdrive binary,posix=0,user 0 0
That's how Cygwin knows to access Windows' C: drive in the /cygdrive directory. Your job now, though, is to add an additional line after that default one which will control the way Cygwin will access the music files you want to tag with CCDT. That command should read something like:
c:\Users\hjr\Music /music ntfs binary,noacl,posix=0,user 0 0
This says, in order, "here's where my music files are physically stored as far as Windows is concerned; here's where I want you to access them via Cygwin; the physical source is formatted with the NTFS file system; there are various mount options I want you to use when accessing them".
Note that Cygwin does not respond well to directory paths that contain spaces -so, it's best to avoid them if at all possible. Also note that Cygwin is generally case-sensitive, so if it's 'C:\Users', you need to say 'Users' in the fstab file, with a capital U, not 'users' with a lower-case one.
The key part of the fstab entry I've suggested you make is the all-important presence of noacl in the mount options: it is this which switches off Cygwin's Linux approach to security. It will only take full effect once every process using Cygwin has been stopped and re-started: the best way of ensuring that happens is to reboot your Windows PC altogether.
Once your PC comes back from that reboot, you are (finally!) good to get seriously working with Cygwin. When you do, you should find that whatever you store in your Music folder in Windows is readily accessible from Cygwin's equivalent /music folder. The rest of this article will show you what extra bits of software (if any) you need to install in order to be able to run the complete set of AbsolutelyBaching audio management scripts on Windows.
4.0 Getting the AbsolutelyBaching Scripts Working
Since this article was first written, I spent a lot of time developing the Absolutely Baching Music Player (or AMP for short). AMP will not work under Windows. Sorry about that: the software will actually run. Here's a screenshot to prove the point:

The trouble, however, is that in order for AMP to work meaningfully, Cygwin has to be able to access the audio hardware that Windows uses, and it doesn't do so in any way that ffmpeg can effectively access. So that means it runs as you can see... but you won't be able to hear anything! If you are a fan of John Cage, however, this may mean that AMP is precisely the Windows Music Player you need! You will come to adore the silence 🙂
Anyway: AMP is the only one of my scripts that doesn't function effectively under WIndows (and I'm still working on seeing if there's a workaround I can put together). All the other scripts work fine. So keep reading for those:
4.1 Classical CD Ripper
4.1.1 Software Prerequisites
To get the Classical CD Ripper (CCDR) working in Cygwin, you first need to install some further packages, as follows:
apt-cyg install cdparanoia
Though this will complete successfully with a claim that "package cdparanoia [is] installed", you won't actually be able to run the command 'cdparanoia': it will claim the command is not found.
The reason for this is that in Cygwin, cdparanoia gets installed as a package called cd-paranoia, with an extra hyphen! I don't know why that is the case, but CCDR needs to be able to run it without the hyphen in its name... so you then need to issue this command:
ln -s /usr/bin/cd-paranoia /usr/bin/cdparanoia
That creates a 'symbolic link' (basically, an alias) between the real program name with its extra hyphen and a hyphen-less alternative.
CCDR needs one other program installed -and, unfortunately, it can't be installed from within Cygwin itself. So, visit this link in your Windows' Internet browser and download the latest version of the program fd. At the time of writing, that would be version 8.1.0. The download you want is called fd-v8.1.0-x86_64-pc-windows-gnu.zip (that's got the version number in it, so if later versions are released, the exact name will change also, but the main point to get across is that you want the x86_64, Windows, Gnu zip version.
So save that to your Windows system somewhere (I shall assume you've downloaded it to your personal Downloads folder). Once downloaded, open that folder in your Windows Explorer file manager and right-click the zip file and ask for it to be extracted. It will probably cause a program file (called fd.exe) to be created inside a new folder that is, again, a representation of the download file name, complete with version number... so change what I'm about to type to match the actual folder name extraction creates.
Back in a Cygwin session, type the following command:
mv /cygdrive/c/Users/hjr/Downloads/fd-v8.1.0-x86_64-pc-windows-gnu/fd.exe /usr/bin
Remember to replace 'hjr' in that lot with your own Windows username -and, again, watch out for the specific version number used! The command effectively moves the freshly-extracted fd.exe file into Cygwin's /usr/bin directory, where it can then be used by other programs (such as CCDR).
4.1.2 Obtain and Install CCDR
With those two bits of software installed into your Cygwin setup, you can issue the following sequence of commands in a Cygwin session to obtain CCDR and install it correctly:
cd
wget https://absolutelybaching.com/wp-content/uploads/2019/11/ccdr.sh
mv ccdr.sh /usr/bin
chmod +x /usr/bin/ccdr.sh
ln -s /usr/bin/ccdr.sh /usr/bin/ccdr
That lot downloads the script, moves it into Cygwin's /usr/bin directory, makes it executable and creates a shortcut to the script that lacks the ".sh" extension, so you can run the program by typing just ccdr rather than having to type ccdr.sh.
At this point, you're ready to run CCDR much as you would run it on "proper" Linux.
4.1.3 Differences to native Linux
Unfortunately, CCDR willl not work quite as it would on native Linux. The principle problem is that Cygwin identifies CD-ROM drives attached to the main Windows PC in unusual ways. This has two consequences:
- CCDR will not be able to determine the read-offset needed to produced accurate CD rips automatically
- CCDR will not be able to auto-eject a CD at the end of a rip, even if you ask it to do so
The first issue is, of course, the more important problem! If CCDR cannot determine your CD drive's read offset, all the rips you do with it will be 'out' by some number of CD 'blocks' or sectors.
You can work around this problem, however, by manual methods. A comprehensive list of CD drives and their offsets is maintained on the AccurateRip website. You can determine your PC's "proper name" by opening Control Panel -> System and Security -> System -> Device Manager (on the left-hand side of the screen):
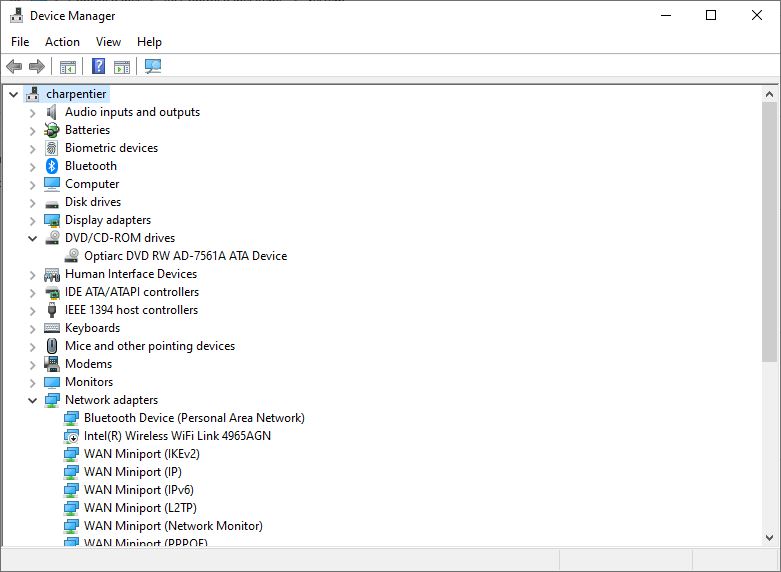
Open the DVD/CD-ROM drives node in the device tree and you'll see the 'technical name' for your device. In my case, as you can see above, my 'CD-ROM' is actually a DVD re-writer made by Optiarc and with a product code name of AD-7561A. If I scroll through the AccurateRip database, I find this:

This tells me that my drive's read-offset should be set to '6'. Knowing this, when I'm prompted to supply an offset by CCDR, I can simply type in '6':
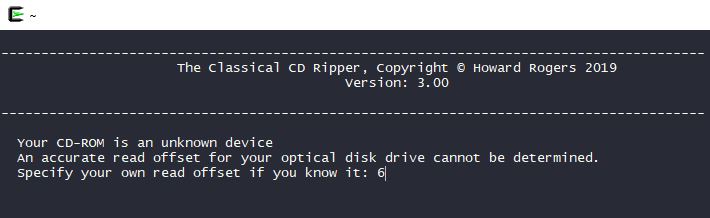
Once you've supplied that offset, you're guaranteed to produce an accurate rip of whatever CDs you supply for that session. Unfortunately, you will have to supply this same offset (whatever one you determine should apply for your drive) every time you run CCDR. It won't remember it between runs because it's unable to correctly identify the optical drive it's being asked to work with.
As mentioned, too, CCDR is unable to eject the CD at the end of a rip, even if you explicitly ask for it to do so. It's again a problem of knowing how to talk to an optical drive it cannot correctly identify! Manual ejection it is, then!
Apart from these two 'quirks', you'll find that CCDR runs exactly as it would on a true Linux system. Moreover, if you compare the rips it produces with those made by tools such as the native Windows Exact Audio Copy (EAC), you'll find that CCDR's rips are bit-identical. For example:
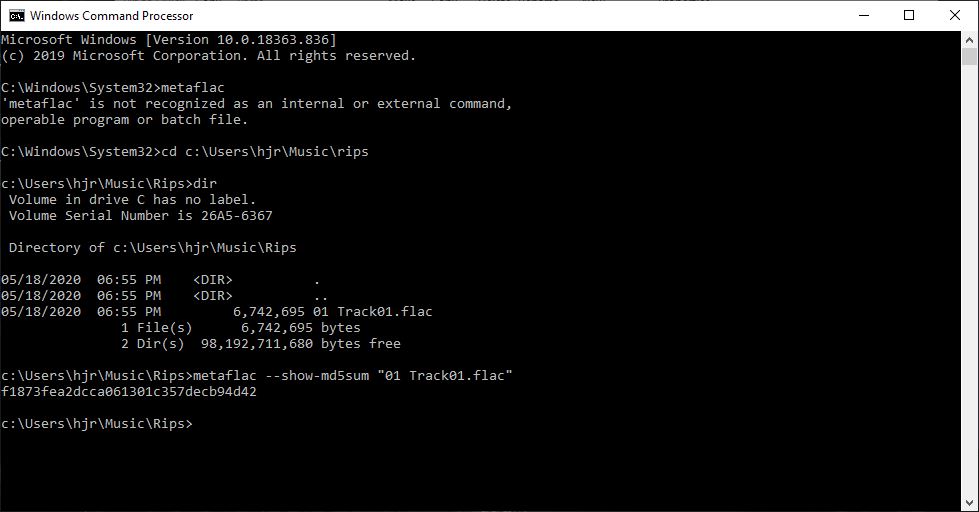
Notice that's a Windows command prompt (so we're in a native Windows session) and I'm able to expose the MD5 hash value for the 1 track I ripped from a CD using EAC. It reads 'f1837fea2...' and so on. On the same laptop, I ripped the same track from the same CD, but this time using CCDR:
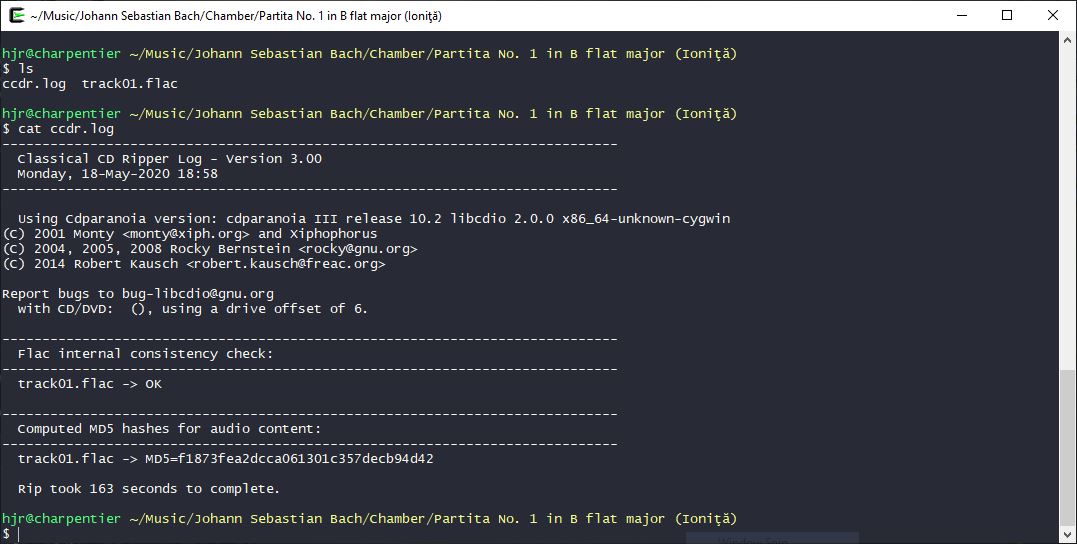
CCDR displays the MD5 hashes for each track it rips, if you ask it to, in the log file it automatically produces for each ripping session. Note that we're now in a Cygwin command session and I've asked to see the log file contents with a simple 'cat' command. At the end, we see the MD5 sum that CCDR computed for the track: "f1873fea2..." and so on. The two MD5s are identical -so the contents of the two files ripped by the two completely different programs must be identical too.
It's unfortunate that (at the moment, at any rate) you must do your own read-offset hunting and detection work to get CCDR to that level of ripping accuracy. Hopefully this will be fixed in a future CCDR release!
4.2 Classical CD Tagger
4.2.1 Software Prerequisites
The Classical CD Tagger (CCDT) has its own set of packages that need to be installed before it can work properly, though most of them are already present as a result of our pre-configuration steps back in Section 3.3. This means the next package installation process is mercifully short and sweet:
apt-cyg install wmctrl
4.2.2 Obtain and Install CCDT
To acquire and install CCDT correctly, issue the following sequence of commands in a Cygwin session:
cd
wget https://absolutelybaching.com/wp-content/uploads/2019/11/ccdt.sh
mv ccdt.sh /usr/bin
chmod +x /usr/bin/ccdt.sh
ln -s /usr/bin/ccdt.sh /usr/bin/ccdt
That lot downloads the script, moves it into Cygwin's /usr/bin directory, makes it executable and creates a shortcut to the script that lacks the ".sh" extension, so you can run the program by typing just ccdt rather than having to type ccdt.sh.
At this point, you're ready to run CCDT much as you would run it on "proper" Linux.
4.2.3 Differences to native Linux
CCDT will run in Cygwin identically to how it would run on a 'proper' Linux distro -with two minor differences:
- Stick to working in your special /music folder
- Remember to start an X server before you launch the program
The first of these points is the most essential to keep in mind. Remember that Cygwin file permissions conflict with Windows' permission, unless a special mount-point is configured to use the "noacl" mounting method. We did that back in Section 3.6. It means that you should only attempt to tag files found somewhere within your special /music folder. If you try travelling to (say) /cygdrive/c/Music or some other location, you are likely to end up corrupting and losing your music files.
The second of the above 'issues' is technically an optional one, but a rather useful piece of functionality is lost if you don't sort it out. On native Linux, you would probably be working in a graphical environment -perhaps with a Gnome, XFCE or KDE desktop. They only display properly because your PC is already running an 'X server' -a background process that allows programs to 'draw' on your PC monitor.
CCDT is a text-only program, so it will operate just fine without an X server being present -but, when you run it, it tries to copy the name of the current directory into the clipboard, so that you can paste it in when prompted for a composition name (on the grounds that, ideally, your folder names should indeed be names of the compositions they contain). And clipboards are very definitely a feature of a graphical desktop environment: they only work if there's an X server running.
So, to enjoy this piece of functionality in a Cygwin environment that generally doesn't use X servers, before you launch CCDT, you need to start an X server. On Cygwin, therefore, you run CCDT with this sequence of commands:
startxwin &
export DISPLAY=:0.0
ccdt
The startxwin command launches an X server -and its use of an '&' character at the end means that the server will continue to run in the background. You only have to issue this command once per Cygwin session, in other words. Future runs of CCDT will not need a second or subsequent X server launched if the first is still running in the background. Be warned that issuing the startxwin command produces a lot of text that will scroll up your screen and look very intimidating: you can, however, ignore it! You may need to press [Enter] to get back to a command line prompt where you can type your next command, though.
The export command is how you tell applications to contact the X server. The syntax is a little arcane and I won't explain it further here: it's again a command you only need to issue once per Cygwin session, after the X server has been launched. So second and subsequent runs of CCDT will not need this command to be re-issued either, provided you re-launch CCDT in the same Cygwin terminal.
Finally, the ccdt command will launch the program you're actually interested in running!
The program is then used exactly as you'd use it on native Linux. See the Linux page describing it for full details. When it comes to Option 2 (supplying the composition name), remember that you should be able to press Shift+Insert to paste in the name of the directory you're currently working in. If that doesn't work for some reason, check your Cygwin 'Keys' options.
That is, click on the Cygwin icon in the very top left-hand corner of a Cygwin terminal and select Options... from the menu that appears. Then click on the Keys item in the left-hand panel:

The first item under the 'Shortcuts' section should have a tick or checkmark next to it, indicating that Copy and Paste functionality is enabled. That option is always on for me by default, but you may need to switch it on if the Shift+Insert functionality doesn't seem to work for you.
Also remember that if you didn't start an X server session before launching CCDT, the Shift+Insert functionality will be absent regardless of what these options are set to.
4.3 The Dizwell Tag Cleaner
4.3.1 Obtain and Install DTC
The Dizwell Tag Cleaner is a simple tool that cleans out metadata from FLAC files that were put there by other software tools. If you've used the Classical CD Tagger (CCDT), your files will already have had their metadata cleaned, so DTC won't do anything for them further. But if you've tagged your files with other software products in the past, your metadata is likely to be full of all sorts of cruft that CCDT wouldn't put in -and DTC will take the unnecessary bits of metadata out.
Happily, there are no additional software prerequisites to be installed, so you can simply download and install DTC by issuing these commands:
cd
wget https://absolutelybaching.com/wp-content/uploads/2019/11/dtc.sh
mv dtc.sh /usr/bin
chmod +x /usr/bin/dtc.sh
ln -s /usr/bin/dtc.sh /usr/bin/dtc
The program works exactly the same as it would on 'native Linux', so you can read how to use it here. Remember, however, that you should only point it at files which are stored within your special /music folder, as only it has the 'noacls' permissions issues resolved. Point it at FLAC files stored elsewhere on your Windows PC's hard disk and you risk corrupting them -or losing them entirely.
4.4 The Absolutely Baching Flac Checker
4.4.1 Software Prerequisites
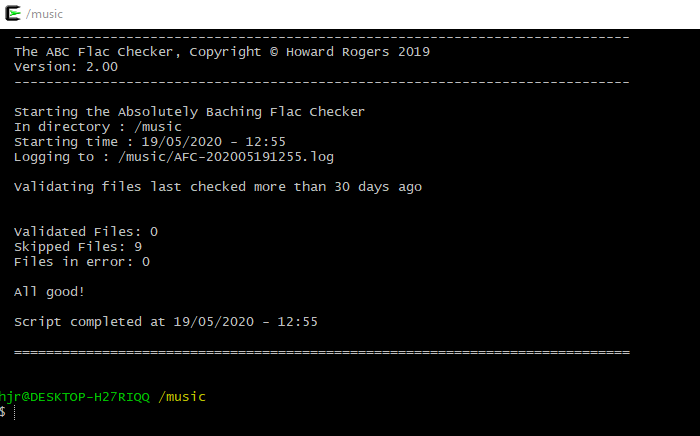
The Absolutely Baching Flac Checker (AFC) re-computes the MD5 checksums for a FLAC file and compares it to the one that was stored inside the FLAC file at the moment it was first created. If the two MD5 checksums match, then you know that the FLAC file's audio signal has not been altered in any way since its first creation: it has suffered zero internal corruption or bit-rot.
To run it, you need to add just one new package to your Cygwin system:
apt-cyg install bc
4.4.2 Obtain and Install AFC
To acquire and install AFC correctly, issue the following sequence of commands in a Cygwin session:
cd
wget https://absolutelybaching.com/wp-content/uploads/2020/04/afc.sh
mv afc.sh /usr/bin
chmod +x /usr/bin/afc.sh
ln -s /usr/bin/afc.sh /usr/bin/afc
That lot downloads the script, moves it into Cygwin's /usr/bin directory, makes it executable and creates a shortcut to the script that lacks the ".sh" extension, so you can run the program by typing just afc rather than having to type afc.sh.
At this point, you're ready to run AFC much as you would run it on "proper" Linux. There are in fact zero differences between running AFC on Cygwin and running it on a standard Linux distro, with the one constant exception to be kept in mind: you should only run it against files which are stored in your /music folder, where the "noacls" mount instructions apply and thus prevent Cygwin from making the files unreadable from the Windows side of things.
4.5 The Absolutely Baching Universal Audio Converter
The Absolutely Baching Universal Audio Converter (AUAC) allows you to easily convert audio files of one format into a variety of other formats (for example, FLACs into MP3s; or APEs into FLACs).
4.5.1 Software Prerequisites
For AUAC to be able to work, you must first install the "fd" program. This is, unfortunately, not installable as a standard Cygwin package. If you've already installed it to be able to use CCDR, then you obviously don't need to install it again (see Section 4.1.1 above).
If you haven't installed CCDR, but still wish to use AUAC, then you need to visit this link in your Windows' Internet browser and download the latest version of the program fd. At the time of writing, that would be version 8.0.0. The download you want is called fd-v8.0.0-x86_64-pc-windows-gnu.zip (that's got the version number in it, so if later versions are released, the exact name will change also, but the main point to get across is that you want the x86_64, Windows, Gnu zip version.
So save that to your Windows system somewhere (I shall assume you've downloaded it to your personal Downloads folder). Once downloaded, open that folder in your Windows Explorer file manager and right-click the zip file and ask for it to be extracted 'here'. This will mean that your Downloads folder now contains a program file called fd.exe.
Back in a Cygwin session, type the following command:
mv /cygdrive/c/Users/hjr/Downloads/fd.exe /usr/bin
Remember to replace 'hjr' in that lot with your own Windows username! The command effectively moves the freshly-extracted fd.exe file into Cygwin's /usr/bin directory, where it can then be used by other programs (such as CCDR).
The only extra software package you'll need, which this time can be installed as a standard Cygwin package is "pv". To install it, issue this command in a Cygwin session:
apt-cyg install pv
4.5.2 Obtain and Install AUAC
To acquire and install AUAC correctly, issue the following sequence of commands in a Cygwin session:
cd
wget https://absolutelybaching.com/wp-content/uploads/2020/04/auac.sh
mv auac.sh /usr/bin
chmod +x /usr/bin/auac.sh
ln -s /usr/bin/auac.sh /usr/bin/auac
That lot downloads the script, moves it into Cygwin's /usr/bin directory, makes it executable and creates a shortcut to the script that lacks the ".sh" extension, so you can run the program by typing just auac rather than having to type auac.sh.
4.5.3 Differences to native Linux
There aren't many differences in the way you use AUAC on Cygwin as compared to running on a more standard Linux distro. The principle differences are:
- There is no support for ISO extraction and conversion
- There is no support at all for the APE format
ISO extraction is a fairly specialised thing to do at the best of times. We're not talking the sort of ISOs that you obtain your Linux distros as, for starters. We're instead referring to ISOs which store SACD audio -a "high definition" audio format that produces ridiculously large audio files for no discernible audio benefit (to my ears, at least!) When I've purchased them as downloads in the past, it's usually been by accidentally clicking on the wrong option on the website's page! Unfortunately, to extract an audio signal from such an ISO, you need a program called sacd_extract ...and that's not packaged for Cygwin. So, at the moment, you simply cannot use ISOs as an input format, as you could on Fedora, Ubuntu or Manjaro for example.
The second difference mentioned above is a little more awkward. APE files are a lossless format, so they are equivalent to FLACs -but with a more complicated licensing scheme (it's not actually open source, for starters). Several "real Linux" distros do not readily support APE either, therefore... and Cygwin is in the same boat. On most Linux distros, though, AUAC will at least convert from APE to something else, though it never outputs to APE. On Cygwin, APE files simply cannot be read at all, so they are not usable even as an input-only format.
The only other issue I've ever had with AUAC on Cygwin is that if the source file contains embedded artwork, ffmpeg may not know how to convert it when converting the audio stream. This doesn't seem to be a problem on 'real' Linux, as the ffmpeg you install on standard distros seems to be built with most major graphics formats supported. If you've followed the instructions above, the ffmpeg you have installed on Cygwin should be capable of transforming between jpg and png artwork, but I can't vouch for any other graphics formats: they may or may not work, simply because I only ever use jpg or png artwork in my own music files.
5.0 Conclusion
Summing up: by installing Cygwin, a decent package manager and a dozen or so extra software packages, you can make all my audio management scripts, originally intended purely to be run on a Linux platform, run on a Windows 10 platform, too. The initial setup is a little trickier than you might be used to (especially installing ffmpeg), but you only have to do it once and thereafter you've a consistent set of tools, geared towards the user of classical music, that can be run on whatever computing platform you fancy.
I will note in closing that as soon as Windows Subsystem for Linux version 2 goes mainstream, I may well have another way of running my scripts on Windows! Watch this space for future developments in that regard.