1.0 What is AUAC?
I always rip my CDs to FLAC format. It's the only format I routinely use for storing my proper music collection: it's lossless (i.e., no part of the audio signal is discarded in making the file) but is around half the size of the original audio file. Why, then, would I ever need an audio file converter? If it's in FLAC format, why would I ever need it to be any other format?
Well, FLACs are good for high-quality home audio setups, but they are large files -and if you're listening to music on the train or an aeroplane, you don't actually need the perfect audio quality they represent, since the ambient acoustic environment, even with good headphones, is never ideal. For those situations, therefore, I maintain a copy of my FLAC collections in relatively low-quality MP3 files. These are lossy (a lot of the audio signal is simply thrown away, though it's supposed to be parts of the signal few human ears are ever likely to notice in the first place!), and accordingly much smaller than the source FLAC files (about half the size, at least).
I also occasionally buy music in APE format -another lossless format, which I prefer to convert into equally lossless FLACs.
Even more occasionally, I buy ISO images of SACD discs. These store audio in a 'high definition' format: DSF, which usually uses a 24-bit, 88.2Khz sampling rate (by comparison, ordinary CDs use a 16-bit, 44.1Khz sampling rate). SACD audio files are therefore enormous -getting on for 8 times the size of the equivalent, ordinary FLAC... but my ears are old enough that they can't hear the difference! So why store a 900MB file when you can store it as an 88MB FLAC?
In other words, I often want to convert FLACs into lossless MP3s; I sometimes want to convert one lossless format into another; and I occasionally need to convert from 'High Definition' audio into conventional audio. For all these reasons, I needed a simple command line tool to be able to handle lots of possible source formats and output to several possible output formats: the Absolutely Baching Universal Audio Converter (AUAC) is that tool.
2.0 Obtaining and Installing AUAC
Installing CCDR is a simple process of issuing the following commands:
wget https://absolutelybaching.com/abc_installer
bash abc_installer --auac
The first command downloads a generic installer script. The second command is an instruction to run that installer script, specifying (with a double-hyphen parameter) that it's AUAC you want to install. You will be prompted at one point for your sudo password, without which the installer cannot install the software in the /usr/bin folder correctly.
2.1 First Run
You most simply run AUAC by typing the command auac, though there are lots of options that can be specified as we'll see. But 'auac' is enough to make the program run the first time, at least. When it does so, it will check your system for the presence of other necessary software packages and will display a message indicating how those can be installed in a distro-specific way. For example:

This is Manjaro's response to trying to run AUAC: it knows to install five missing bits of needed software -and knows that on Manjaro, you use "pacman -S" as the command to install new software. On other distros, you'll get advice to use 'sudo dnf install', 'sudo apt install' and so on: whatever is appropriate for that distro, in other words. If all software is present, no warnings will be given and AUAC will just start to work, depending on what you've told it to do (see below!)
Unfortunately, and uniquely, the ffmpeg package is not available in Fedora's standard repositories, so you will need to enable the RPM Fusion repository in order to install that (as AUAC will inform you!). To do that, you first need to run these two commands:
The ffmpeg package is not included in any of Fedora’s standard repositories for fear of patent infringement, so in order to be able to install it, you need to first enable the RPM Fusion software repository, which can be done by issuing these two commands:
sudo dnf install https://download1.rpmfusion.org/free/fedora/rpmfusion-free-release-$(rpm -E %fedora).noarch.rpm
sudo dnf install https://download1.rpmfusion.org/nonfree/fedora/rpmfusion-nonfree-release-$(rpm -E %fedora).noarch.rpm
On OpenSuse, you will receive a similar extra message telling you to install the Packman repository (for the same sorts of reasons that Fedora needs the RPM Fusion one!). That's done with the following one-liner:
sudo zypper ar -cfp 90 http://ftp.gwdg.de/pub/linux/misc/packman/suse/openSUSE_Leap_15.2/ packman
With that repository enabled, you can re-run AUAC and again see the 'you are missing software' warning -but the command to install it all will now be capable of completing successfully!
Once those are installed, then you can run the 'sudo dnf install' command that Fedora recommends to get all necessary software prerequisites installed. Only then can AUAC be run successfully.
2.2 Optional SACD ISO Support
SACDs were the "upgrade" to bog-standard CDs that never really took off (because they required a lot of rather expensive, proprietary hardware for starters!) Nevertheless, you will often be able to buy downloads of SACD-hybrid CDs. As physical disks, these usually have a standard 2-channel CD soundtrack, plus the extra high-def audio stored in a separate disk layer that normal CD players cannot read but which special SACD players can. When you buy downloads of these products, they are often supplied in ISO file format, within which are contained both layers. As a result, these ISO files are enormous -and, unless you have specialised surround-sound playback hardware, you won't benefit from the extra data.
Until version 2.05, AUAC always extracted the ordinary CD-quality stereos signal from SACD ISO files and down-sampled it to standard CD audio quality (that is, your music files ended up containing a 16-bit, 44.1KHz signal). From version 2.05 onwards, you can still get AUAC to do an SACD extraction in that way, but you can also specify --o=hires as an output format. When you do that, AUAC will extract the audio to 24-bit, 176.4KHz files, thus preserving the high resolution audio signal contained within the original SACD.
A quirk of the recording industry and its digital technologies, however, is that when mastering SACDs, they tend to be mastered 6dB quieter than the exactly equivalent CD. See, for example, this page in which the following information is to be found:
DSD files are supposed to follow the SACD protocol which requires that the music signals be encoded 6dB down from maximum theoretically encodable (0dB) level. This is because DSD encoders have the potential to go unstable under certain conditions, and if the signal level is kept at least 6dB down from the 0dB level this problem is effectively eliminated. However, the onset of instability is graceful, and many DSD recordings can be found to contain passages which the recording engineer has allowed to exceed this -6dB limit without any obvious sonic penalty. Others, however, are conservatively encoded, and never actually approach the -6dB limit.
You will therefore usually find the files extracted from an ISO are considerably quieter than you are probably used to, though you can't guarantee that the reduction in volume is precisely 6 decibels. Accordingly, having extracted all the files from the source ISO, AUAC will scan them, work out what the smallest volume boost is that will make the loudest file as loud as it can technically be... and then apply that volume boost level to all the files of the extracted set.
Note that this volume boost to extracted ISOs only happens if the output format is FLAC. If, for example, you say to extract an ISO to ogg or mp3 format, no volume boosting ever takes place. So if you wanted to end up with volume-boosted OGGs, you would have to extract the ISO to volume-boosted FLACs first, and then re-run AUAC to convert FLAC to OGG.
If you do not want volume boosting to occur when outputting to FLACs, you can specify a -v=n or a --volume=n run-time switch when invoking AUAC. But be aware that AUAC always leaves the un-boosted files on disk. So, you always have those to fall back on, no matter how ghastly the volume-boosted ones might sound. So, no real harm comes from letting the volume boost take place (other than the extra time taken to do the volume analysis and boosting, plus the extra disk space involved in having a second set of files hanging around).
Now, with all that said, hardly any Linux distros are configured to extract audio from SACD ISO files at all! Without the relevant piece of software being installed first, AUAC will work -but if it's asked to extract from an ISO file, you'll see this error message:
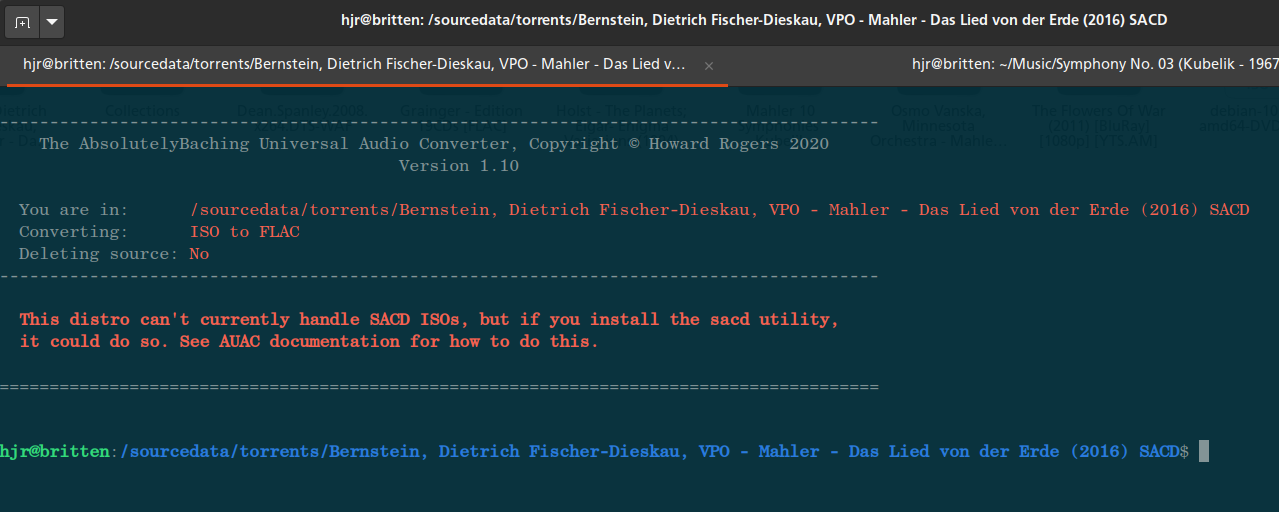
How you add ISO capability to AUAC is really fairly simple to do. In essence, you 1) add development tools to the distro, so it can compile software; and 2) obtain, extract and compile the odio-sacd software. It sounds more complicated than it really is. Here are the necessary commands :
sudo apt install g++ make binutils gcc git
cd

git clone https://github.com/tari01/libodiosacd.git
cd libodiosacd
make
sudo make install

git clone https://github.com/tari01/odio-sacd.git
cd odio-sacd
make
sudo make install

sudo ln -s /usr/bin/odio-sacd /usr/bin/sacd
cd
rm -rf libodiosacd
rm -rf odio-sacd
Only the first line of that command really needs to be changed, depending on what distro you're running. Instead of "sudo apt install", you might need "sudo pacman -S" (Manjaro/Arch) or "sudo dnf install" (Fedora) or "sudo zypper in" (OpenSuse) or "sudo eopkg install" (Solus). Do note, however, that on OpenSuse, they don't call it 'g++', but gcc-c++. So the first line on OpenSuse needs to read sudo zypper in gcc-c++ make binutils gcc git : it's the only distro I'm familiar with that has this particular problem, thankfully! In similar vein, on Manjaro, git's installed by default and g++ is not required, so the first line there can be simply sudo pacman -S make binutils gcc -though if you ask to install software that's already present, the installer won't error out on you anyway. Note, in passing, that Raspbian is essentially Debian-on-ARM CPUs, so the commands work as fine on that platform as they do for Debian on normal Intel and AMD CPUs.
Apart from those development tools, getting odio-sacd installed consists of first downloading and compiling the necessary libodiosacd application library; and then separately downloading and compiling the odio-sacd application itself. The last few commands create a 'softlink' from the real program's name 'odio-sacd' to mere 'sacd'. That's simply because AUAC was written expecting to use the shorter name, so the softlink allows AUAC to be fooled into thinking 'sacd' exists when actually it doesn't. Finally, the two 'rm' commands merely tidy up: once the software has been installed, there's no need to keep the source code sitting around taking up disk space.
Please note that if you decide not to install the "odio-sacd" program, you can continue to use AUAC to convert between the other supported audio formats, but just not from SACD ISOs.
3.0 Using AUAC
Once you've installed the software prerequisites that AUAC prompts you for on its first run (or if they are already present on your system), you run AUAC by cd'ing to a folder that contains the music files you want to convert. See Section 3.9 below for a way to stop needing to do this.
Once in a folder that contains audio files, you invoke AUAC as follows:
auac [ -i=<input format> | -o=<output format> | -q=<quality number | -d=<y or n> | -v=n]
This means that the AUAC program is invoked with from 0 to 5 parameters which control what it does and how it does it. We'll examine each of those parameters in turn now.
3.1 Input and Output Audio Formats
The -i parameter tells AUAC which audio format files it's supposed to be converting. The default is FLAC. The -o parameter tells AUAC to which audio format it's supposed to be converting the input files. The default is also FLAC.
The full list of audio formats supported is as follows:
| flac | FLAC is lossless. Can be specified as input and/or output |
| wav | WAV is lossless, but can contain no metadata tags. Can be specified as input and/or output |
| ape | APE is lossless. Can be specified only as an input format. AUAC cannot output to APE |
| mp3 | MP3 is lossy. Can be specified as input and/or output |
| ogg | OGG is lossy. Can be specified as input and/or output |
| wma | WMA is lossy. Can be specified as input and/or output |
| iso | ISO files are SACD images. Can only be specified as an input format. AUAC cannot output to ISO |
| dsf | DSF files are also SACD image files, but per-track rather than per-disk. Can only be specified as an input format. AUAC cannot output to DSF |
| hires | This switch implies high resolution FLAC output (i.e., 88.2KHz, 24-bit). Can only be specified as an output format. Only available in version 2.05 and above. |
| xhires | This switch implies extremely high resolution FLAC output (at 192KHz, 24-bit). Can only be specified as an output format. Only available in version 2.07 and above. |
Lossless audio formats are those which contain the complete audio signal from a CD but are usually compressed to about half their usual size. WAV files are lossless and uncompressed. Lossy formats, however, throw away some of the audio signal (in the belief that you can't really hear it anyway, so it's loss won't matter). Since they discard some of the audio signal, they can achieve much smaller sizes than any lossless format could manage.
Note that AUAC will happily convert a lossy format to another lossy format. This is inadvisable to do (because doing so just compounds the amount of audio signal that is being discarded at each conversion step), but AUAC will not stop you doing it, if you insist on it.
AUAC will also convert a standard lossless FLAC (i.e., 16-bit, 44.1KHz) into a hi-res one (i.e., 24-bit, 88.2KHz) or to an extremely hi-res one (i.e., 192KHz, 24-bit)... but it cannot add anything to the music signal when doing so. These are therefore a pointless conversion to do: you end up with precisely the same amount of music data in the signal, but now in a file that occupies around 4 or 8 times the disk space it originally did! So, AUAC won't stop you doing -i=flac -o=hires or -i=flac -o=xhires, but they are both silly combinations and should be avoided!
3.2 Quality Setting
The quality parameter determines the aggressiveness with which lossy output formats will discard parts of the audio signal. If they discard large amounts of it, your output files will be very small, but will probably sound a bit rough. If they don't discard much, they will sound good, but will be significantly larger than they otherwise would be (but still not as big as a lossless FLAC or APE would be).
The quality setting only applies when the specified output audio format is a lossy format. If you are outputting to FLAC, for example, and say '-q=6', the quality parameter is just silently ignored (since lossless formats don't discard any of the audio signal at all, ever).
The default quality setting is "4", which approximates to around 128kbps and will result in "reasonable" sound quality for all the lossy formats you might want to use. Unfortunately, MP3 qualities work in the opposite way to the way OGGs and WMAs work. That is, when outputting MP3s, a quality of 9 will sound terrible and a quality of 0 will sound excellent. When outputting OGG or WMA, however, exactly the opposite applies: a quality of 9 for either of those formats will sound great and a quality of 0 or 1 would sound very poor.
3.3 Delete after Conversion
AUAC does not delete the input file(s) by default. If you are converting FLACs to MP3s, for example, the default situation is to end up with a set of FLACs and MP3s. Only if you specify -d=y will the source files be deleted at the end of the conversion process.
You may, however, specify an environment variable called AUAC_AUTODELETE which reverses this behaviour. If that is set to the value of TRUE before you run AUAC, then AUAC's default behaviour will be to delete your input files unless you say -d=n. To set an environment variable temporarily, you can generally issue the command export AUAC_AUTODELETE=TRUE (with no spaces anywhere). To set it permanently, you can usually add the line AUAC_AUTODELETE=TRUE to your .bashrc or .bash_profile file, though you generally then have to launch a new terminal session before the new variable is automatically set in your session.
You can check whether AUAC_AUTODELETE has been set by issuing the command:
echo $AUAC_AUTODELETE
The use of upper-case for this parameter in all contexts is mandatory. The result would be something like:
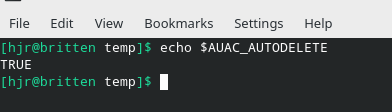
Once you see it set to 'TRUE', you know that your input files will be deleted automatically, unless you explicitly say -d=n.
3.4 Folder Depth
By default, AUAC only looks in the current working directory to find files to convert. There is no run-time parameter you can supply to alter this behaviour, either. However, if you set an environment variable called AUAC_FOLDERDEPTH to a numeric value, either with an interactive "export" command or via your .bashrc or similar environment-setting configuration file, then the program will look that many folders deep to find files.
Consider the following example:
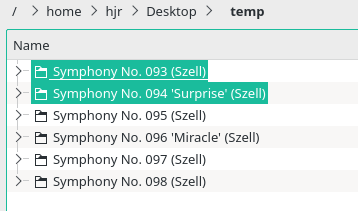
Here I have a folder, called /home/hjr/Desktop/temp, which contains 6 different sub-folders, each containing a set of audio files of a single Haydn symphony. If I invoke AUAC in the ../temp folder directly, with nothing specially configured, this happens:
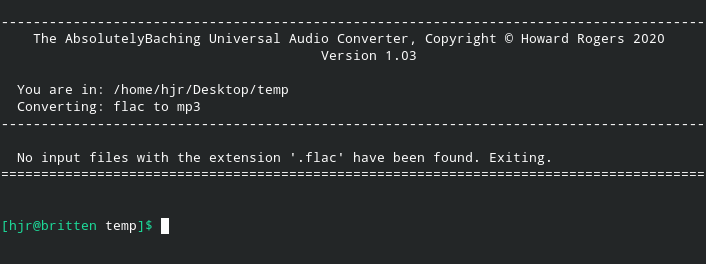
Since the /temp folder itself contains none of the input files my AUAC command implied, the program simply errors out, having performed no conversions. The 'normal' alternative at this point is to descend into each Symphony's own folder, one by one, and perform the file conversion for each in turn. With a couple of folders to process in this way, this might not be a bad option. But if I set AUAC_FOLDERDEPTH=2, then the program will look in the folder at depth 1 (which is the /temp folder) and then in every folder directly beneath that (which, in my case, would mean considering the contents of each of the symphonies' folders, too. So first I set the depth to 2:

...and now I re-run AUAC with exactly the command I used before:
This time, AUAC works perfectly well, because it has been able to find source 'flac' files. They are not in the /temp directory that, as you can see, I'm still sitting in as my working directory; but it has now been allowed to descend one more folder level down -and it's found usable FLAC files there.
This feature is designed to allow you to convert multiple source folders'-full of files in one quick pass. It is, potentially, quite lethal: if I accidentally ran AUAC in the root of my master FLAC collection with AUAC_FOLDERDEPTH set to something silly like 99, I'd see all my FLAC files converted to (potentially) a lossy format at a single stroke! For this reason, it is recommended that you only set folder depth to 2, or possibly 3, at the most. AUAC will not warn you if you go beyond that, however, and the consequences are all on you!
3.5 Volume Boosting
As mentioned above in Section 2.2, SACDs are usually mastered at a level at least 6dB below what an ordinary CD would use. Therefore AUAC will always seek to boost the volume of files extracted from an SACD ISO, but only if the extraction is to FLAC files. An extracted ISO will, in these circumstances, always result in two sets of FLAC files: the unboosted "originals" and the volume-boosted versions. You can then audition both sets to see which you prefer and then discard the set you consider no longer worth keeping. There is thus no harm in AUAC boosting the volume of extracted ISOs, since you are always left with the unboosted originals to fall back on if you prefer. The only cost, really, is disk space: you have to have room for two sets of files, at least temporarily.
The amount by which the sound signal has its volume boosted is calculated automatically by AUAC. It will scan the complete set of extracted files and work out what is the loudest of them. It will then determine by how much that loudest file could be amplified to get its peak volume to as close to its maximum possible without introducing distortion or clipping, less 0.5dB to be on the safe side. If it finds that the loudest file can be amplified, it will them amplify the entire set of extracted tracks by that same amount.
This approach means that although all files are amplified, they are all amplified by an exactly equivalent amount. Therefore, their relative volume will not change. The quiet Adagio will not suddenly sound as loud as the wildest fff in the Furioso movement! Instead, all files will sound a bit louder -usually by around 6dB- but the specific amount will vary, depending on what the recording engineers were up to on the day.
The original files (without any volume boosting) from an ISO extracting will usually be named (2ch)..., indicating that AUAC has converted a multi-channel SACD audio signal into a standard stereo one. Volume-adjusted files extracted from an ISO will always be named X-dB-(2ch)..., where the 'X' at the front of the file name will match whatever number of decibels AUAC has determined is the maximum possible volume boost. Thus a file created by a 3.2 decibel volume boost will be called 3.2-dB-(2ch)...<something>. The part of the filename which comes after the (2ch) identifier in all cases is specified by the internal data stored within the ISO file itself and is not, therefore, something over which AUAC has any control. To get more respectable names assigned to your music files, you'll probably best off using the CCDT Classical CD Tagging program, which will rename files according to the TITLE tags that you supply.
3.6 Special Audio Formats
You will see from the above list that there are two formats which AUAC is happy to accept as inputs, but cannot use as outputs: APE and ISO. Ape is a proprietary, lossless format which the program AUAC uses to read and write audio files, ffmpeg, is usually configured only to be able to read, not write. Licensing issues seem to be the main problem here -and the fact that Monkeys Audio (which is the brand name for the 'Ape' audio format) seems mainly to be intended for use on Windows platforms.
Meanwhile, ISOs are a special case at the best of times: these are SACD image files, and not the normal ISOs which you might see used, for example, to store a Linux distribution. They accordingly have to be read and extracted by special tools before their contents can be converted into one of the output formats. It would thus make no sense at all to produce an SACD ISO image (for example), even if you wanted to, since you'd never be able to play it on your computer anyway!
3.7 Parallelism
AUAC ordinarily converts audio files in parallel (i.e., multiple files at once). The default degree of parallelism is the number of available CPU threads. If, for example, you have a quad core CPU with hyperthreading enabled, the default degree of parallelism would be 8.
A higher degree of parallelism means audio conversion jobs finish more quickly than they would with a lower degree of parallelism. On the other hand, if your CPU is hit hard by a high degree of parallelism, your PC may effectively lock-up and be unable to do any other work for you until the audio conversion job is complete.
You can change the default degree of parallelism by setting and environment variable called AUAC_THREADS. If you set it to 16, for example, then 16 concurrent conversion jobs will be run; set it to 2, and only 2 audio files will be converted at the same time.
You are not required to limit the setting to the actual number of 'threads' your PC has, but it probably makes sense to do so: your CPU can only process the same number of jobs at any one time as you have threads. If you set AUAC_THREADS higher than the number of virtual cores, the extra threads are simply paused as the maximum that the CPU can actually schedule perform work.
Here is an example of me setting AUAC_THREADS dynamically, immediately before invoking AUAC itself:

If you wish to make a more permanent setting of a default, you can edit your .bashrc or .bash_profile and set the parameter in there, like this:
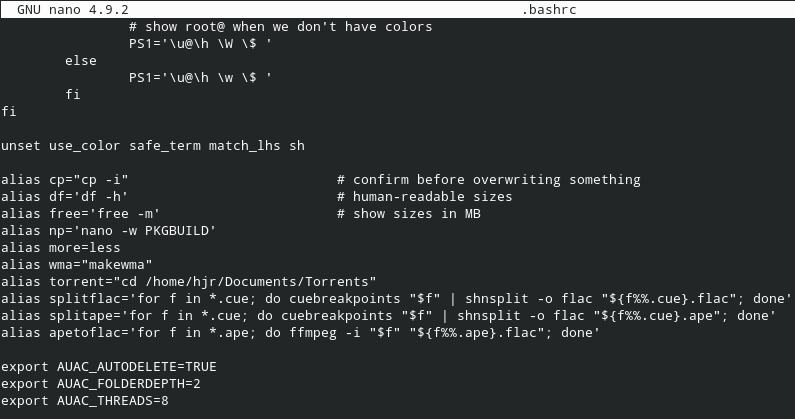
In my .bashrc, I'm setting all three AUAC-related envionment variables, but you don't have to do this if the defaults are acceptable. Note that there is no run-time switch that can over-ride the defaults for folder depth or the number of threads to use for conversion jobs.
3.8 General Usage Notes
From the syntax example shown at Section 3.0 above, you can see that all run-time parameters supplied to AUAC are optional. Any which you do not supply have defaults. Input and output formats default to FLAC; quality defaults to 4; delete defaults to 'no' (unless the AUAC_AUTODELETE environment variable has been set to TRUE) and the volume boost capability defaults to true (but only applies to outputting FLACs from an SACD ISO). Additionally, AUAC defaults only to looking in the current folder for input files and will run with a degree of parallelism that matches the number of virtual cores your PC possesses.
There are three possible environment variables which can be set to change the default delete behaviour (AUAC_AUTODELETE), the folder depth used to find input files (AUAC_FOLDERDEPTH) and the degree of parallelism (AUAC_THREADS).
When you don't specify an input format, the program assumes, as previously mentioned, that it's being asked to convert from FLAC. When you also don't specify an output format, the program will assume that it's being asked to convert to FLAC. When you therefore specify neither an input nor an output format, the program will assume it is being asked to convert from a FLAC to a FLAC - which might seem a bit pointless! However, it is actually a legitimate thing to do, since you might be converting from high definition 24-bit FLACs and wanting to output to CD-quality, 16-bit FLACs. When both input and outputs are explicitly specified to be FLAC; or when they are implicitly defaulted to both be FLAC, then the conversion will always be to 16-bit, 44.1KHz sampling rate CD-quality FLAC -and a '-16' will be added to the file names to indicate the newly converted files are, indeed, 16-bit ones.
When AUAC is asked to convert from a format, it determines whether files of that format are present simply by looking at file extensions. If, for some weird reason, you have decided to name all your FLAC files to be <something>.xyz, for example, then any AUAC job that asks to convert from FLAC to (say) MP3 will fail to run with a 'no input files of the right format found' error. AUAC does not inspect files, in other words, to check whether their internal contents match the required format.
AUAC always converts all files of the specified input format, if they exist. That is, if you have a folder containing four FLAC files and you run AUAC to convert FLACs to MP3s, all four files will be converted to MP3. You cannot, in other words, get selective about it: you can't ask for AUAC to convert only 3 of the 4 FLACs.
AUAC always over-writes any output files it is asked to create. This means that if you convert some FLACs to MP3s (for example), without deleting the inputs, you can run the same conversion job a second time and the MP3 files already present will be re-created without warning. The MP3s created by the first AUAC run will, in other words, be silently over-written by the second. You will not end up with two sets of MP3 files, despite the two runs of AUAC.
Please be aware that AUAC does not delete any files unless asked; and even if asked, it won't do so until all output files have been created. This means that you need to operate the program on a system that has sufficient free disk space to accommodate both versions of your music files, if only temporarily. If you don't explicitly ask for source files to be deleted, they won't be -so, in that case, both versions of your files will co-exist for, potentially, quite a long time!
All AUAC run-time parameters can be specified in a double-hyphen, long-form version, if you prefer to work that way. For example: --input=, --output=, --quality=, --delete= and --volume=
3.9 Working Remotely
AUAC's default mode of working is always to expect to be invoked within a directory that contains the audio files you wish to convert. If the FLAC files you want to convert are stored in /home/hjr/Desktop/temp, for example, then AUAC would normally expect you to first cd to that directory before invoking it. If you are frequently converting files, however, and the directory they're stored in is always the same, having to cd to that directory before you can do any conversion work can become tiresome.
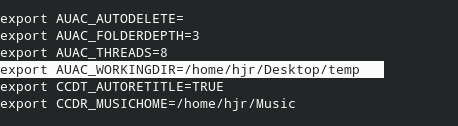
Accordingly, AUAC has the ability to let you to work 'remotely' -that is, to convert files in a directory that you are not currently located within. For example, I could open a new terminal and I would default to being in /home/hjr -which isn't where I store my FLAC files at all. But, if the AUAC_WORKINGDIR environment variable is set to /home/hjr/Desktop/temp, then I can convert audio files stored in that temp directory, even though I don't first cd to it.
You can set this environment variable dynamically:
export AUAC_WORKINGDIR=/home/hjr/Desktop/temp
You can set this parameter statically in your .bashrc or .bash_profile files:
Whichever method to set the variable you use, you can always 'switch it off' by issuing the command:
unset AUAC_WORKINGDIR
...and at that point, AUAC will revert to its default behaviour of expecting to see audio files within the current directory. If the parameter is set statically in your .bashrc or .bash_profile file, however, opening a fresh terminal session will cause the AUAC_WORKINGDIR environment variable to be set once more, and you're once more back to being able to work on files stored in a directory other than the one you are currently in.
Note that if you decide to set AUAC_WORKINGDIR, it must point to a single directory that actually exists and to which you have read/write access. The program will immediately display an error message and quit if these conditions are not met.
4. Some AUAC Examples
Given this directory of files:
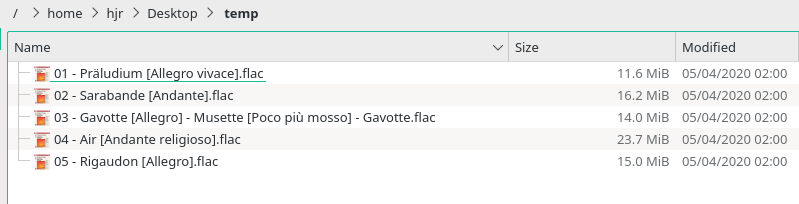
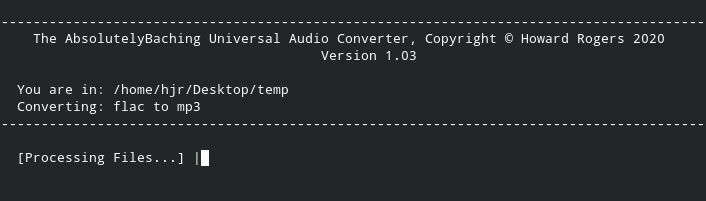
Then we can convert all those files to reasonable-quality MP3s as follows:
cd /home/hjr/Desktop/temp
auac -o=mp3
Note that I have not specified an input format (because FLAC will then be assumed). I haven't altered the default quality (so 4 will be used) and I haven't asked for the source FLACs to be deleted, so 10 files should be present in the folder when I'm done:
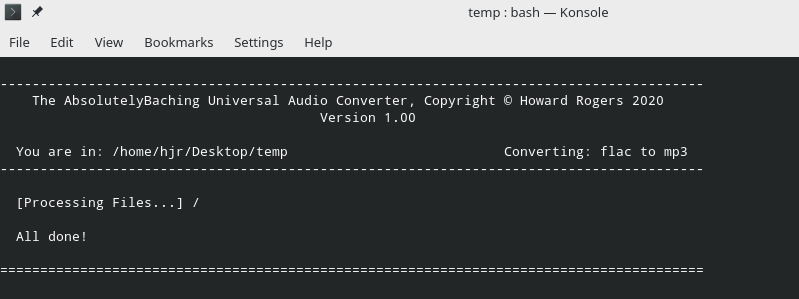
The program reminds you what directory you're working in, with a message towards the top the screen. Keep an eye on that: it's there so you don't accidentally convert files in places you didn't mean to work in! A reminder of what you're converting from and to is also displayed towards the top of the screen: here, "flac" has been assumed as the 'from' format, even though I didn't specify it. At the end of the conversion process, we see:
For each FLAC, there now exists an equivalently-named MP3. The FLACs did not disappear, because I did not ask them to be deleted (if you don't explicitly set -d=y, the default is to assume that -d=n).
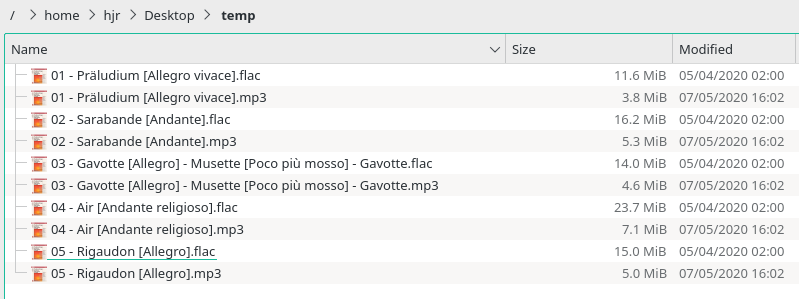
Now I will convert all the MP3s to OGG, but I will ask for the MP3s to be deleted:
auac -i=mp3 -o=ogg -d=y
The program display is very similar to before: the only difference is that the 'Converting...' message at the top of the screen reminds you that this is an MP3-to-OGG run. Remember that doing this is rather foolish, since the resulting OGGs will be of rather poor quality, since they are being produced from files which were already of only 'reasonable' quality. Nevertheless, the point is that it is possible to convert from lossy to lossy formats. AUAC won't stop you from doing so.
Anyway, the result of this conversion run:

There are still only 10 files in the folder: the original FLACs and now equivalent OGG files. But there are no MP3 files now, since they were deleted once all the OGGs had been created. If you compare the OGG file sizes to those produced earlier by the creation of MP3s, you'll see the files are in the same sort of size ballpark. File 4, for example: 23.7MB as a FLAC, 7.1MB as an MP3 and 5MB as an OGG. The MP3 and OGG default qualities are not identical, but they are approximately equivalent.
A final example: let us create a set of OGGs of much higher quality, this time from the source FLACs directly. The command would be:
auac -i=flac -o=ogg -q=9
Remember that for MP3s a quality of 9 would be terrible, but for OGGs and WMAs, 9 is about the best you can get (though not as good as the original flac, of course):

Again, we see the FLACs and OGGs co-exist, since I didn't ask for the source files to be deleted. But we now see that the OGGs are much larger than before (though still around half the size of the source FLACs): File 4, for example, is now 12MB in size, rather than its previous 5MB. By upping the quality parameter, we have discarded less of the source audio signal and thus the file sizes get bigger.
Finally:
auac -o=wma -d=y
This command doesn't mention an input format, so FLAC is assumed. It doesn't mention a quality for the WMA output files, so a quality of 4 is assumed, which works out to be about 140Kbps. And we're this time asking for the source FLACs to be deleted after the conversion completes:
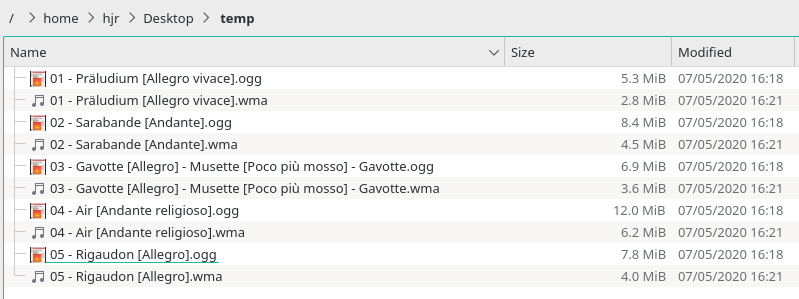
Notice how this time, the folder contains the earlier OGGs and now a new set of WMAs ...but no FLACs. The OGGs persist because they were not part of the AUAC 'transaction' just completed. A folder may contain a mix of flacs, oggs, wmas and ISOs, for example: if the auac command says -i=wma, only the WMA files present in the current directory will be read (and deleted, if that's requested explicitly). The FLACs, OGGs and ISOs that might be present at the same time are simply ignored.
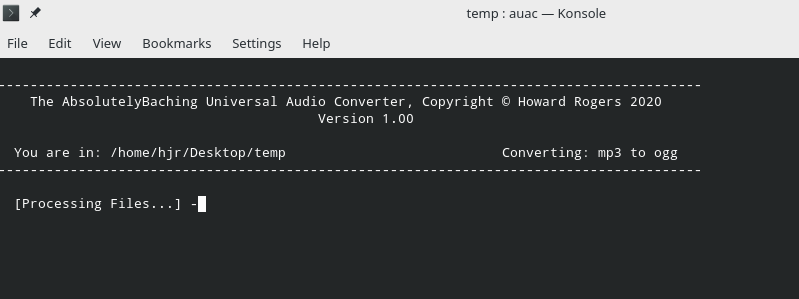
SACD ISOs and DSF files are a special category of files and the program will look slightly different when you use AUAC to work with them. A command to extract and convert an SACD image might be:
auac -i=iso -v=n
...which implies a conversion of the SACD image contents to 24-bit, 88.2KHz FLACs (since no output format is explicitly mentioned, and that's the default for both ISOs and DSFs) and that no 6dB volume boost is to be applied to the finished FLACs:
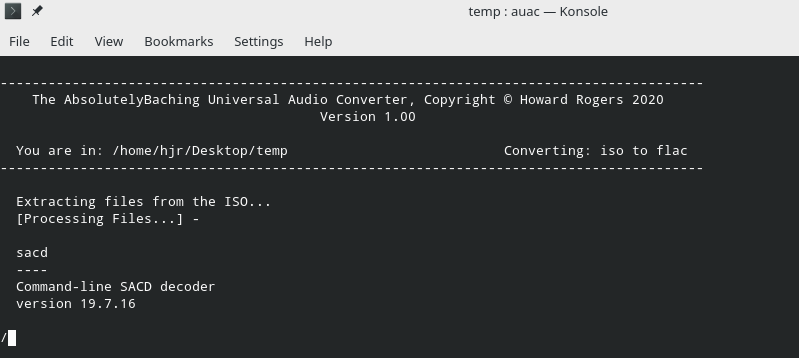
When extracting SACD ISOs, the AUAC program looks slightly differently than it otherwise would: there is a message indicating that the 'sacd' program has been invoked. The lack of such a program installed on your system at this point would, of course, result in an error message telling you that you must first install 'sacd' before you can work with ISOs. See Section 2.2 above for details on doing this. As the program extracts the ISO contents, you'll see this if you look in your file manager:

You will see the presence of a number of WAV files, despite me asking for the ISO to be extracted to FLACs. This is normal. ISOs are extracted to WAVs as an intermediate file format. These intermediate files are then converted to the requested output format (in this case, FLAC). Only then are the intermediate files deleted -and they are deleted whether you said -d=y or not. At the end of this conversion, therefore, I will see this:
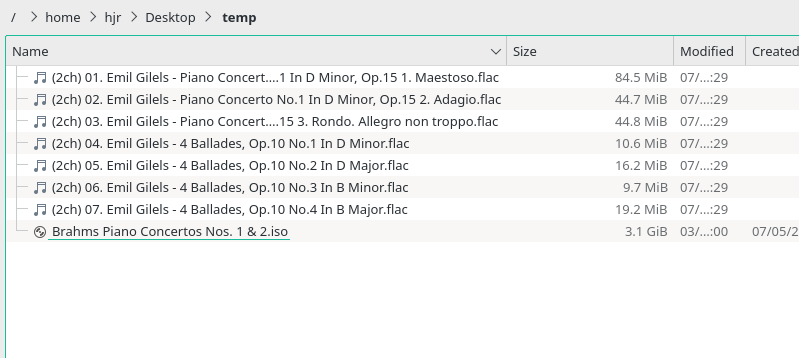
Notice that, now, I have a bunch of FLAC files, as requested. The ISO file also exists -because I didn't say -d=y. But the WAVs have disappeared. When working with ISOs, in other words, the intermediate files are always deleted; the source ISO is only deleted if you explicitly ask for it to be. So, as a final example, I will re-issue my last command with a small additional component:
auac -i=iso -d=y -v=n
...and the net result of that is:
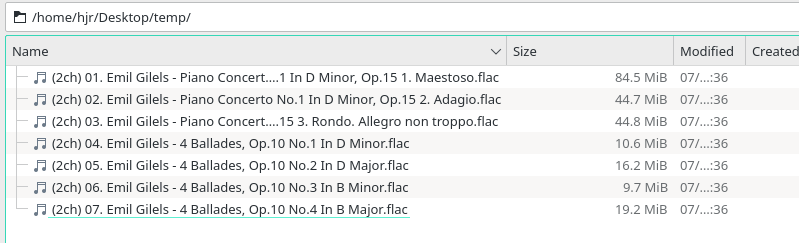
This time, I have my FLACs as before (the new ones silently over-wrote the originals produced last time)... but the ISO itself is missing. When working with ISOs, the --delete or -d parameter governs what happens to the source ISO, not what happens to the intermediate WAVs, in other words.
5.0 Housekeeping and Legal Stuff
Author
AUAC was devised and written by Howard Rogers ([email protected]).
License
AUAC is copyright © Howard Rogers 2020, but is made available freely under the GPL v2.0 only. That license may be downloaded here.
Bugs Tracking, Feature Requests, Comments
There is no formal mechanism for reporting and tracking bugs, feature requests or general comments. But you are very welcome to email your comments to [email protected].