 1.0 Introduction

Auto-tagging is a wizard-driven tagging process. You are prompted to supply in turn metadata about:
- Recording-wide data, such as: Composer, Composition, Distinguishing Artist, Genre, Recording Year and Performing Artists
- Recording-wide custom tags, if they've been turned on and configured
- Per-track titles, unique to each FLAC
Once that metadata has been supplied, the wizard will then automatically and without prompting:
- Re-number and re-name all FLACs, starting at 1 (thus, a file called 07 - Allegro.flac might end up being called 01 - Allegro.flac, for example, and internally have a TRACK NUMBER=1 tag)
- Look for a JPG, JPEG or PNG file within the same folder as the FLACs being tagged, and embed the first such graphics file discovered automatically within each track as album or cover art
- Apply a 'cleaning' process to a FLAC's complete set of metadata, removing any 'non-canonical' tags and ensuring only the 'canonical' ones remain, in a meaningful order
The auto-tagging wizard will generally try to prompt you for data in the relevant fields: the question then is simply where Semplice sources those metadata prompts from? There are three possible sources:
- From the FLAC files themselves, by reading their existing metadata and re-displaying it as a prompt
- From the physical folder characteristics within which the FLACs being tagged are currently housed
- From metadata supplied in an immediately prior tagging session
If you were using Semplice to edit a little typo in one particular tag, for example, it would be madness to start with a completely clean slate and have you type every tag back in from scratch! In that circumstance, it would surely make more sense to read all the existing metadata from the FLACs, display that to you on a nice form and let you slightly adjust the one tag that needs fixing: hence, the first item in the above list of sources. If you've just purchased some digital music from an online source, however, the chances are that reading existing metadata will be an exercise in futility: if the FLACs contain any metadata at all, it's likely to be useless. For this reason, if you tell Semplice to source its prompts from existing metadata and it turns out that there is no metadata for the relevant tags, then Semplice will 'improvise' some data for you, by parsing the folder name in which the FLACs live. If the folder name is in the form of Composition Name (Distinguishing Artist - Recording Year) and no existing metadata for Composition, Performer or Recording Year exists, then Semplice will parse that folder name into at least three possible recording-wide tag prompts for you and display them on the relevant form, for you to edit or delete as you see fit. Finally, if you've got a CD containing half a dozen different compositions, you may well labour long over getting the metadata for the first one correct -but the correct approach for the remaining compositions would, surely, be to re-use that first submission as the source for all further metadata prompts. Sure, specific items such as the Concerto or Symphony number will be wrong for the second and subsequent recording, but correcting that would be a minor change: at least by borrowing the composer name, orchestra details and conductor name from the first recording you'd be getting a good proportion of the metadata for the second and subsequent recordings correct without having to re-type anything.
Let's see how these auto-tagging principles work in practice. I'll use this CD as a worked example:
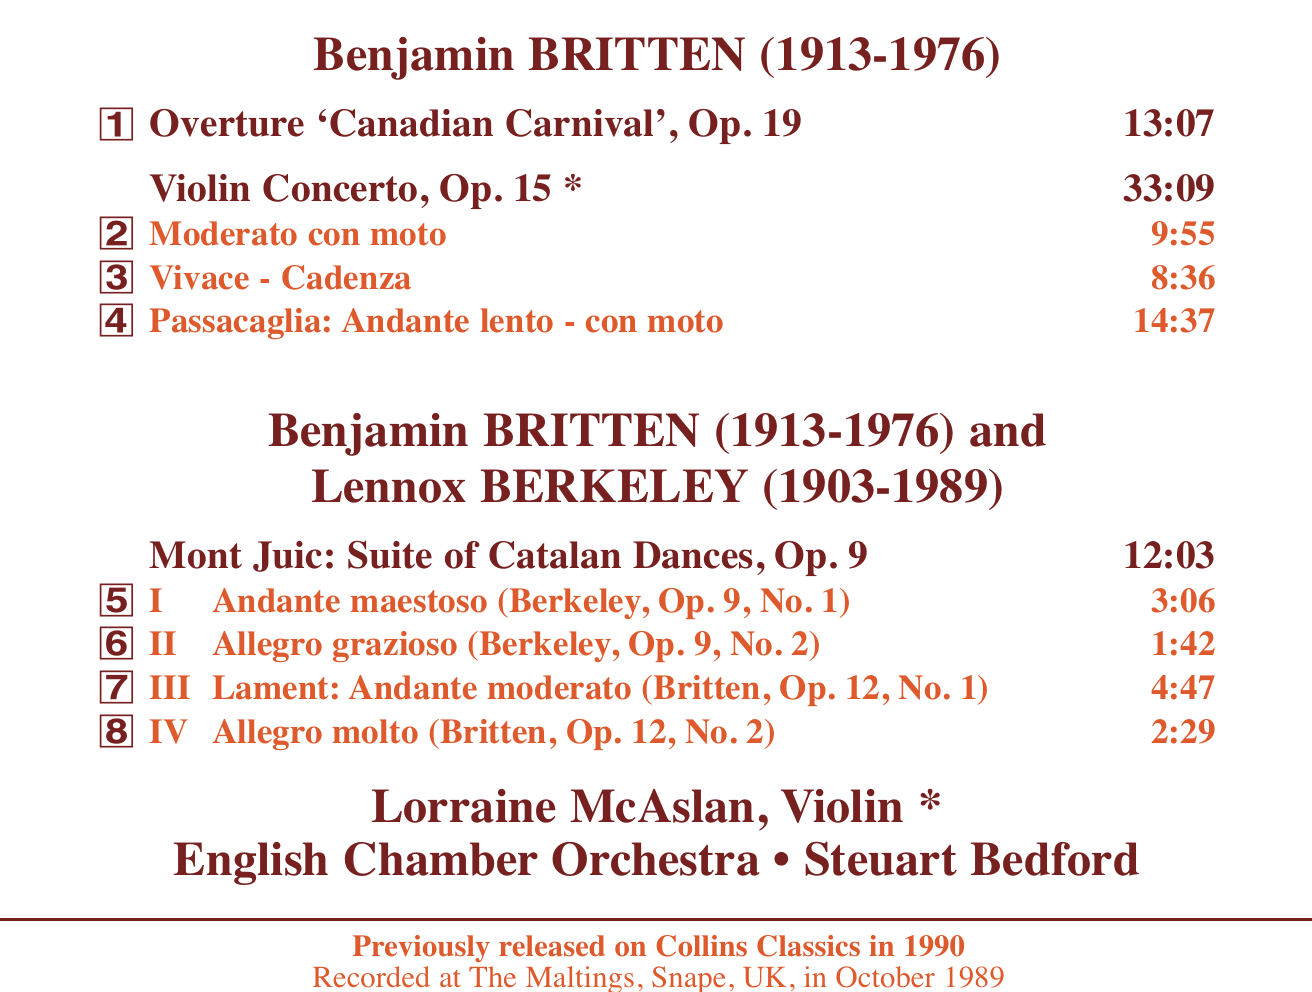
You'll note that the single CD contains three separate recordings. Steuart Bedford and the English Chamber Orchestra play throughout all three recordings, whilst Lorraine McAslan plays violin on one of them. Additionally, everything was recorded at the same time, in 1989. So, if I spend the time getting one of these recordings tagged correctly, the composer, orchestra and recording year will be right for all the two others. The genre is shared by two of the recordings ("orchestral" for the Canadian Carnival and Mont Juic suite) but will need to change for the third ("concerto" for the Violin Concerto).
So with that in mind, let's see how I'd go about tagging this CD.
2.0 Tagging in Practice
Auto-tagging works best when you've prepared your physical file and folder layout ahead of time to properly represent the logical construction of the CD. Continuing to use the Britten/Bedford/McAslan CD as a worked example, therefore, it's useful to note that I bought this as a FLAC download from Prestoclassical, and it came down from the Internet exactly like this:

That is, there are 8 numbered FLACs, one JPEG file for the cover art and a PDF, representing the electronic version of a CD booklet, all sharing the same download folder. The first job, therefore, is to knock this physically into shape: that is, separate out files into different physical folders, each folder representing a 'recording' or composition or work that happened to be delivered as part of a single CD's-worth of music. I'd end up with something like this:
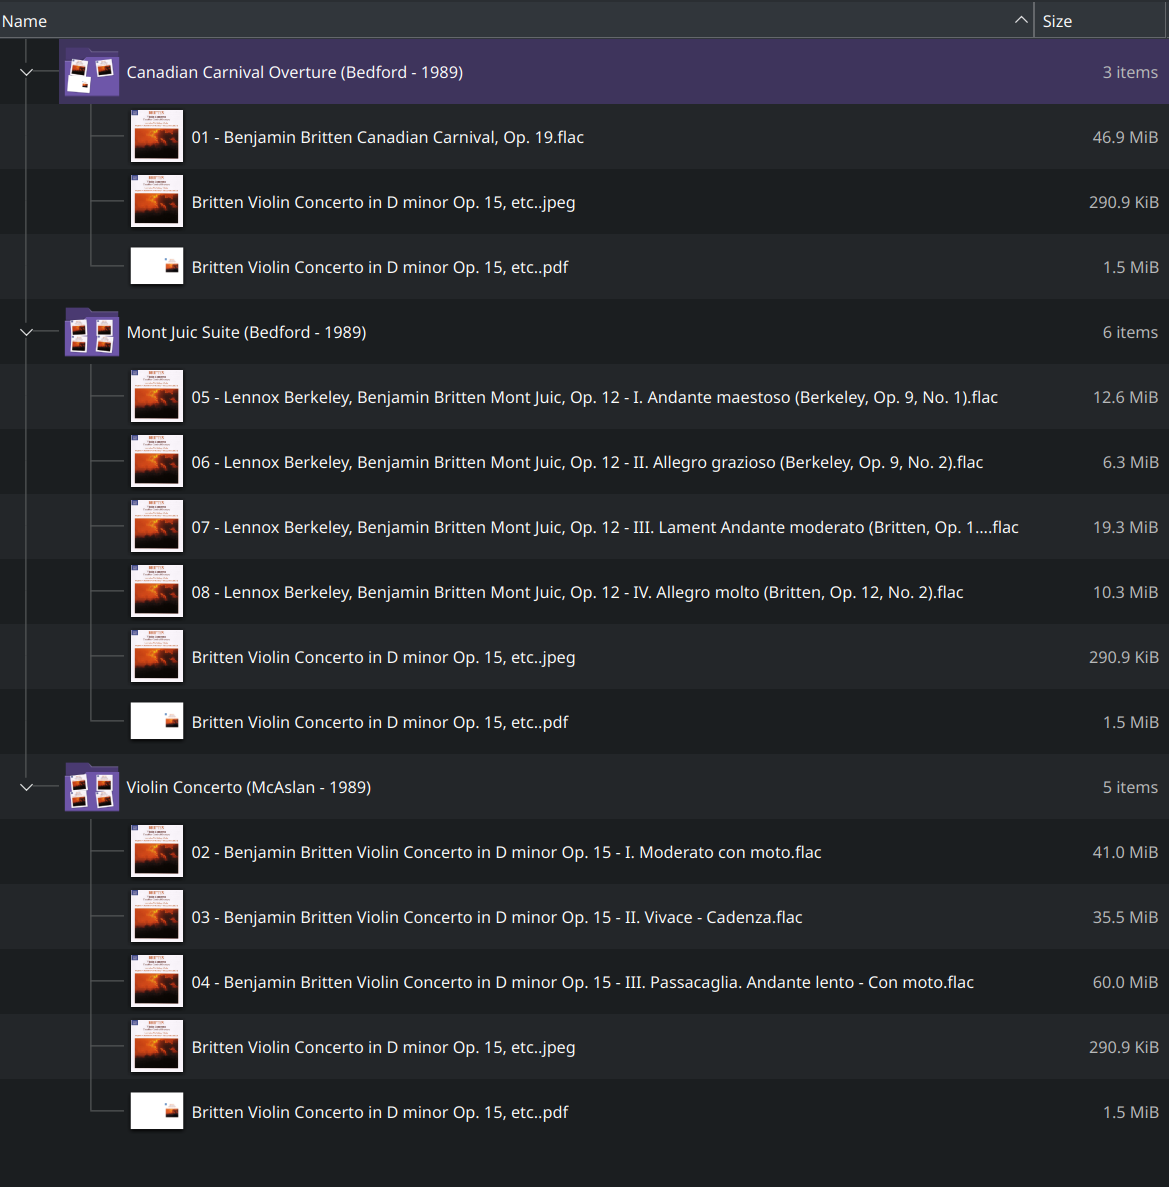
Here, you see I've created three new sub-folders, each of whose names is the extended composition name -that is, the 'normal' composition, plus the 'distinguishing artist' and a recording year. I've then moved the relevant FLAC files into each sub-folder, and copied the PDF and JPEG file into all three sub-folders. Thus, the Violin Concerto's FLACs are now housed in a folder called 'Violin Concerto (McAslan - 1989), along with the cover art and PDF.
2.1 Select a Working Folder
Now I can launch Semplice. Immediately after having done so, however, and before you can tag, you need to be 'inside' the folder which contains the FLACs you want to tag. So, the first requirement is to set the correct working folder. That's done by tapping the 'W' key:
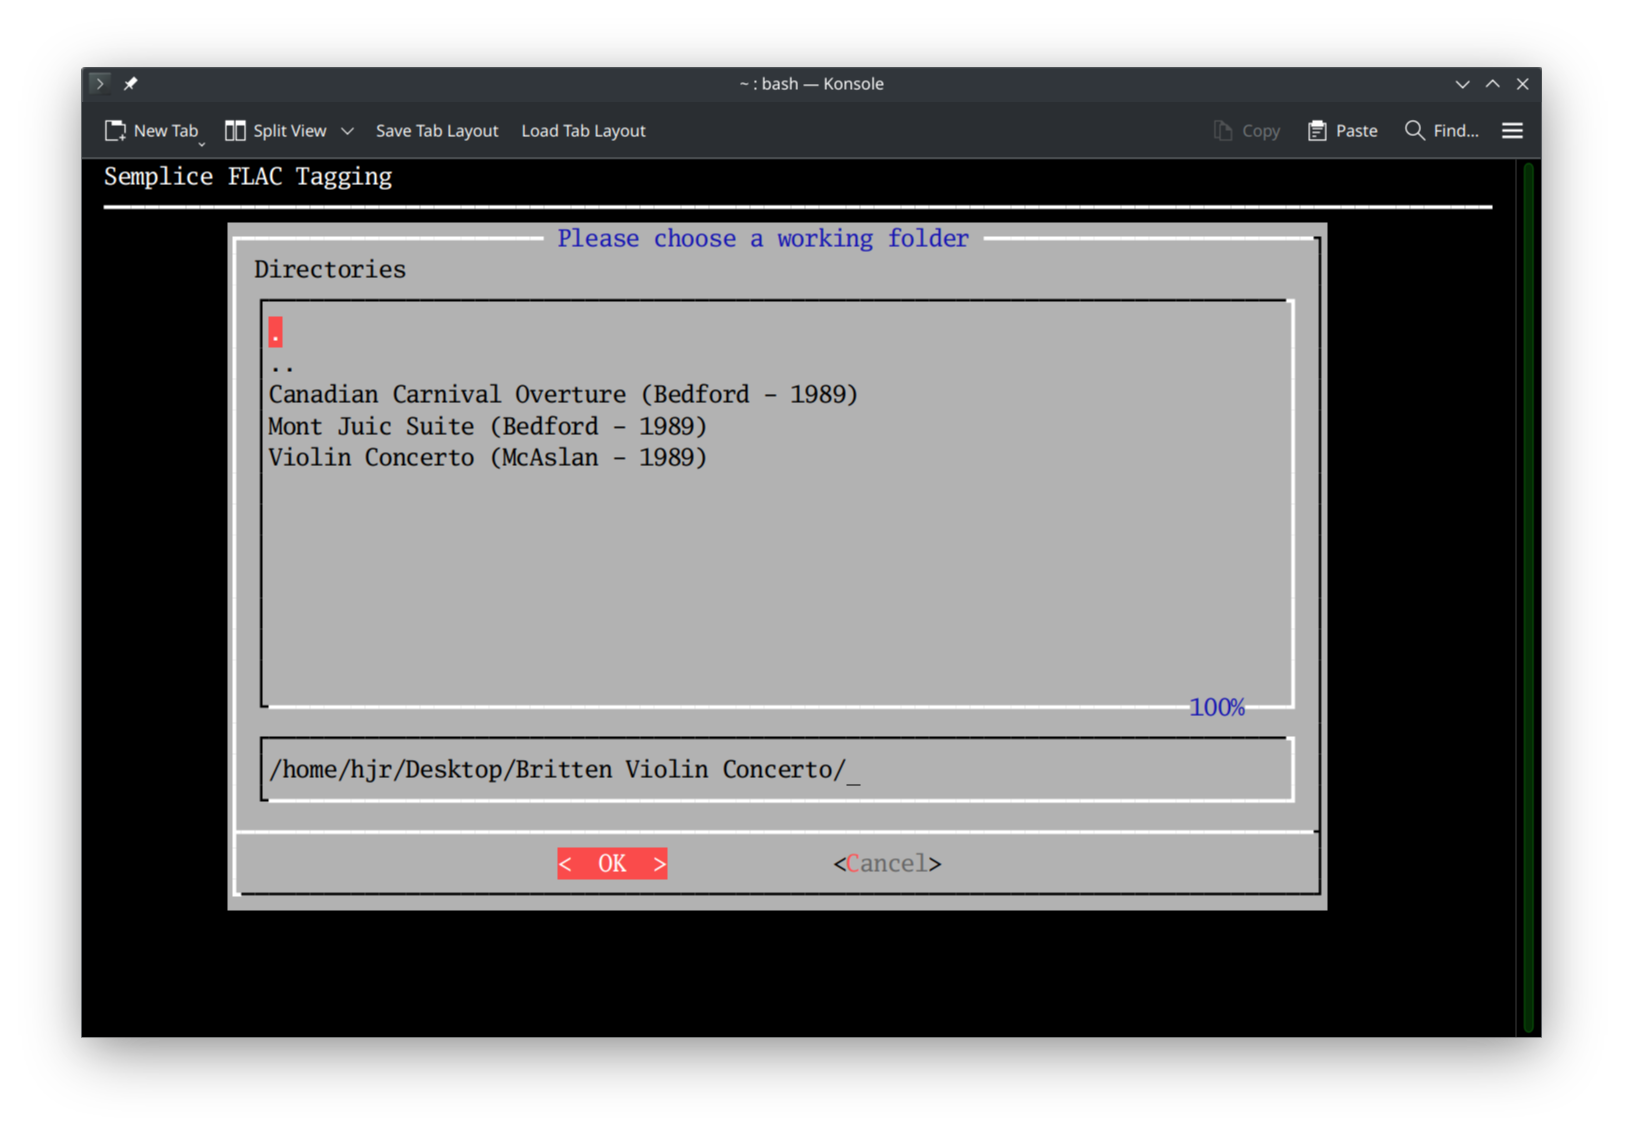
This is a fairly straightforward folder navigation dialog. You can do things manually by literally typing the path you're interested in in the horizontal panel, just above the OK and Cancel buttons. If you do that, the folders shown in the upper panel will automatically change to display the contents of the path as you type it. You can also use the upper panel directly: scroll up and down until you're sitting on a folder name and then hit the [Space Bar]. That makes Semplice 'go into' that folder, and the path displayed in the horizontal panel will update to record the fact. In this way, you can 'drill down' into your folder structure. In the screenshot above, you can see I've reached the folder inside which I just created the three recording-specific sub-folders mentioned before. That is not sufficient! Semplice needs you to be inside a folder containing FLACs, so in my case, it's not enough to be in the 'Britten Violin Concerto' parent folder: I need to move into a specific sub-folder into which I moved my FLACs earlier:
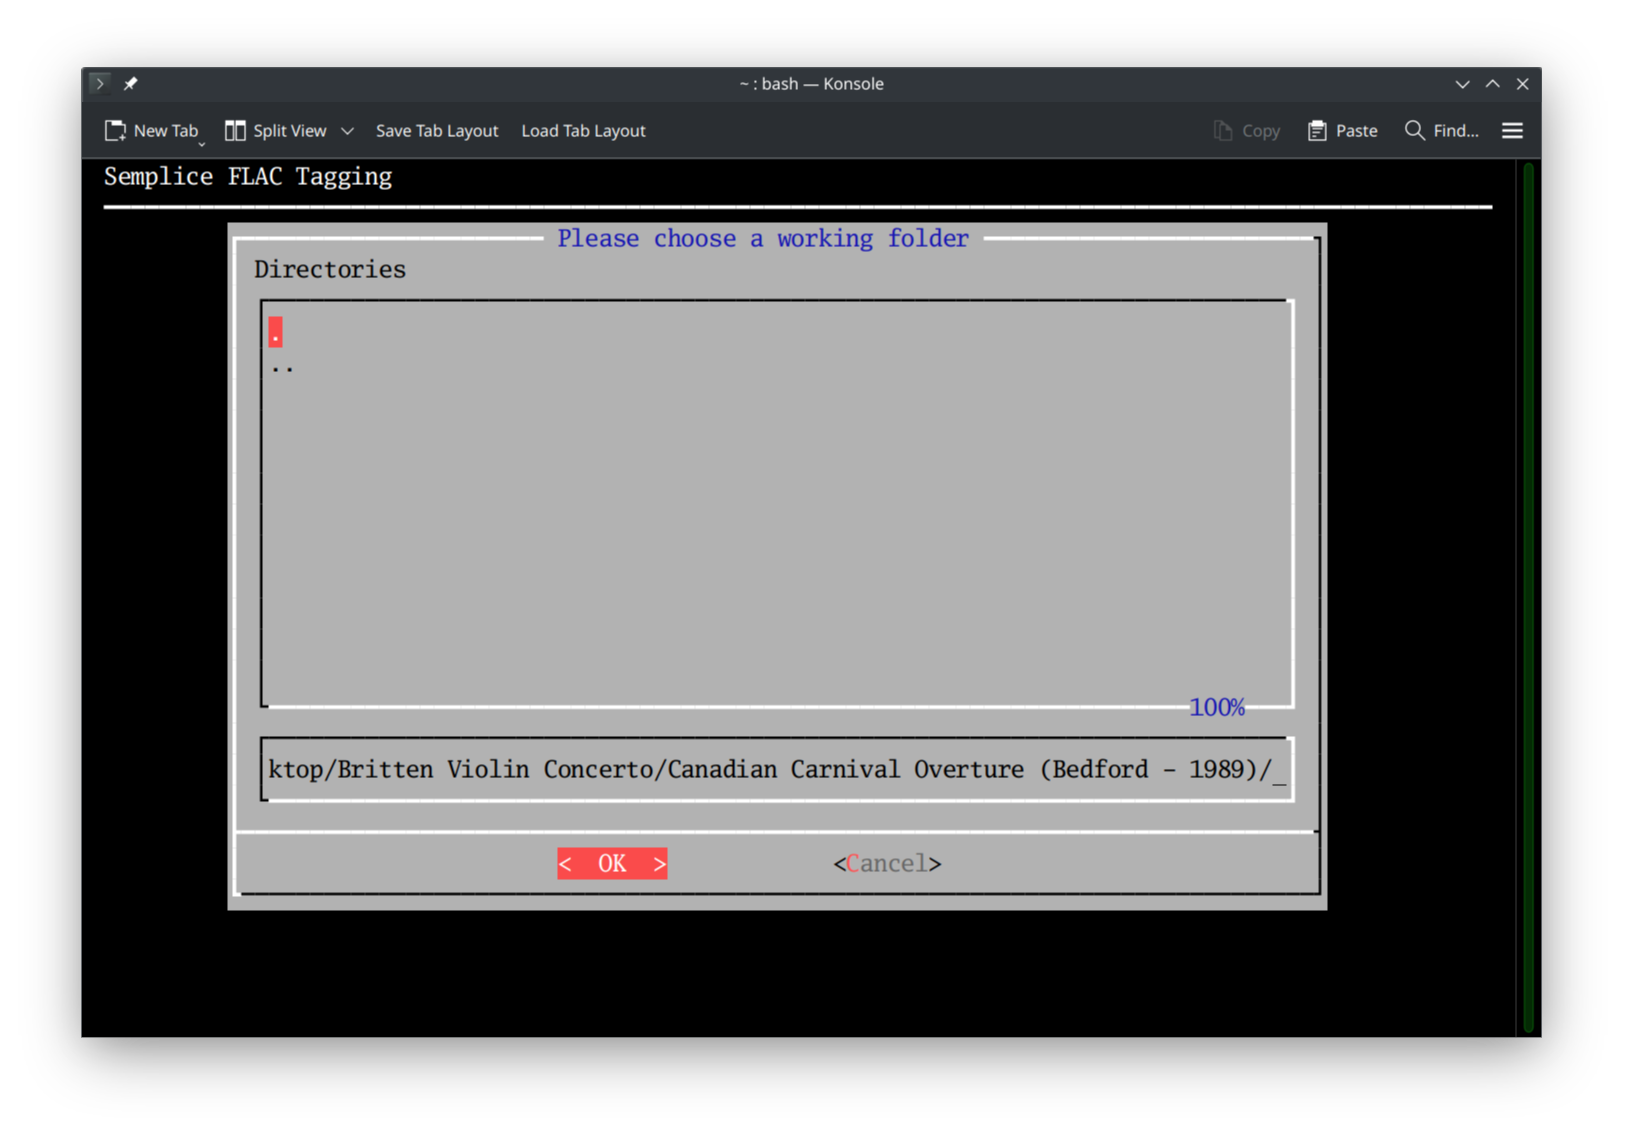 Here, I've entered into the Candian Carnival sub-folder. You can't see the FLACs themselves in the main panel, but the fact you can only see '.' and '..' entries there tells you that you've reached the end of the line: there are no further sub-folders to descend into. I can therefore arrow or tab around the screen until the [OK] button is highlighted in red and then press [Enter]. This immediately returns you to the main program menu:
 If you read the top of this screen carefully, focussing on the yellow text, you'll notice that the working folder now displays the 'Canadian Carnival Overture...' name. That's visual proof that everything you now do will be affecting the FLAC or FLACs found in that particular physical folder on your hard disk.
Now, because this is the first time I'm tagging anything from this CD, it would make sense to see if Prestoclassical supplied this FLAC with any usable metadata (though chances are low!) -and therefore, Option 1 would be the most appropriate tagging option to take ...which I'll do now.
2.2 Starting to tag...
Now you are ready to begin the tagging process. Select the Tagging menu, Option 1 and you'll immediately be presented with this:
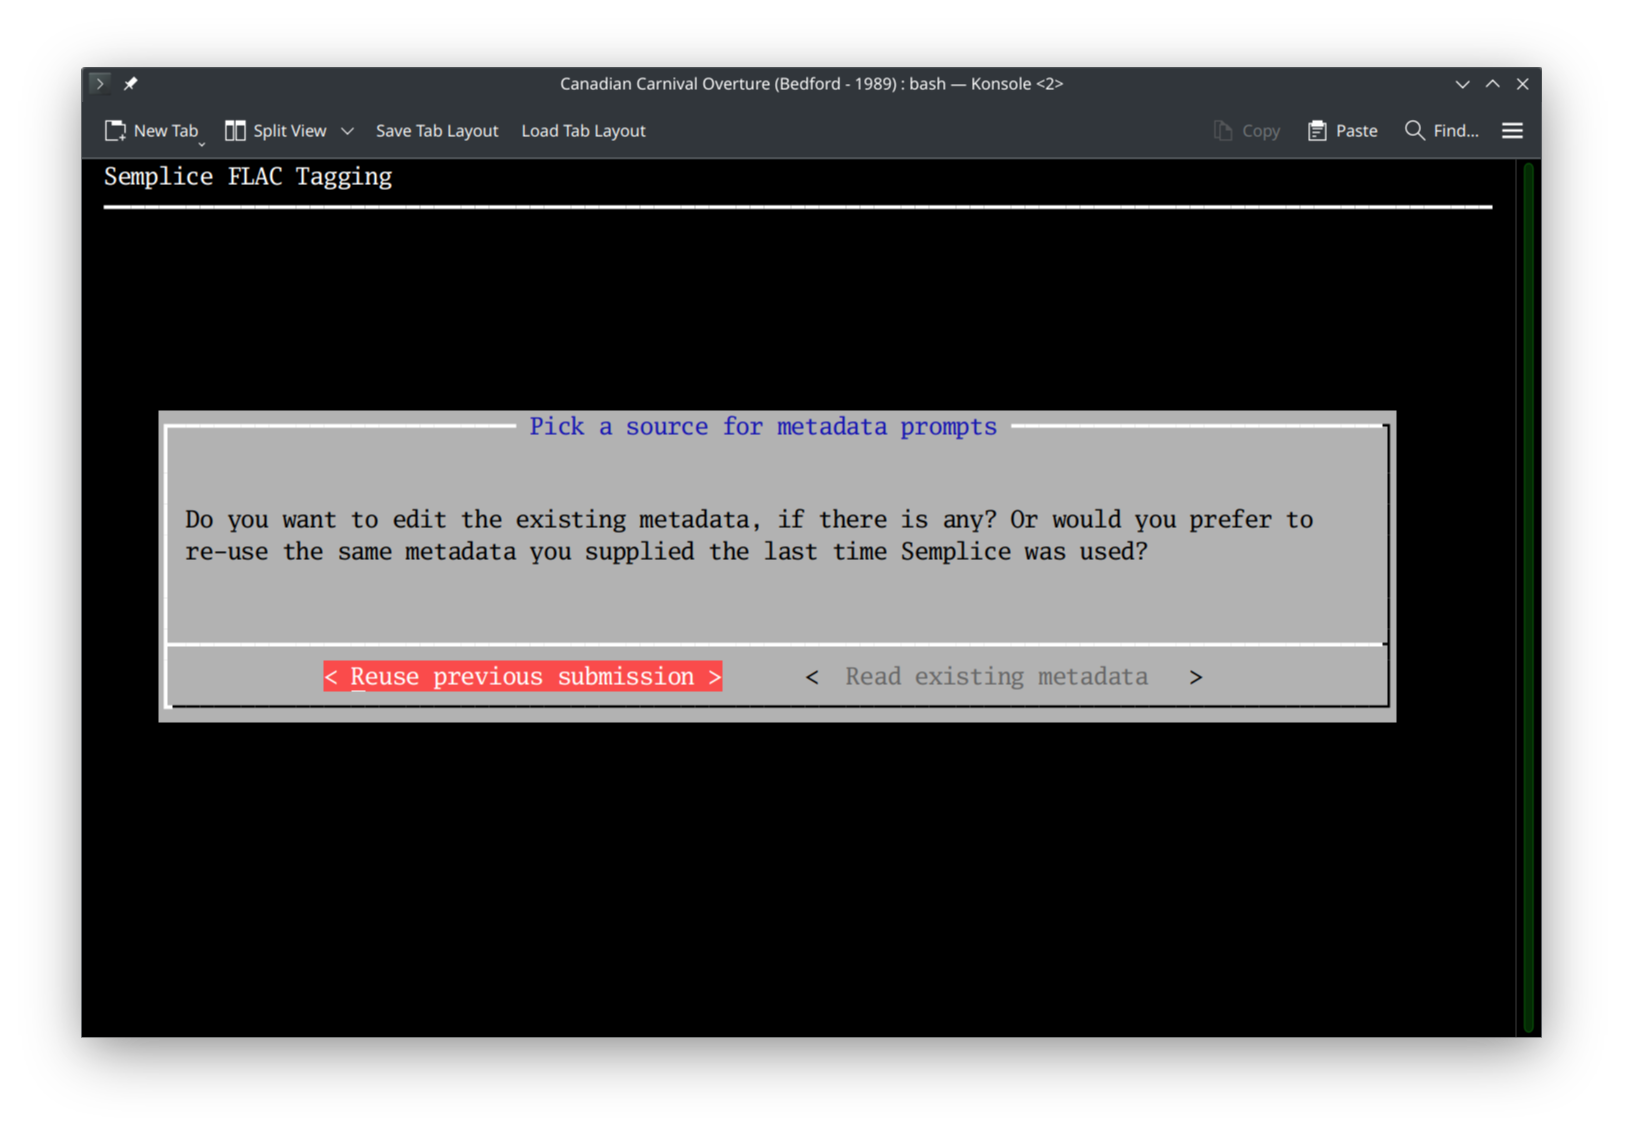 This comes right back to the problem posed in Section 1's introduction above: where do I want to source the 'metadata prompts' from. In this case, since it's the first tagging done with Semplice, there is no 'previous submission' I can meaningfully use, so my choice sort-of has to be the 'Read existing metadata' one. So I can use the Tab key to switch back and forth between those two options (or just use the left- and right-arrow keys to achieve the same thing). Once 'Read existing metadata' is highlighted, I press [Enter] to accept the choice. Immediately, I see this:
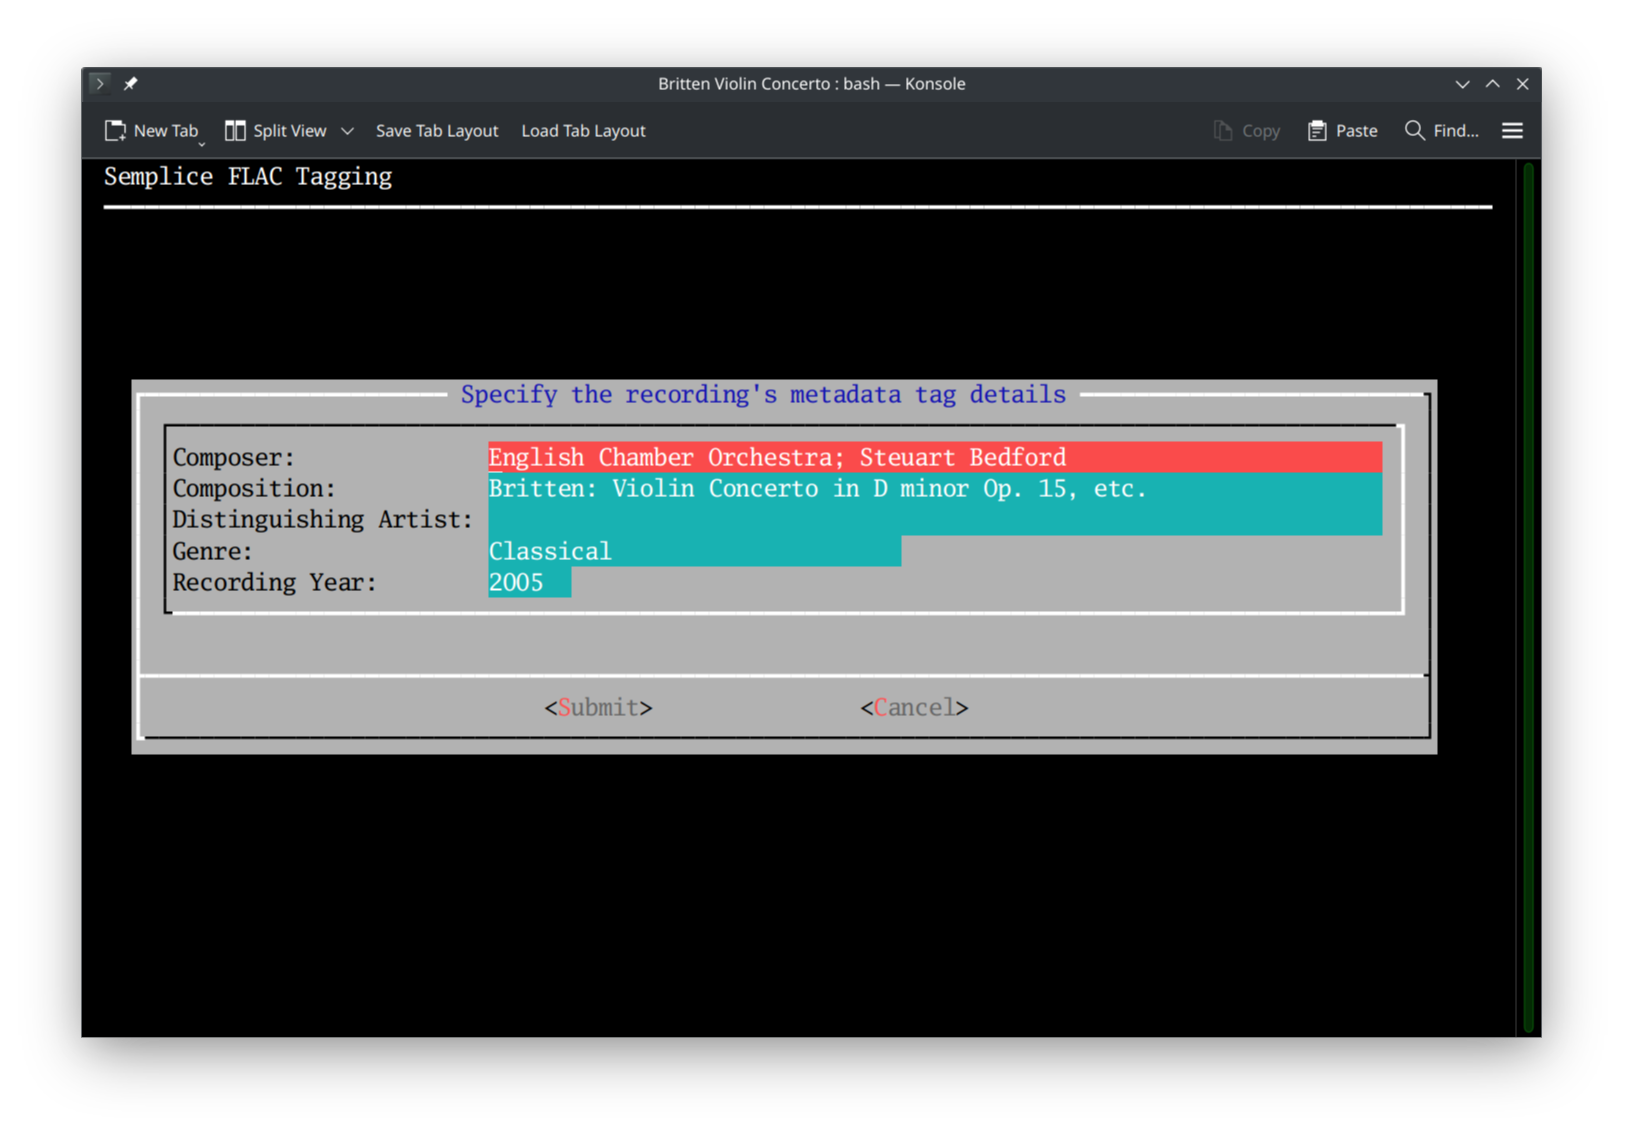
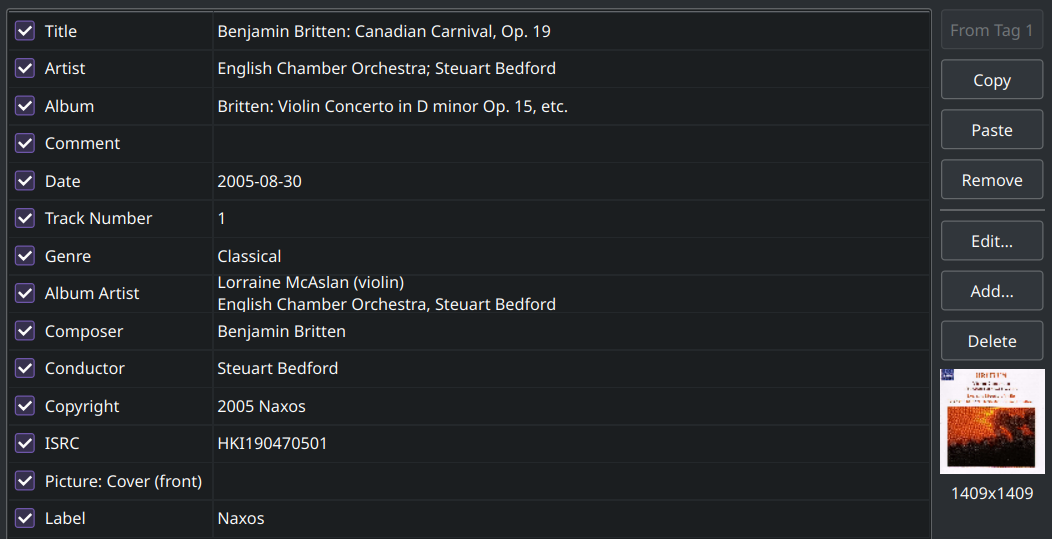
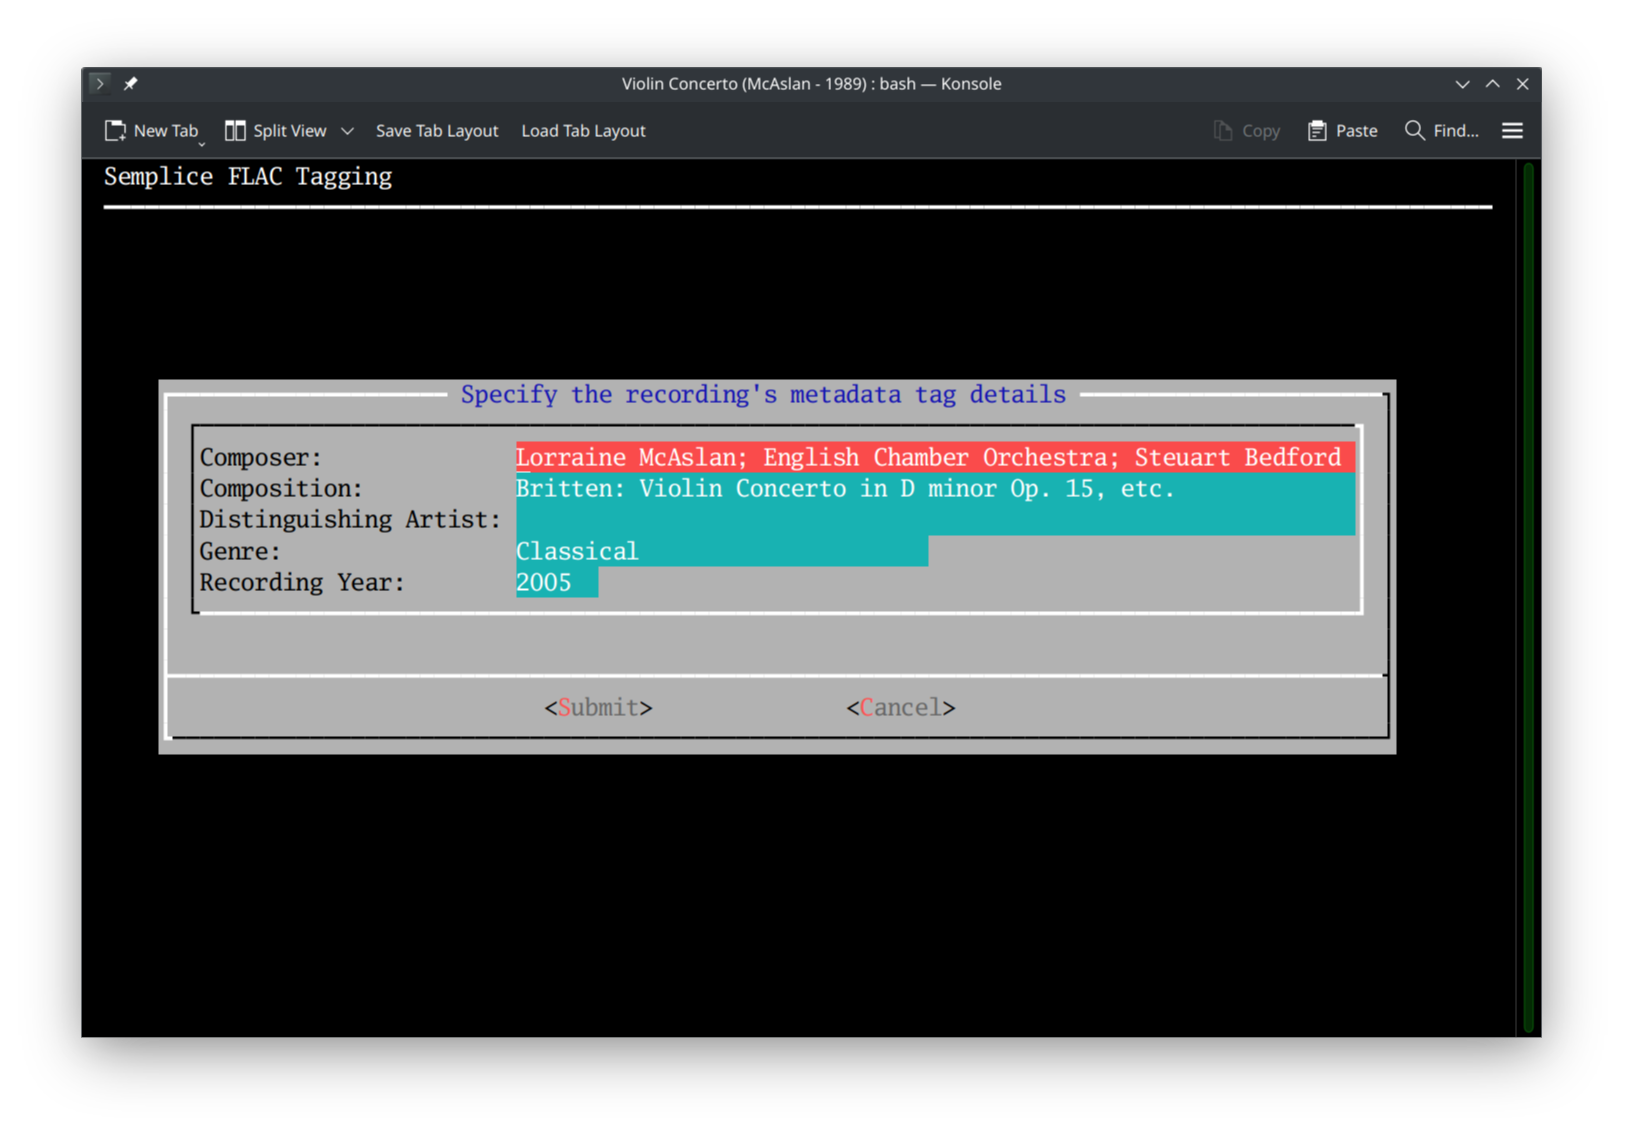
Semplice has read the first FLAC in this folder and extracted its existing metadata as suggested data entries for the five recording-wide tags shown on this form. This is metadata that was placed in the file by Prestoclassical -or perhaps by their suppliers, Naxos. Who knows?! In either case, it's not very good metadata: the recording year is completely wrong; no piece of classical music should have a genre of 'Classical' and there seems to be a fatal mixup in someone's mind between the guy who wrote the music and the guys & gals who are merely performing it: Steuart Bedford and the English Chamber Orchestra, great as they may be or were, are not the Composer! Finally, any recording you've got that has "etc" in its title is being impossibly vague!
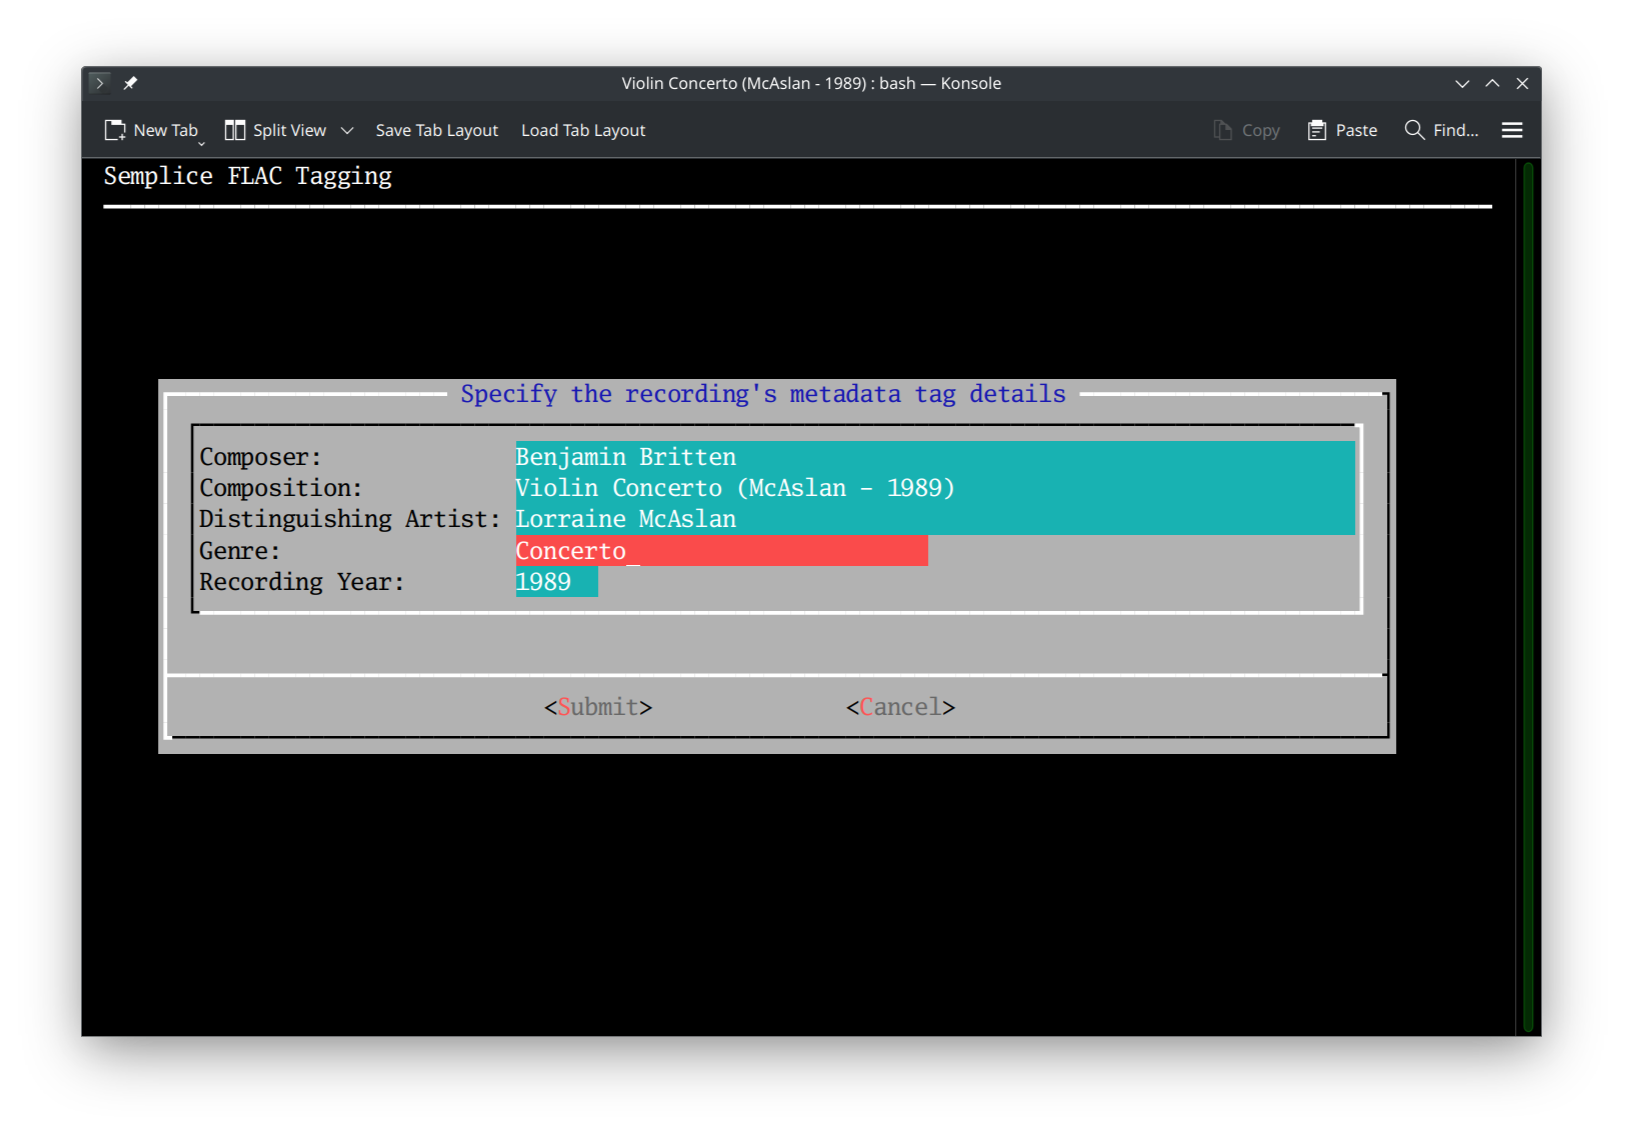
So: it's read the existing metadata ...and you can quickly see that it's pretty hopeless stuff. All of it needs correcting... so you need to make friends with the Ctrl+U key combination: that wipes out the data in whatever data entry field you're sitting in when you press it. Your job is therefore to use the up- and down-arrow keys to move to a data entry field, press Ctrl+U to clear it and then type in something more sensible instead. If any of the existing metadata looks re-usable with just a bit of tweaking, then you can move to a data entry field and use the left- and right-arrow keys to move through the existing entry, before using the Delete and Backspace keys to remove any existing letters or typing new letters into place. Do that and, with a careful bit of typing, you end up with something looking like this instead:
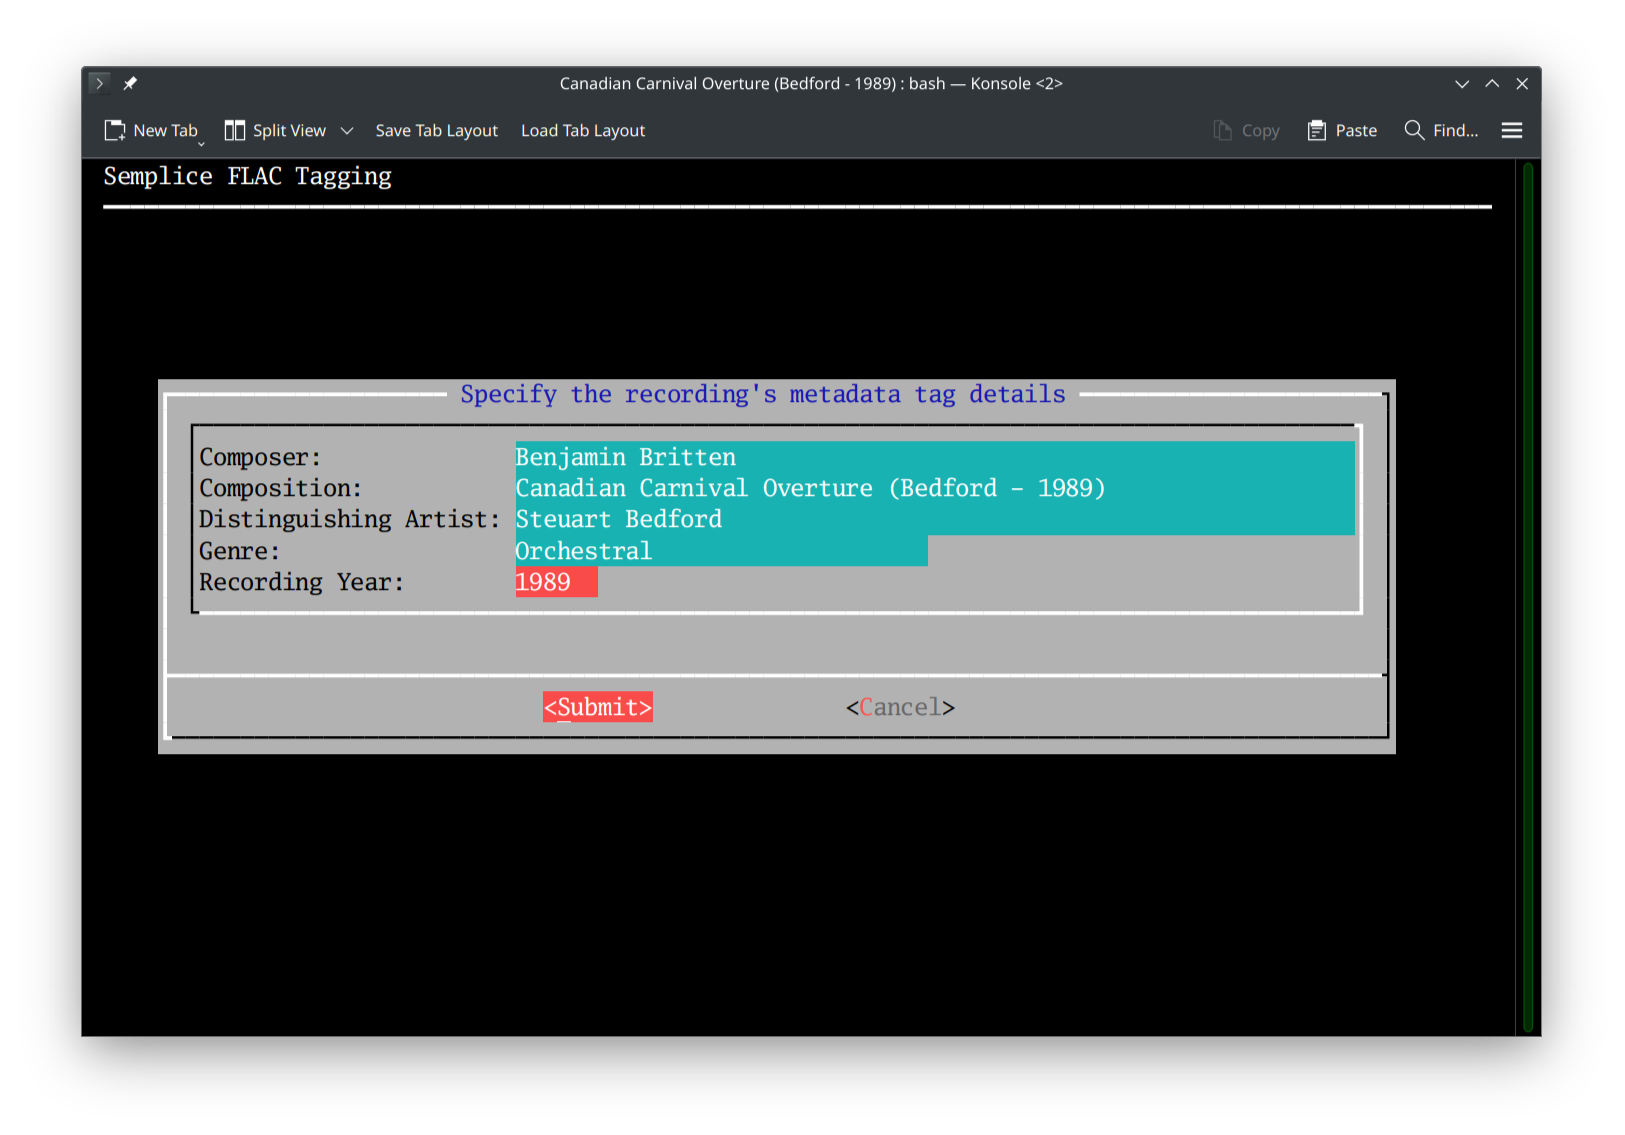 When the data is ready to be submitted, press the [Tab] key to move to the Submit button. With the [Submit] key highlighted, press [Enter] to move on. If you instead select [Cancel] and press [Enter], you'll be returned to the Semplice main menu without anything having been changed in your FLACs. Incidentally, too, the tagging you see in the above screenshot conforms precisely to the assorted strictures of my Axioms of Classical Music Tagging article -and is accordingly recommended to you by way of 'best practice'!
2.3 Performing Artists Details
When I press [Submit] on the completed 'recording metadata' form, I see this:
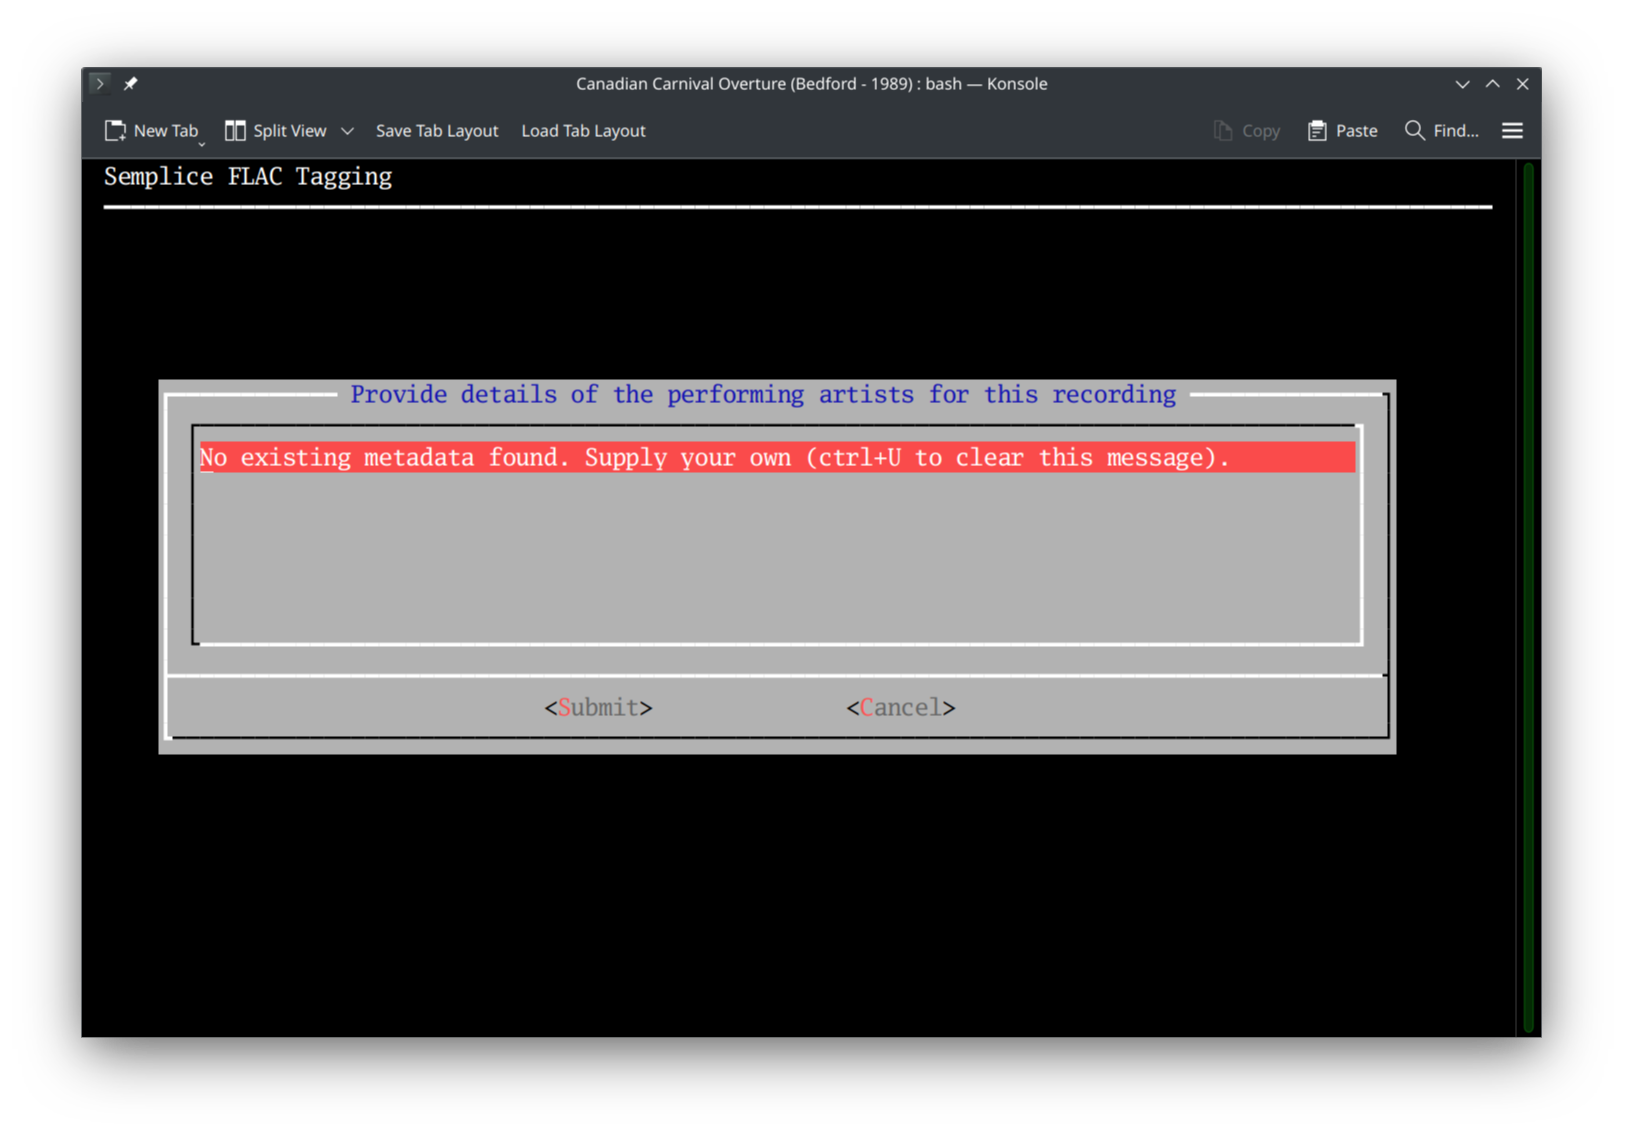
Sadly, most commercially-supplied FLAC files are going to have this problem: the relevant metadata is often supplied as part of an ALBUM ARTIST or ARTIST tag, which is not where Semplice expects the performing artist data to reside. Press Ctrl+U to clear the 'no existing metadata' warning, therefore, and get typing:
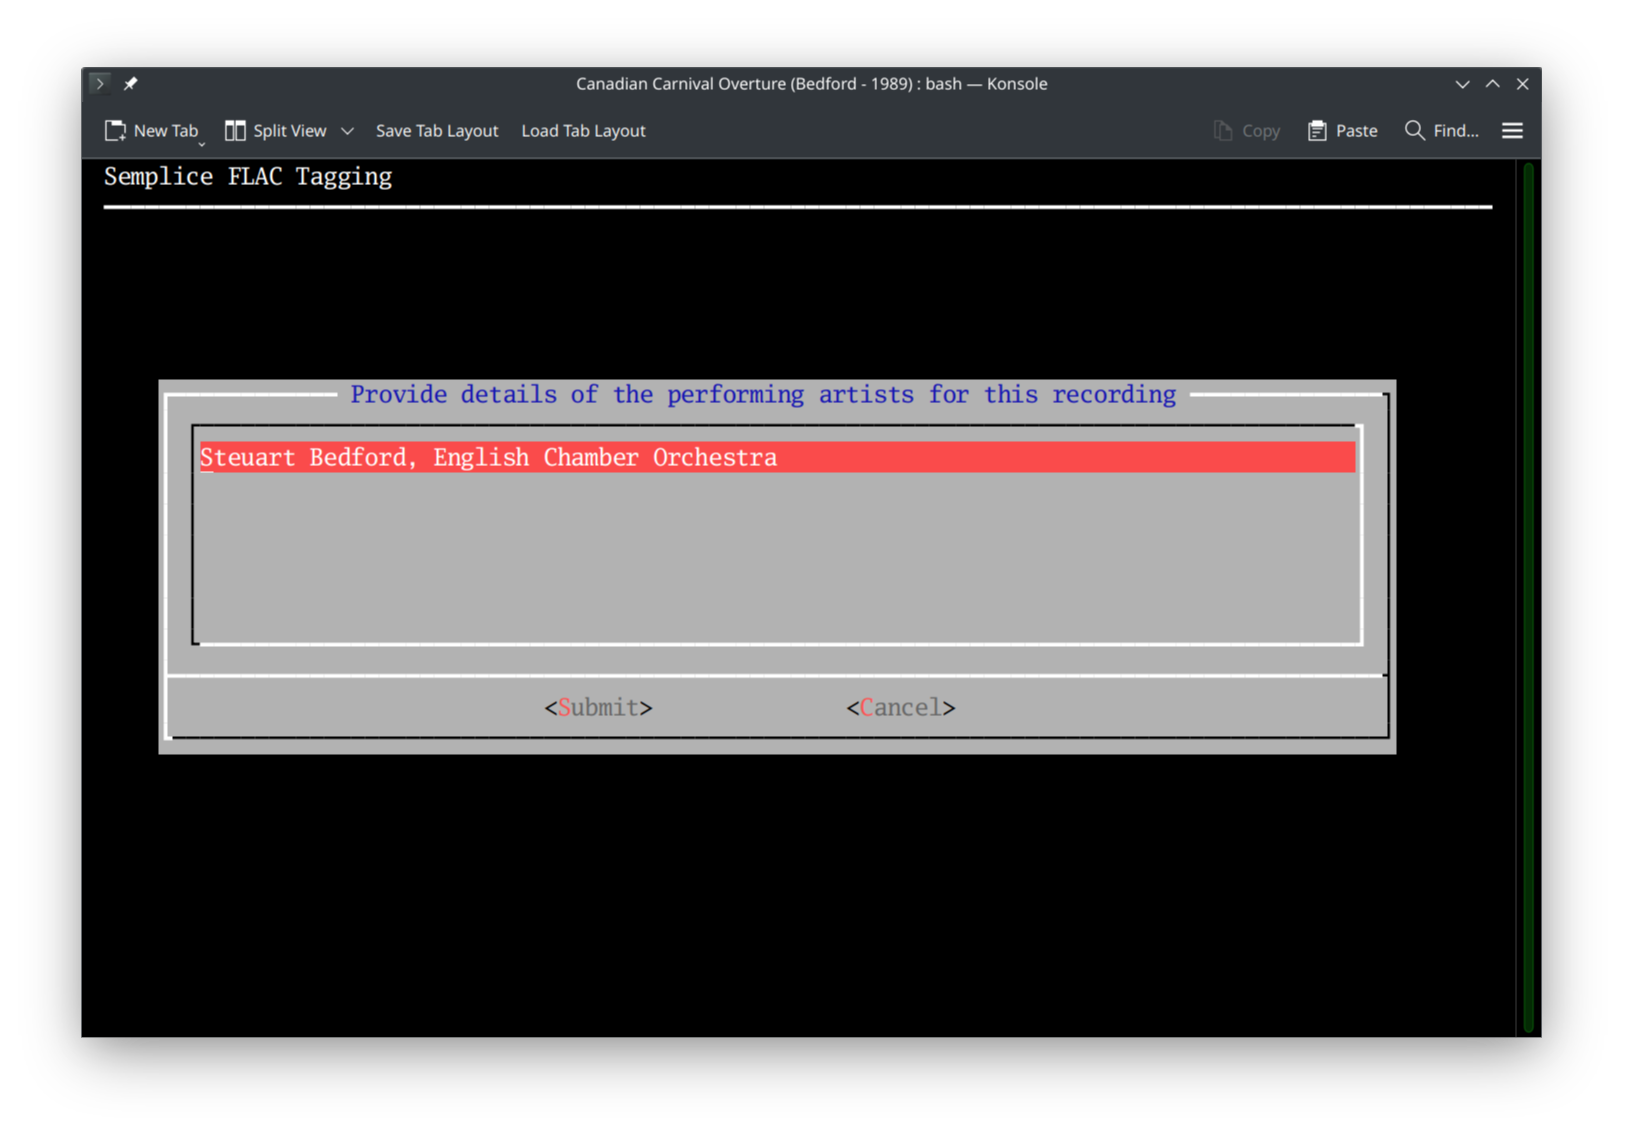 In the main panel of this display, you can type for as long as you like (up to a maximum of 4GB of text!). It will scroll off to the right if the lines are long enough, but you can also press [Enter] to make hard line breaks. As I've recommended in my Axiom article, I would suggest you always supply composer, orchestra, choir and soloists in that order, in a comma-separated list, missing out any component elements that don't apply for a specific recording -exactly as I've done above, in fact. The usual text editing rules apply: the delete and backspace keys work as you'd expect; you can also left- and right-arrow through text to get to a specific bit that you want to edit; you can also use the up- and down-arrow keys to move to different lines of text, if you've added line breaks into the text at any point.
When you're ready, you press [Tab] to move down to the Submit and Cancel buttons. If you press [Cancel] at this point, you'll be returned to the main menu, and nothing at all will be written to your FLACs: they'll remain exactly as they were before you started the auto-tagging wizard. If you press [Submit], however, then your album-wide metadata is written to all your FLACs in turn: if there are lots of FLACs or your PC is a bit feeble, you may see a message to this effect displayed briefly at the bottom of the screen. With few FLACs and/or a decently-powerful CPU, that message might disappear before you get a good chance to read it, though! Anyway: the main thing to grasp is that this is a bit of a point of no return: if you press [Submit] at this point, your FLACs will be modified. You can press [Cancel] later on during the wizard, but those changes will remain.
2.4 Custom Tags
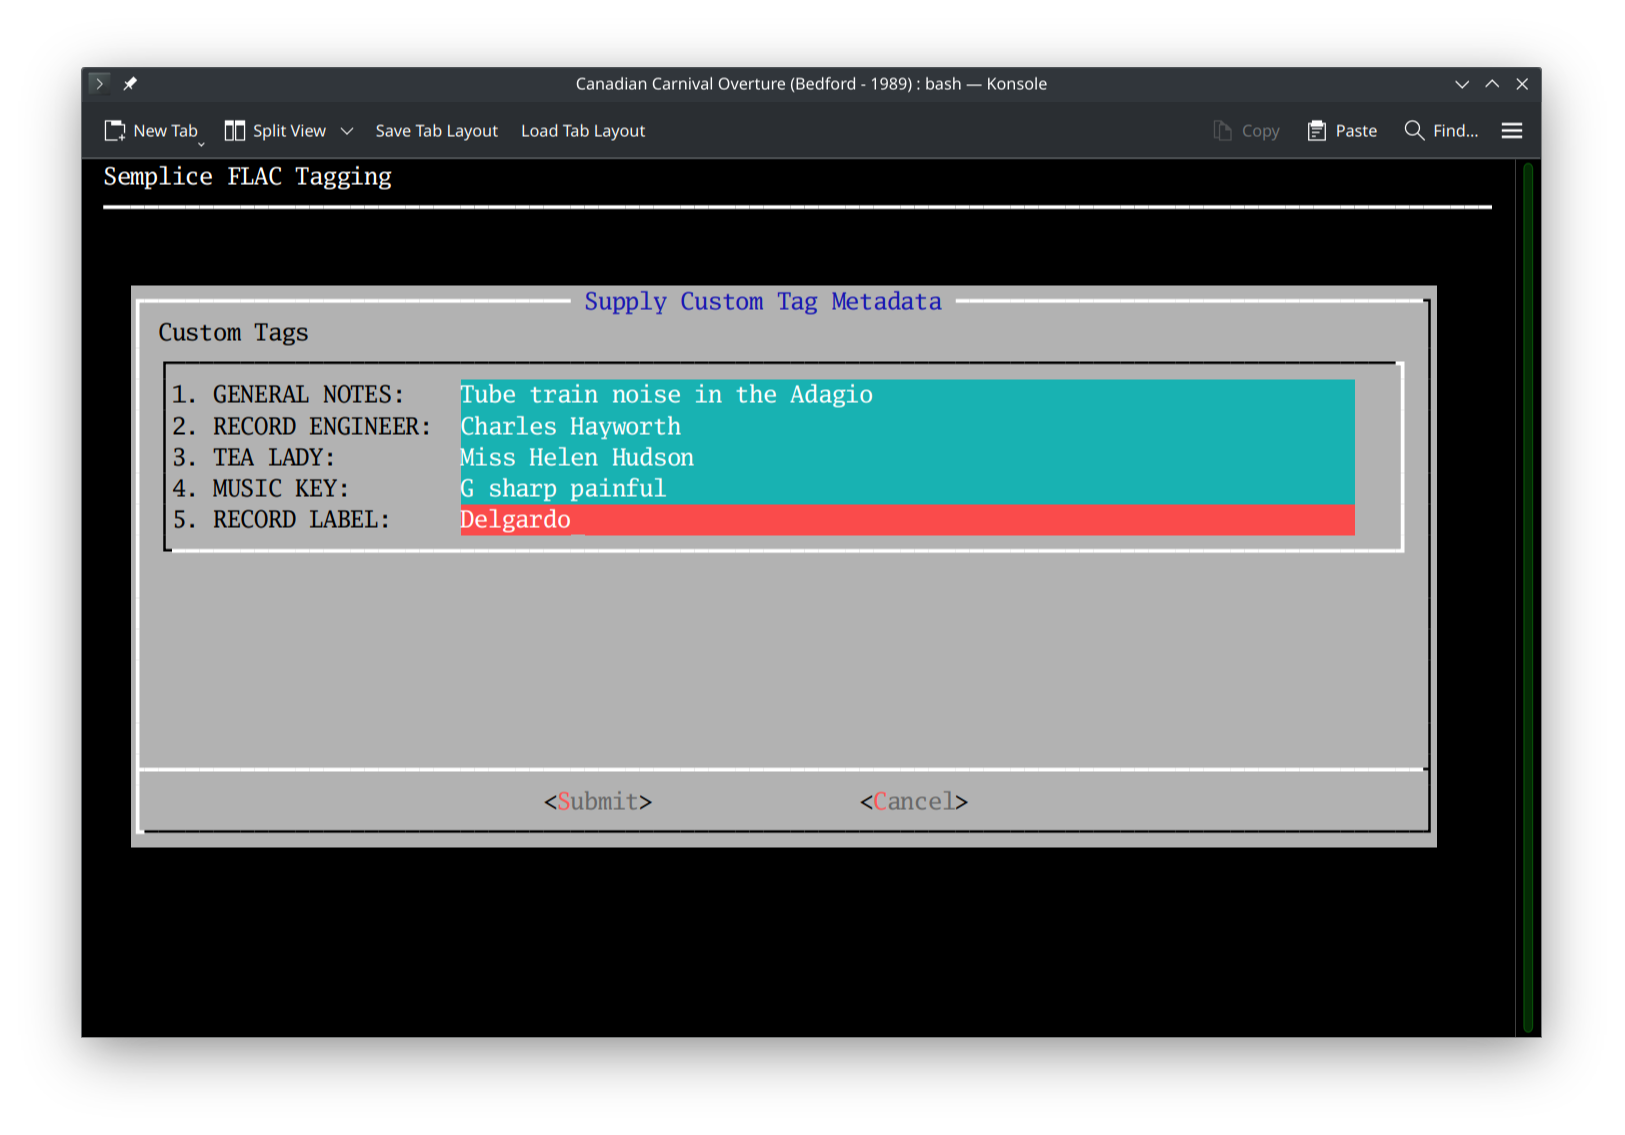
Once the recording-wide tags have been submitted, you might see this sort of screen:
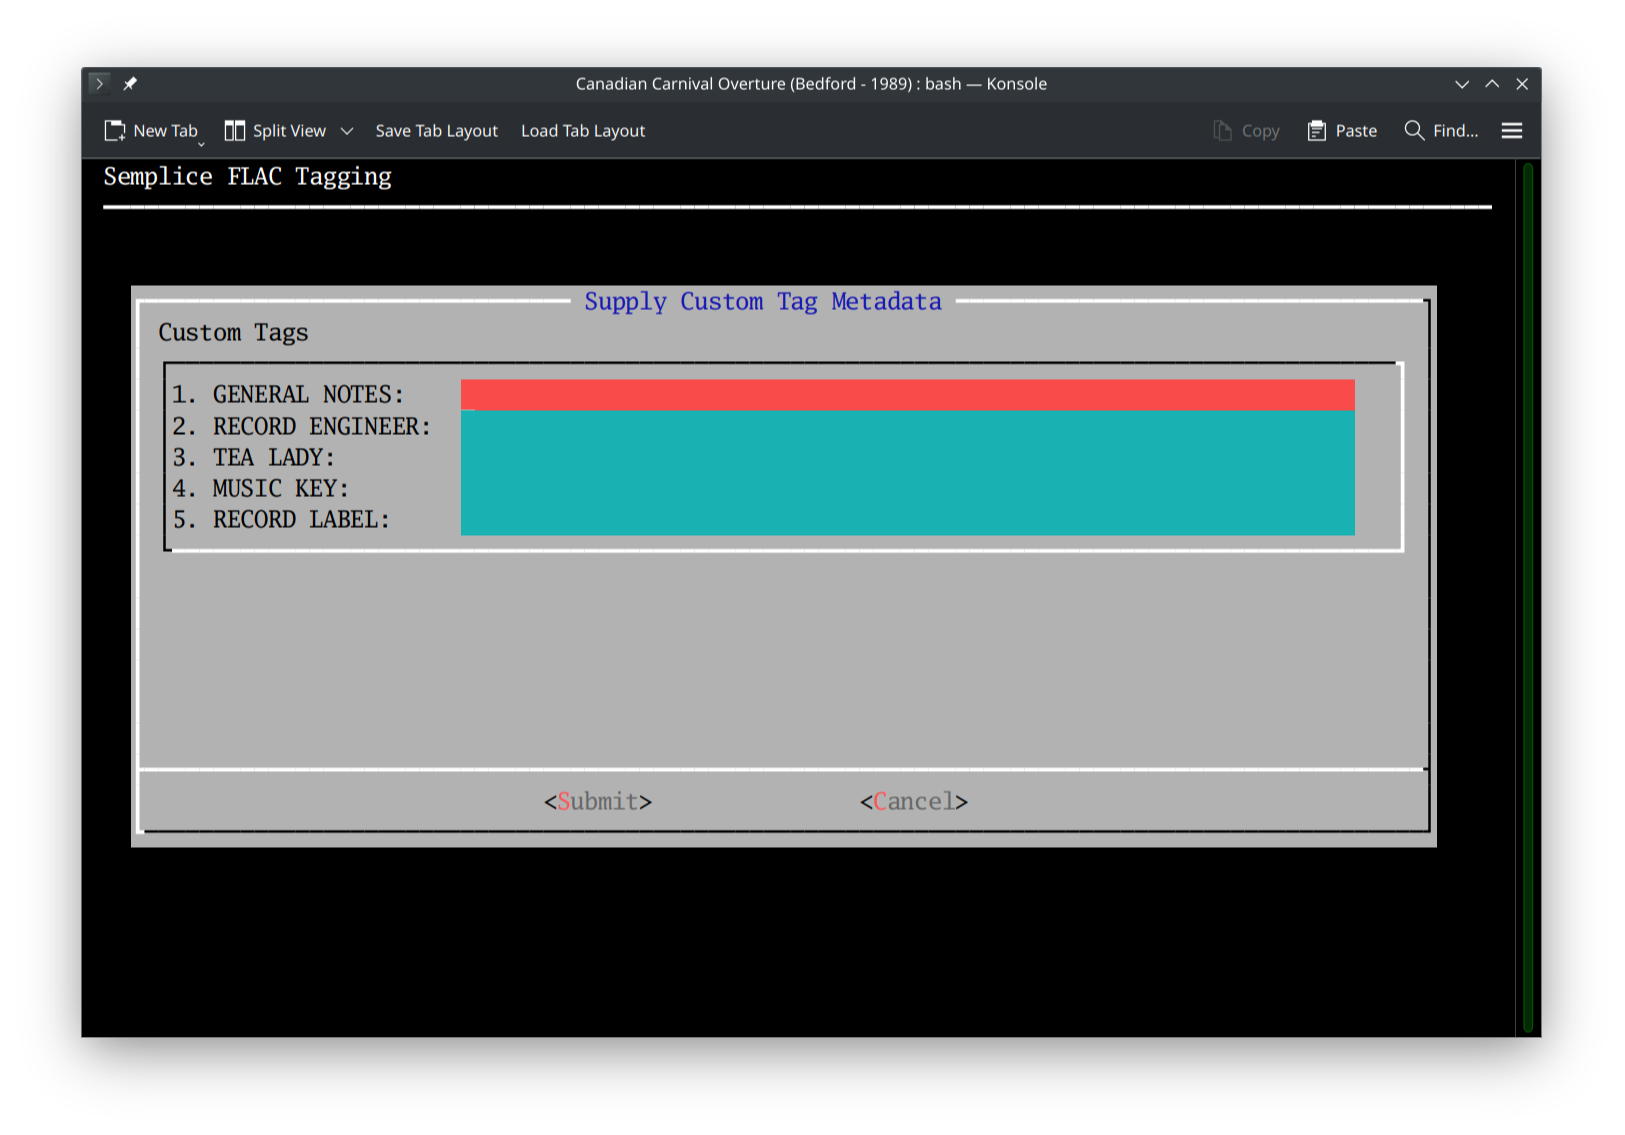
This is the form used to supply Custom Tags to a bunch of FLAC files. These were discussed in my overview of Semplice's tagging model, the general tenor of which was: please don't use Custom Tags!! If you have them switched off in the Semplice configuration file (which is the default), then you will simply not see this screen at all. However, if you've chosen to switch on their use in the Semplice configuration file and have then also set up at least one custom tag name there, then this screen will display the up-to-nine custom tags you've defined. You can fill in the data fields as appropriate and press [Enter] once the [Submit] button is highlighted to have that metadata added to your FLAC files' tags:
Custom tags, by the way, are never re-used when tagging subsequent recordings. You always have to type them in from scratch, which is another reason why their use is strongly not recommended.
2.5 Per-Track Tags
At this point, a form showing entry fields for each FLAC file found in the current working folder is displayed:
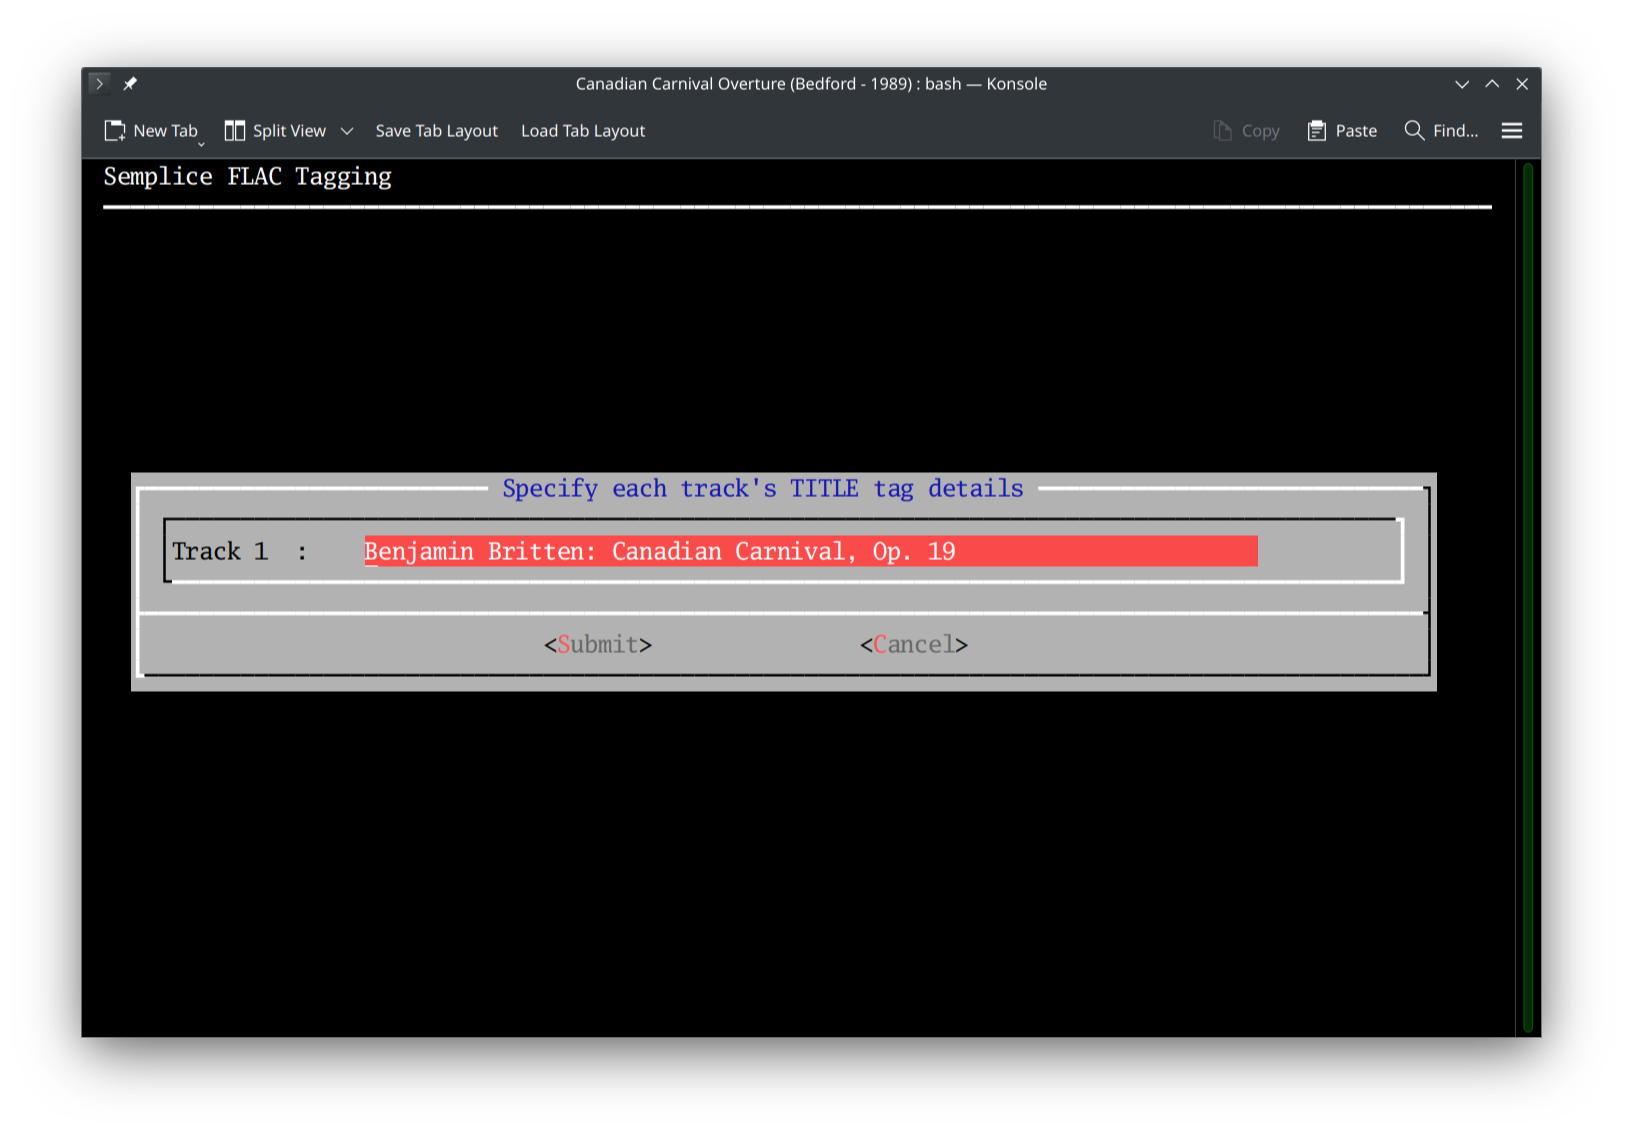
Once again, Semplice tries to help by fetching the metadata already present in the FLACs for each track and displaying it, in case it happens -miraculously- to be usable! In this case, there's only a single FLAC making up this particular work and its existing per-track metadata is mostly OK, though we don't include the composer's name in per-track tags! A bit of judicious right-arrowing and use of the backspace and delete keys soon knocks this into suitable shape, however:

Once again, I would now tab round to the [Submit] button and hit [Enter] when I got there: I am at that point immediately returned to the main menu and it may be difficult to know whether anything has happened! But let's examine what has happened at length, next.
2.6 Auto-Tagging Consequences
A quick visit to your physical folder in the file manager of your choice will soon reveals things certainly have changed since before you launched the auto-tagging wizard:

The first thing to notice that the PDF booklet files are still there, completely untouched. Semplice never messes with any file which isn't a FLAC or a piece of album artwork, so PDFs will survive the auto-tagging process completely unscathed, always.
Second, however, you'll spot that the .jpeg file which was there has been deleted. That's happened because the configuration file contains a setting called Delete album art after embedding: it's on by default, and I've not changed that. Anything that gets embedded in my FLACs as album art is thus automatically deleted from the file system as a standalone file, without warning or confirmation. While we're on the subject of album art, here's what was originally embedded in the FLAC by Naxos (or Prestoclassical!):
Now here's the equivalent, post-auto-tagging:
Spot the difference? The artwork is now 1400x1400 pixels in size, not 1409x1409: when the auto-tagging wizard embeds artwork, it resizes it according to the following rules:
- Only files with .jpg, .jpeg or .png extensions are considered valid art files: BMPs or ICOs or WMFs need not apply!
- If there are multiple candidate art files present in the working folder, there is an order of precedence: JPGs beat JPEGs which beat PNGs.
- If there are multiple candidate art files with the same extension in the working folder, the first when files are listed in alphabetical order is assumed to be the intended candidate
- Candidate files are resized to be square, always, by measuring their largest dimension and then using that to resize based on the following rules:
- Candidates that are larger than 1400 pixels in their largest dimension are resized to be 1400x1400
- Candidates that are larger than 900 pixels but smaller than 1400 pixels in their largest dimension are resized to be 900x900
- Candidates that are larger than 500 pixels but smaller than 900 pixels in their largest dimension are resized to be 500x500
- Candidates that are smaller than 500 pixels in their largest dimension are resized to be that dimension square (e.g., a 320x280 image will be resized to be 320x320)
- All resizing is done without regard to aspect ratio: the smallest dimension is just forced to be the appropriate size, regardless of what skew that introduces to the final image. For this reason, it's best to always start with candidate files that are square or nearly so.
- After embedding, the embedded artwork is deleted from disk if Delete album art after embedding is set to yes in the configuration file. The default value for this parameter is, indeed, yes -so if this is not behaviour you want, be sure to adjust your configuration file to set the parameter to be explicitly 'no'.
- Artwork files which are present in the working folder but which are not considered candidates for embedding are never deleted. If you had a JPG and a PNG, for example, then the JPG would take precedence for embedding and would thus be auto-deleted after embedding (by default), but the PNG would not be deleted and would thus still exist as a file in the working folder.
- If there are no candidate artwork files in the working folder, all FLACs are simply left without embedded artwork: you are not prompted to fetch or point to art files which might be stored elsewhere on your hard disk. You'll need to use Tagging menu, Option 6 to apply non-local artwork to your FLACs as a separate exercise in that case.
Third, a close comparison between my file manager screenshot before and after auto-tagging reveals some interesting changes. Here's the before-shot once more:

And here's the equivalent after-shot:
You'll spot that the file names have been changed! First, the bulk of the filename is now in 'tracknumber - tracktitle tag' format. That is, since I said this track/file was 'Canadian Carnival, Op. 19', that has become this FLAC's physical file name, preceded by the '01 -' that indicates the track has acquired a track number of 1. Secondly, though, you'll notice that the file name has acquired some weird-looking numbers: instead of 01 - Benjamin Britten Canadian Carnival, Op. 19.flac we now have 01 - Canadian Carnival, Op. 19-16-44100.flac. The new '-16-44100' parts of the name are the 'bit-depth' and 'sample-rate' at which this audio track was recorded and/or ripped. The "16" means this is a 16-bit audio file (as you would expect on a standard audio CD), and the "44100" means that the music signal contained in this file has been sampled at 44,100 times per second -again, exactly the specification used by standard audio CDs. FLACs ripped from SACDs or purchased as 'high resolution FLACs' might end up with -24-88100 parts in the file names: 24-bit, sampled at 88.1KHz. The idea is that merely by looking at the file name here, I can tell whether this FLAC was sourced from high-resolution media or 'ordinary' CD. Adding these bits of technical information to your FLACs filenames is optional: it depends on the answer to the 'Force filenames to display bitdepth/sample rate' question in the Semplice configuration file:
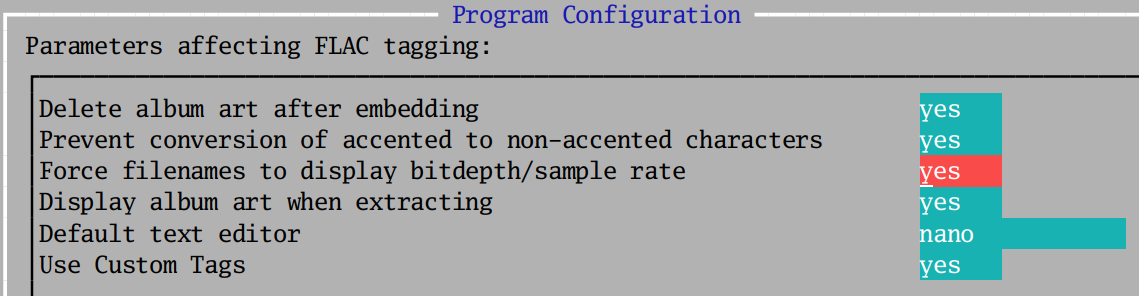
As you can see, I've set mine to be 'yes', which is why Semplice automatically added them to my file names when adding the tag data to the files. The default value for this parameter is 'no', so it doesn't happen unless you explicitly request it to do so.
Some file name changes will be less obvious, but they can happen ...and they're not configurable. That is, Semplice always makes filenames NTFS-safe. This means removing characters in file names which would be considered 'illegal' on the Windows-specific NTFS file system and replacing them with underscores. NTFS will not, for example, allow a file name to contain ampersands, question marks or asterisks, so Elgar's movement called "***" from the Enigma Variations becomes a bit of a problem! By replacing dodgy characters with underscores, Semplice makes sure all files it works on can be stored on Windows-based file servers and shared over the network: Elgar's movement would end up being called something like 13 - ___.flac, for example! Bear in mind that 'illegal' characters are only removed from physical file names: the metadata tags stored inside the FLAC can be as illegal as you think they need to be!
Finally, the tags in this FLAC have, as part of the auto-tagging process, been cleaned. If I had inspected the tags for this file when first shipped by Prestoclassical (using Tagging menu, Option 6), I would have seen this
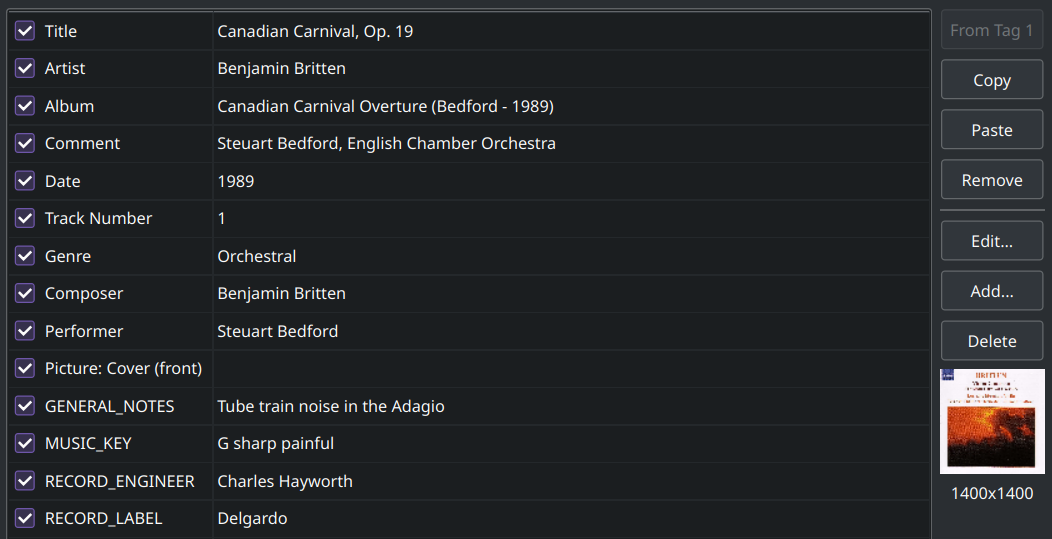
 You can see the poor original metadata: things like 'etc' in the ALBUM tag, the name 'Benjamin Britten' in the TITLE tag, and so on. Obviously, we've now improved that, as we'll see. More importantly in this context, however, is that there are a bunch of weird tags here that are not 'standard' as far as my Axioms of Classical Music Tagging are concerned: LABEL, COPYRIGHT and ISRC and not tags which will ever help you find music to play so are, as far as this website is concerned, 'non-canonical'. By way of contrast, if I check the metadata of the file post-auto-tagging, I now see this:
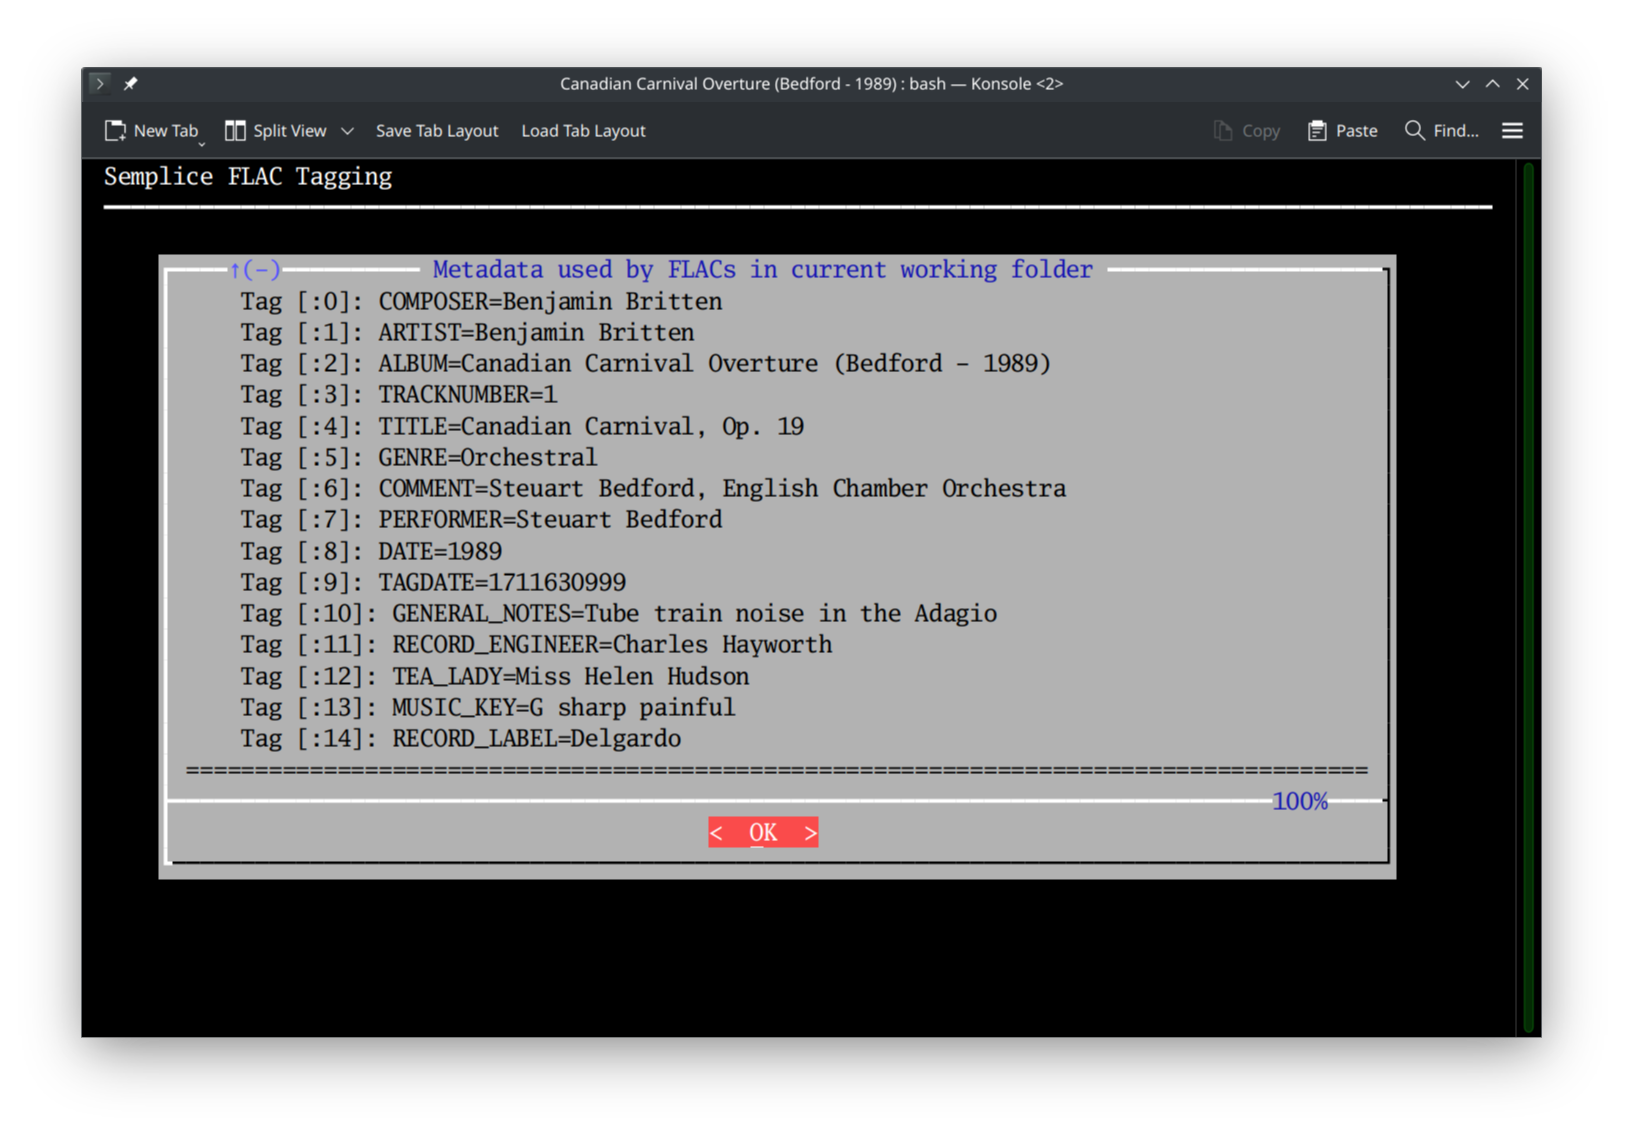
Now all the tags appear in a coherent, single list with the main tags (composer, composition, genre and so on) coming first. The strictly peculiar custom tags are there at the bottom of the list, because I insisted they be there for the purposes of this documentation ...but, apart from them, all those non-standard, non-canonical tags have been removed. That's what 'tag cleaning' means and results in ...and is something that the auto-tagging wizard very much does as it completes its work.
2.7 Final Steps
There are a couple of things the auto-tagging process does not change, however, and which are things which you might want to consider doing immediately post-tagging.
For starters, you may wish to use the Audio Processing menu Option 1 to boost the volume of the just-tagged FLAC (many FLACs are mastered at a recording level that works for the CD as a whole, but once individual recordings are separated out, that 'average level' is too low for some: the volume boost option can fix that problem). This process is explained in greater depth elsewhere in this manual.
Secondly, if your just-tagged recording consists of multiple, separate, per-track FLACs, you might consider 'merging' them into a single FLAC that contains within itself the entire audio signal that was previously stored in the individual track-FLACs. This is is the business of creating 'SuperFLACs' and is performed by taking the SuperFLAC menu, Option 1. Again, the philosophy and practice behind this step is explained in detail elsewhere in this manual.
Finally, you may want to quit Semplice entirely: you do that by typing 'Q' to get to the Quit menu and then take one of the two possible options when you get there. The Quit menu Option 1 re-cleans your tags (so is strictly unnecessary for me in my worked example, since that's just happened because of the auto-tagging process! It doesn't do any harm to re-clean, however) and then exits Semplice entirely; the Quit menu Option 2 simply quits Semplice, without doing any new tag cleaning on the way out. An even shorter way of achieving the same thing is to tap the 'X' key: that quits-without-cleaning, too. In other words, typing K,X is functionally the same as typing Q,2.
One other option presents itself, however: don't quit Semplice at all, but simply navigate to a new working folder (use the 'W' option to do so) and start tagging the next recording obtained from your source CD ...which is precisely what I'll do next.
3.0 Second and Subsequent Tag Sessions
Without leaving Semplice, therefore, I'm now going to type W and select the next of my recordings from this Naxos CD I'm working on:
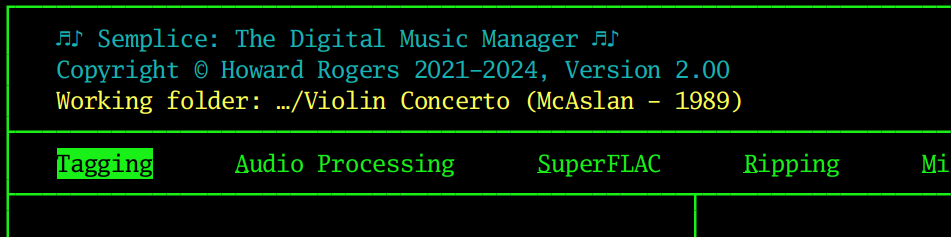
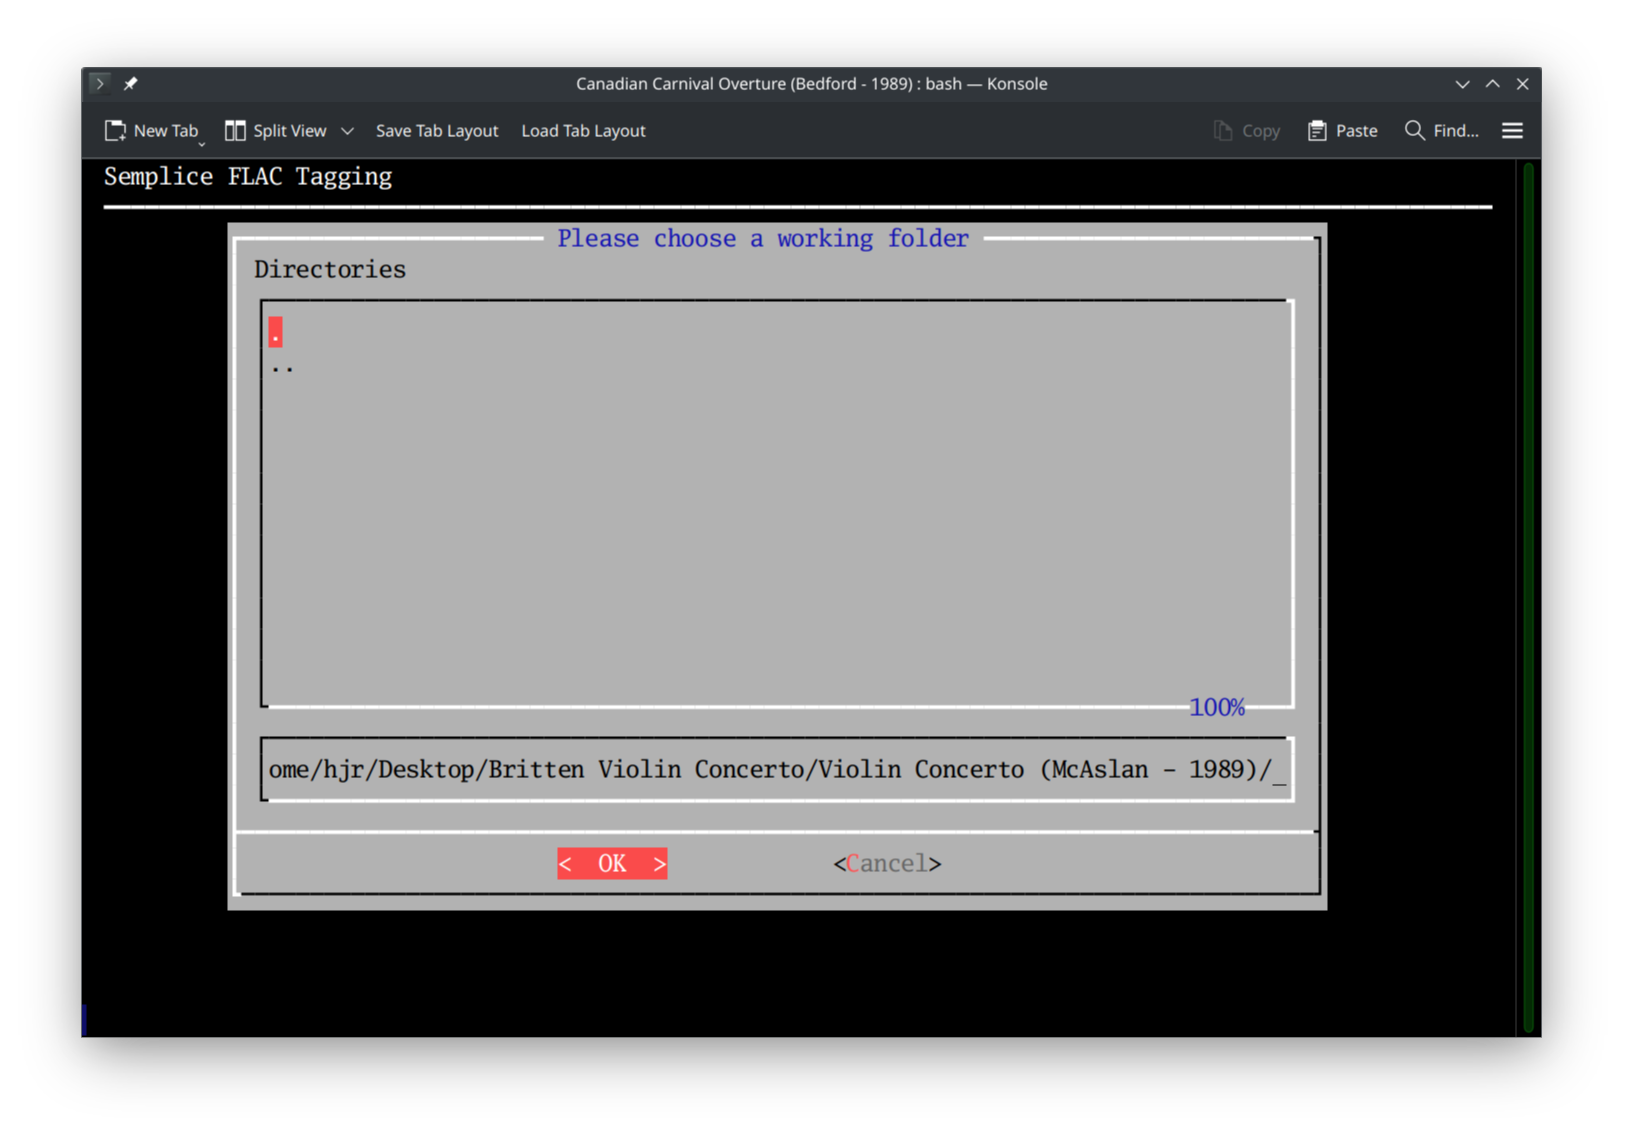 As you can see, this time I'm selecting to work with the Violin Concerto recording: I've navigated into the correct folder and can press [Enter] once the [OK] button is highlighted. The top of the Semplice program display indicates the change of working folder has taken effect:
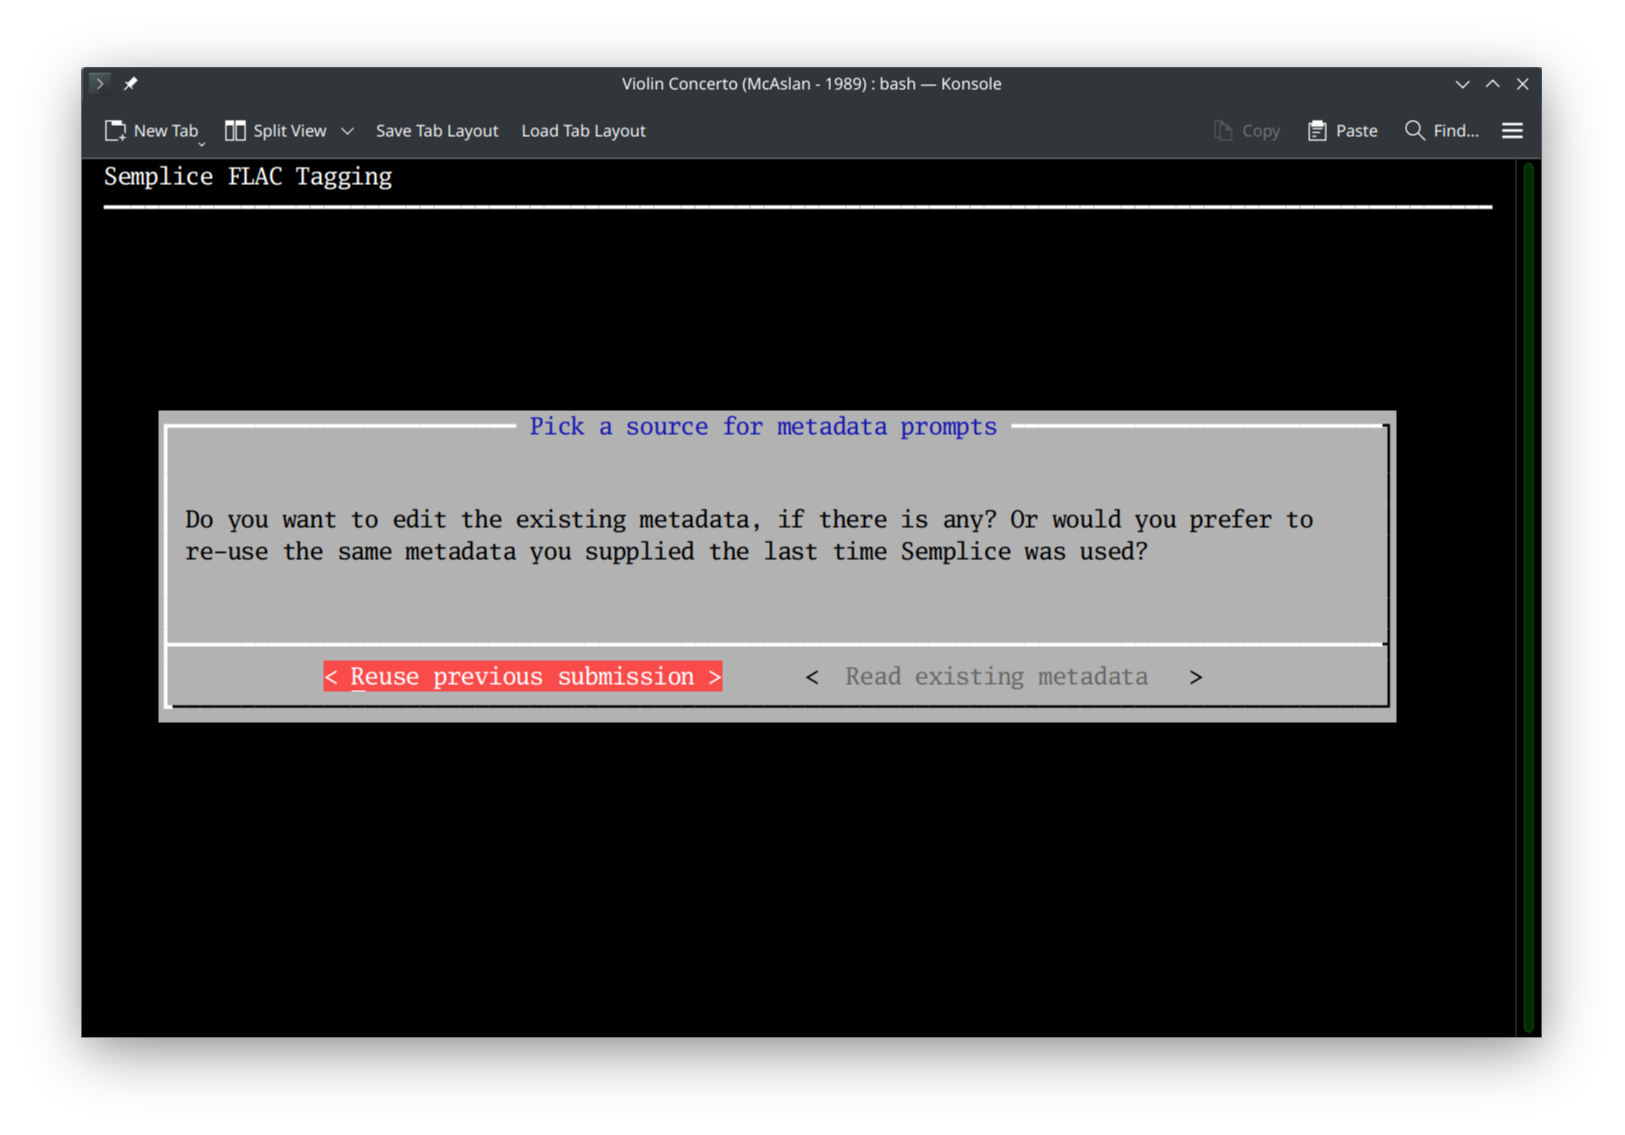
So I'm now ready to start tagging this new recording up ...and since I spent some time, back in Section 2, getting all sorts of metadata correct for the first recording on the CD, it now makes sense for me to take the 'reuse previous submission' option when I select the auto-tagging option once more:
 When I press [Enter] with that option highlighted, I see this:

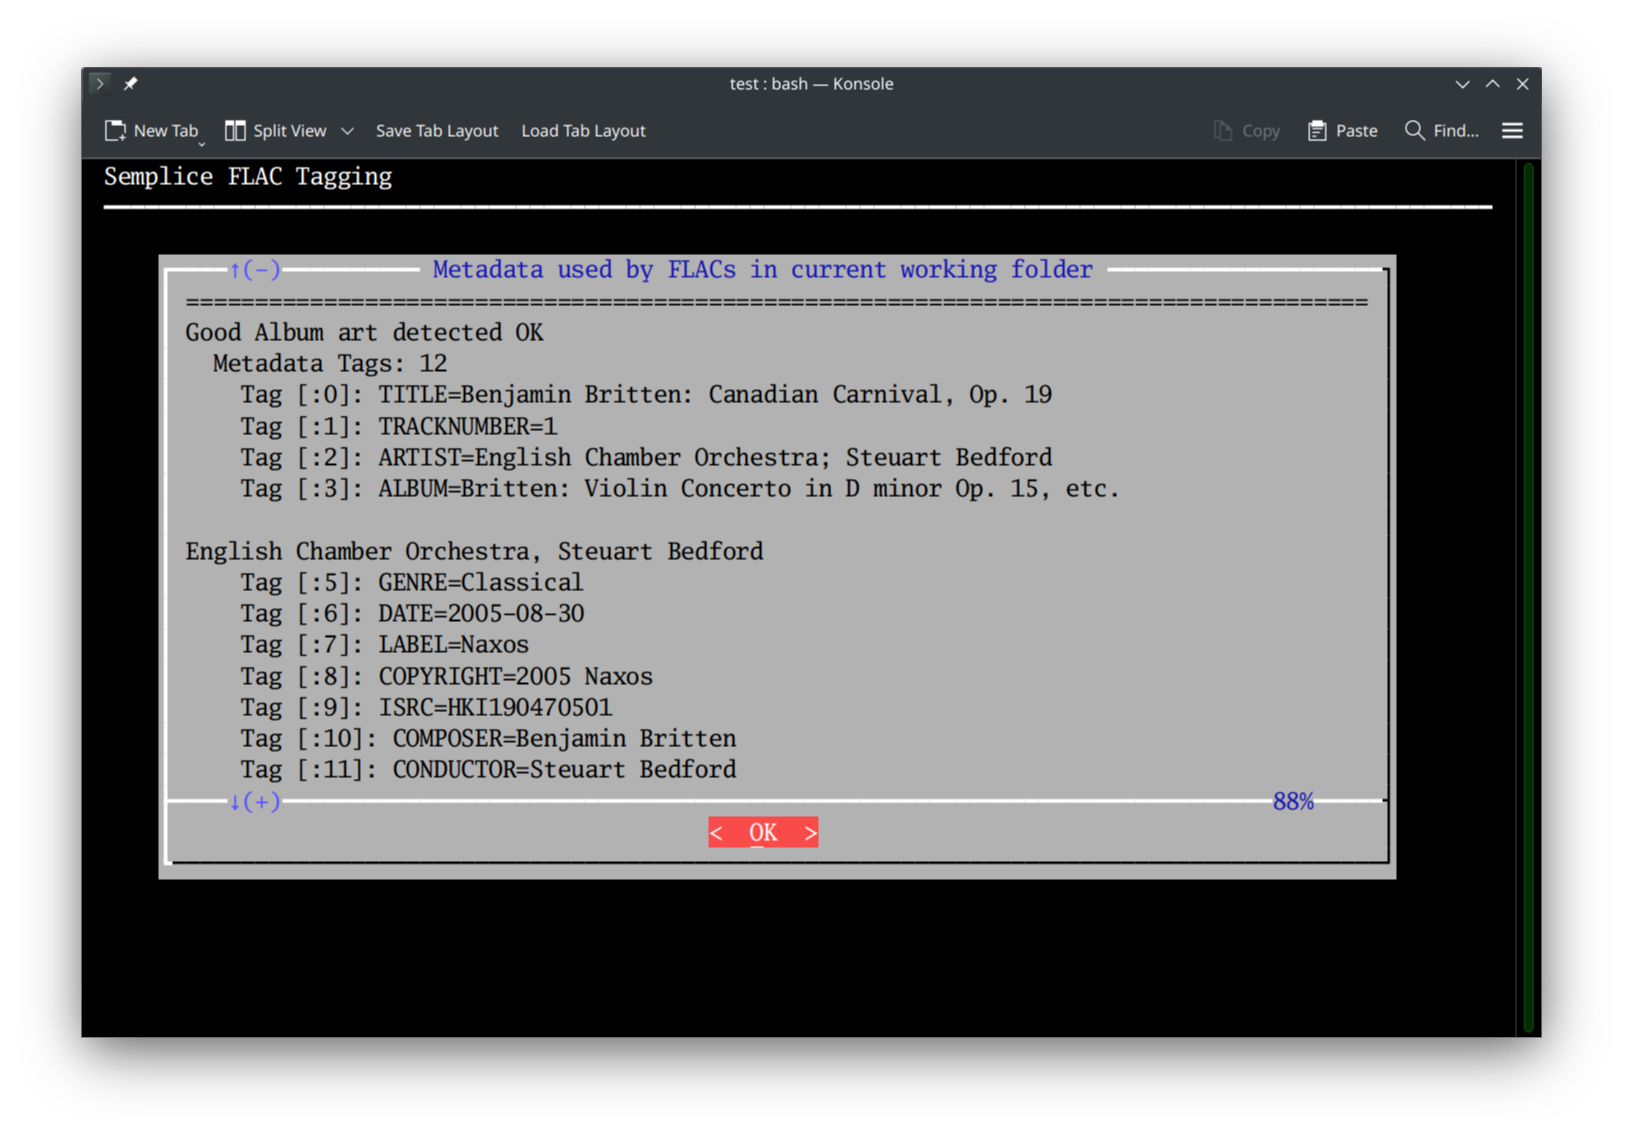
Do you notice how, in the title bar of the window, we know we're working on the Violin Concerto recording ...and yet here we see the same metadata we just provided earlier for the Canadian Carnival recording. It's obviously 'wrong' in the sense that the 'Composition' field is completely bonkers this time round... but it's a lot better than I'd have seen if I'd taken the 'read existing data' option instead:
 In this case, not a single data entry field would have been salvageable: Ctrl+U would have been put to work overtime and a lot of typing of fresh data would have ensued. With the 're-use prior' option taken instead, I obviously need to edit the data prompts, but there is potentially much less work involved overall:
By re-using the previous submission, therefore, I speed up the data entry process -in this case by a little; in other cases, perhaps by quite a bit. By selecting to re-use the previous submission, too, the performing artists prompt will be pre-filled with usable data:
 ...and tacking the violinist's name on to that involves relatively little typing:
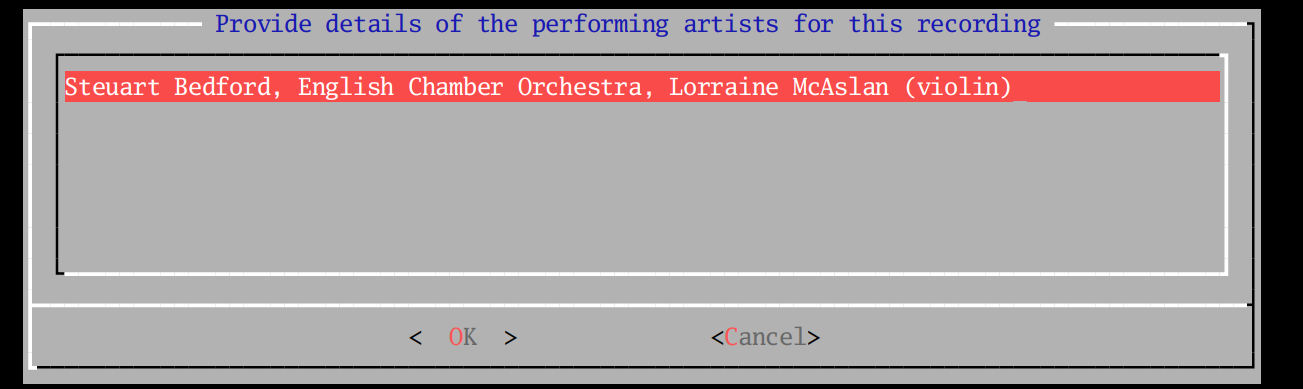
...and, just like that, I get appropriate metadata for the new recording without having to type in the conductor or orchestra details at all. Imagine if this had been an opera and you'd typed in all the cast details for CD 1 of the recording... how much time would you save by merely re-applying that earlier submission when it comes to tagging up CD 2 of the same recording?!
4.0 Summary
To conclude, therefore: auto-tagging is the business of re-numbering tracks starting from 1; embedding artwork into the FLACs if present in the folder; and prompting you via a wizard-like interface to supply album-wide and track-specific metadata tags which are then written to your FLACs.
When starting the wizard, you are asked whether you want to source 'metadata prompts' from the existing metadata stored within the FLACs themselves (useful for the first tag of the day; or when seeking to do minor edits or 'touch-ups' of existing data); or whether you wish to re-use metadata prompts supplied in the immediately-previous Semplice tagging session (useful for second and subsequent tags of the day, and when a single CD produces multiple recordings all of which usefully share large amounts of metadata).
Auto-tagging concludes with the automatic 'cleaning' of the metadata tags associated with all FLACs in a working folder, meaning that non-canonical tags (such as copyright notices or internal record company catalogue numbers) are stripped from the FLACs, and leaving behind only the canonical tags (plus any custom tags you've configured).
Should you need to 'correct' any aspect of the work that auto-tagging has inflicted on your FLACs (such as re-numbering them, or embedding different cover art), that's the job of the various manual tagging operations, which are discussed in detail elsewhere in this manual.
|[Back to Front Page]|[Tagging Home]|[Ripping Standard CDs]|[Ripping SACDs]|[All About SuperFLACs]|[Volume Boosting]|[Audio Codec Conversions]|