 1.0 Introduction
If I'm being brutally honest with myself, I've got to admit that Semplice doesn't really run on Windows at all! It does run under Windows, though... which is a distinction techies and nerds will enjoy making, but end users need not worry about too much! The point is that Windows 10 and 11 can have the Windows Subsystem for Linux (WSL) installed, entirely for free, and a full copy of Ubuntu, Manjaro or other Linux distro of your choice installed into that 'subsystem' then ends up able to run anything that would normally run on those Linux distros when run 'natively'. It then looks like Linux programs are running in Windows -with complete access to the Windows PC's graphics, audio and disk storage resources. This 'run within WSL' approach works well for both Windows 10 and 11, provided only that your physical PC is a 64-bit one, has a decent amount of memory fitted (8GB counts as decent for these purposes) and has virtualisation technologies enabled in its BIOS or UEFI equivalent.
For the record, I've run Semplice Version 2 on both Windows 10 and 11, in one case running on a 2012-vintage HP Folio 13, complete with 8GB RAM and a 500GB solid state hard disk and a 2nd generation Intel i5 processor running at a sedate 1.6GHz: anything more modern than a 2012 laptop is going to run rings around it, but Semplice works perfectly well on it nevertheless.
In what follows, I've documented the installation of Semplice Version 2 on Ubuntu 22.04, running on Windows 10 -but I've also run it under Manjaro and Fedora on Windows 11. I would expect that if you can install a Linux distro in WSL2, Semplice will run on it as well as it would on its 'native' distro.
Of course, before you can even contemplate installing and running Semplice on Windows, you will need to have installed WSL2 on Windows first. This article can help you do that: it documents Windows 10 specifically, but the steps are identical these days for Windows 11 too. In a nutshell, they are: open a command prompt as Administrator; type the command wsl --install; reboot when prompted; when the PC comes back up, create a new user account/password combo for your new Linux-under-Windows environment. Job basically done! Do read that article for a more detailed walk-through, though! If you've managed to get a Linux command prompt running under Windows, though, you're in business and can proceed to read the rest of this article!
2.0 The Installation
You'll find 'Ubuntu' (or whatever the distro you chose to install in WSL2) is launched by clicking the appropriate menu item in the standard Windows Start menu. Doing so will launch a terminal session, into which standard Linux commands can be typed. We therefore immediately begin by typing the commands:
cd
wget doco.absolutelybaching.com/seminst
bash seminst
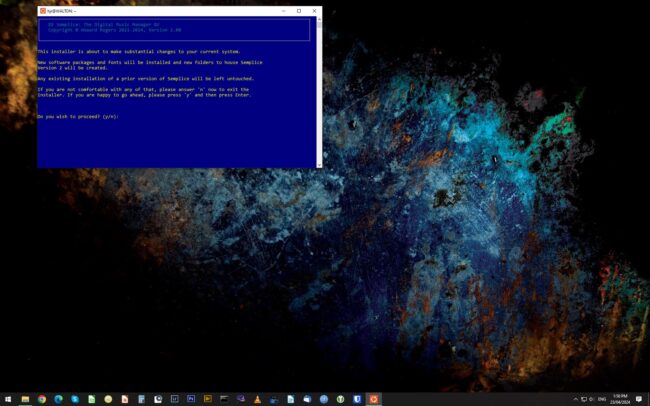
The first 'cd' just makes sure you're in your /home/username folder. The wget command downloads the Semplice Version 2 installer. The bash command then launches that installer:
My terminals on Windows are usually configured to display in yellow-text-on-blue, which is why the particular colour scheme you see here appears. You may well find yourself using a more traditional white-text-on-black terminal. The particular choice of colours of course makes no difference to functionality! You'll see a screen-full of warning text advises you that installing Semplice will make quite considerable changes to your system. Those changes are as follows:
- Full system update, if needed
- Installation of ImageMagick, Ncurses, Cuetools, Flac, Ffmpeg, Curl, Dialog and other minor audio-visual helper programs
- Installation of thebuild-essential program group, along with python, allowing source code to be compiled into working executables
- Installation of sacd, in order to be able to work with ISOs ripped from SACDs
- Installation of the python audiotools package
Additionally, of course, once all that preparation has been done, the Semplice installer will... er, install Semplice Version 2!
You can decline to proceed at this point, but if you wish to proceed, type 'y' and press [Enter]:
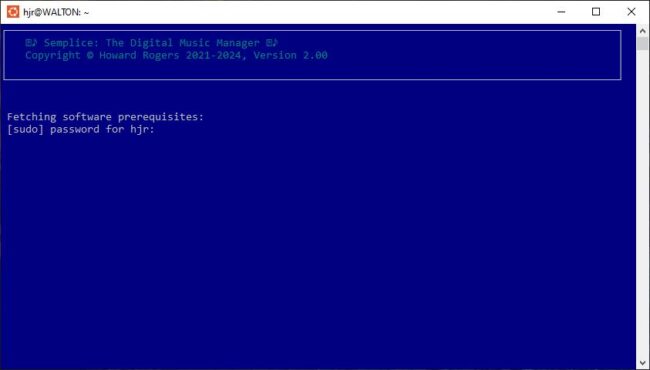
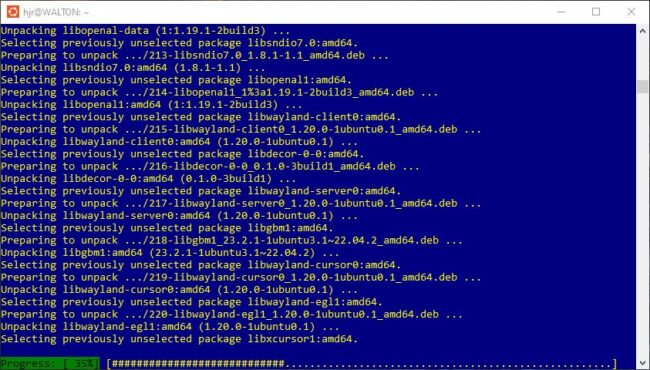
Semplice needs to install some software and copy files in the /usr/bin folder, so elevated privileges are required from the outset. You thus provide your own password at this point to acquire sudo rights. As soon as you do so, you'll see that various software packages begin to be downloaded in the usual fashion:
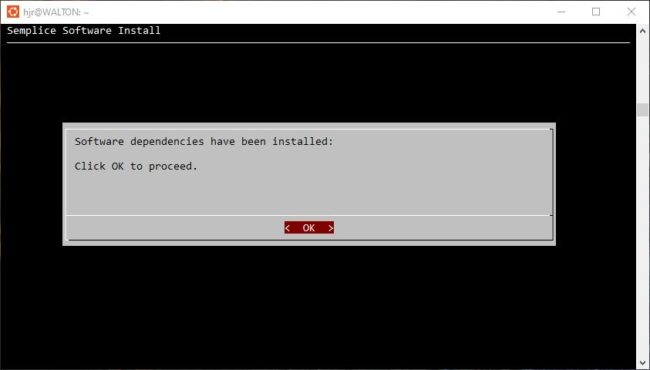
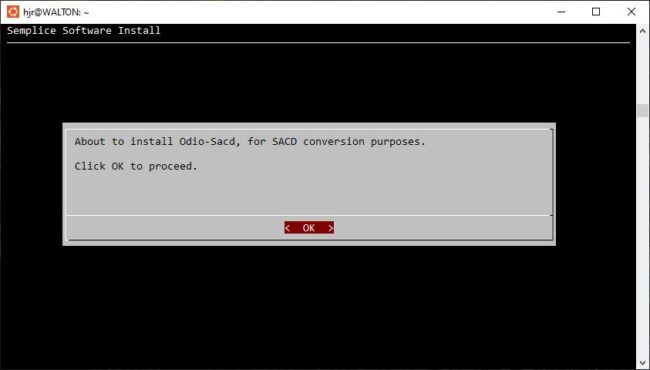
After just a few minutes, the software prerequisites are downloaded and installed and the Semplice installer changes to display this:
This is a 'waymark' of sorts: it's telling you that the installation of third-party programs and libraries that Semplice depends on has completed successfully. If you now click [OK] at this point, the Semplice installer will move on to the next stage of the installation process, which is the installation of the sacd ISO-reading program:
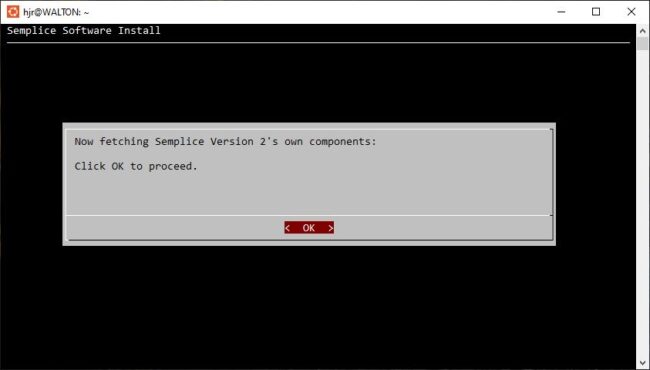
Again, click [OK] to proceed to another software-download-and-compile process, which can look ugly but only takes a moment or two to complete. Once it finishes, the Semplice installer changes once more to display this:
Click [OK] to start this next phase of the install process:
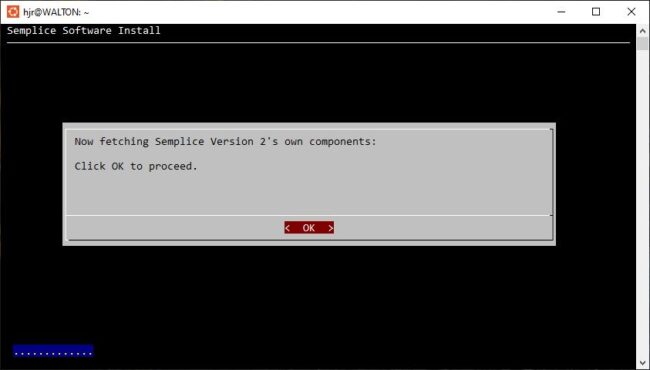
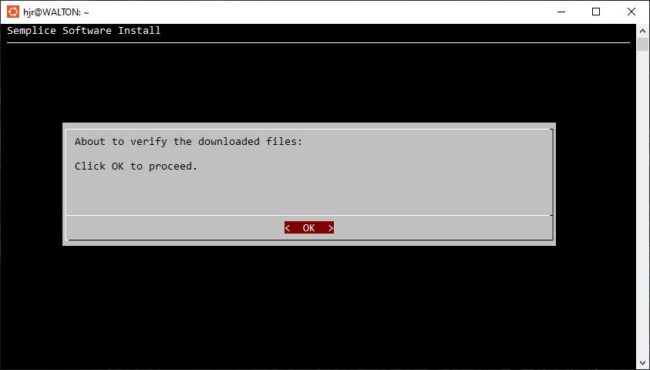
You'll see a series of dots appear in a region towards the bottom of the screen. Each dot represents one of Semplice's files; if an 'X' appears instead of a dot, it means that fetching the file has failed for some reason. You'll be offered a chance to re-try should any failures occur. If worse comes to worst, you can simply re-run the entire installation procedure (by re-issuing the bash seminst command) to fix any errors arising from, say, this site's temporary unavailability. A re-run Semplice installation will whizz through the software prerequisites part of proceedings (because, of course, everything Semplice depends on has, at this point, already been installed) and jump straight to this file copying routine. Once all the files have been fetched without error, you'll see this new message appear:
This is the file verification procedure: Semplice generates a hash sum for each of the files it's just downloaded and compares that hash sum with a list of known good hashes that I keep on this site. If the two match, we can be sure that your downloads were good ones. If they don't, you'll be warned and a second attempt to fetch known-good files will be made. Click [OK] to kick off the verification process -and be patient, because it takes a while to complete and there's no particular evidence of anything happening whilst it does so. A blinking cursor in the bottom left-hand corner of the screen is about all the indication you'll get that the installer is doing something, I'm afraid! After what will feel like hours, but is in reality only a matter of 30 seconds or so, you'll hopefully see this:
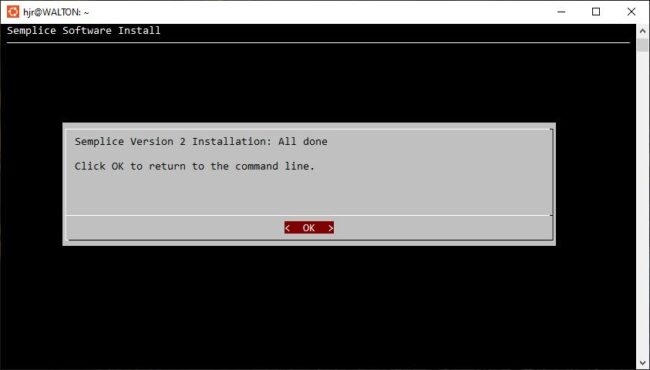
This is the point where you know the Semplice installation has completed and been successful. If instead you get a message that says, "Verification of downloaded files has failed: Click OK to try downloading again" then you should click [OK] (or press [Enter] which amounts to the same thing) and let the installer have another attempt. It is in any case unusual to need a second attempt, however, and usually the second attempt fixes things without drama. If Semplice seems to behave oddly or fails to function as advertised elsewhere in this user manual, however, you may want to try re-installing it at a later time: Semplice doesn't use a database or other form of persistent storage of any great consequence, so re-installing the program multiple times does no harm.
3.0 Running the Program
If this were 'real' Ubuntu running natively, you'd now be able to launch Semplice by clicking the Linux equivalent of the Start menu, finding the Multimedia menu item within it and then locating the 'semplice' program launcher within that. But this is command-line Ubuntu running under Windows: Semplice certainly won't have inserted any program launcher into Windows own Start menu and the Ubuntu environment lacks a start menu equivalent of its own! This would seem to be a bit of a problem, therefore!
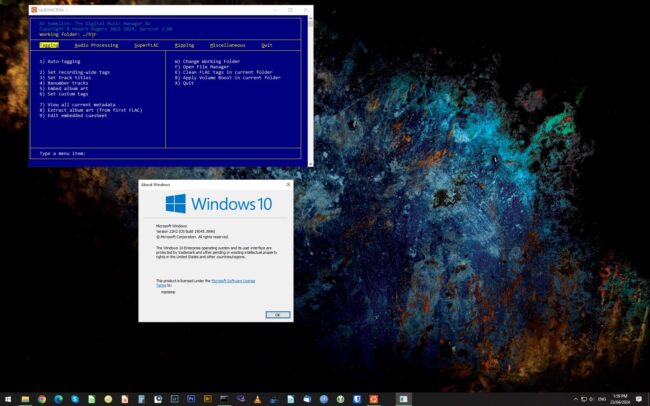
Well, the answer to this conundrum is to simply type the command semplice within the Linux-on-Windows environment terminal. This will mean that Semplice launches with Windows' choice of terminal font and colours:
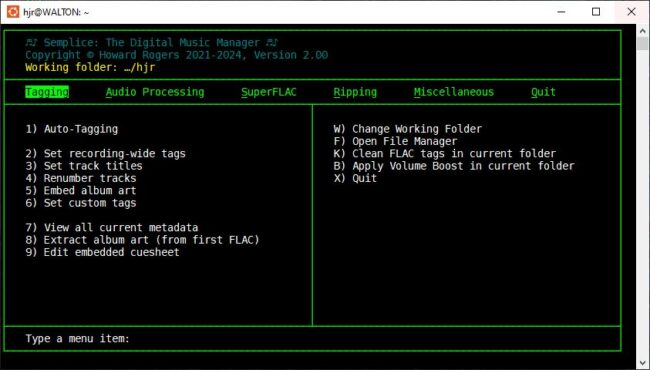
Here, you'll note, Semplice is running in the same yellow-on-blue environment we've seen previously. Now: that might be perfectly fine for you ...and, of course, you can set Windows terminal properties to alter the font, colour scheme and so on to fine-tune the look-and-feel of the program, as you feel appropriate. Here's one I prepared earlier, for example:
I've gone for the classic green-on-black look here, but you can experiment with the Windows terminal colour and font properties to your heart's content! No matter what you fiddle, however, you still won't end up running the program precisely as it was intended to run! For that, you need to futz around a little!
For starters, within the Ubuntu terminal, issue the following commands:
cd
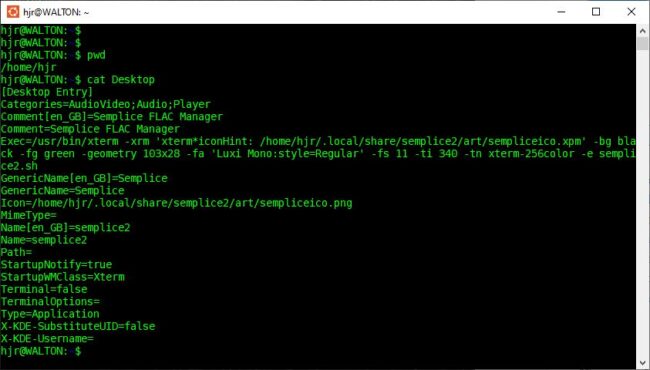
cat Desktop
You should see the complicated-looking contents of a text file appear, like so:
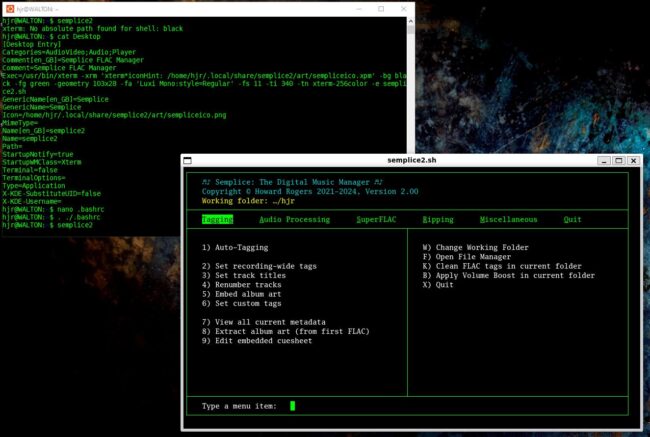
You will note there a line that starts 'Exec=/usr/bin/xterm...' and then goes on for rather a long time! That's the command needed to execute Semplice on Linux: you'll note that it's intended that the program should run within its own xterm window, using a particular 11-point font, and in a windows that's 103x28 characters wide/tall. If you were easily able to issue that exec command yourself, that would be to run Semplice as its designer intended it should be run!
Fortunately, that's relatively easy to arrange. To start with, select and copy the contents of that Exec line, though without the leading "Exec=" bit. That is, highlight from /usr/bin/xterm right to the end of the -e semplice2.sh stuff ...and then press [Enter]. Now you have the required command in the clipboard.
Next, issue these two commands:
cd
nano .bashrc
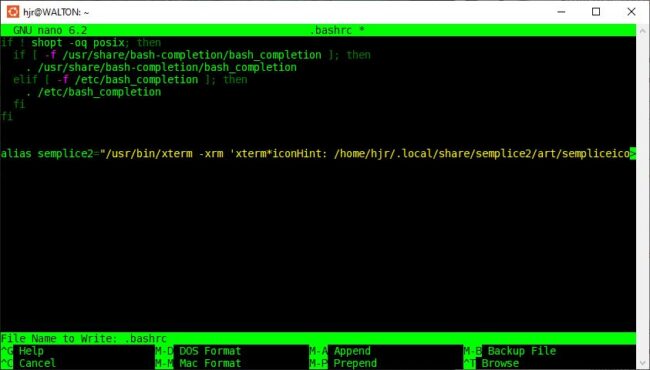
You should now be editing a long, complex text file. Just scroll right down to the end and on a blank line, right-click your mouse: the contents of the clipboard should be pasted into the document. Finally, you prefix the new line with the words: alias semplice2=" and then scroll to the end of the line and add a closing double-quote:
Save the modified file. Now, make your Ubuntu environment notice the changes you made by issuing this command:
. ./.bashrc
...which is "dot space dot forward-slash dot bashrc". You should now be able to type the command:
semplice2
...and see this:
Your existing Ubuntu window stays running in the background: you can minimise it, but don't close it. It has now launched a second, independent window that is an xterm window (notice how it doesn't have the Ubuntu 'roundel' logo in its top left-hand corner, whereas the original window does) and within which, Semplice is running as its author intended. It is a predominantly green-and-white colour scheme, on a black background, and using a Serif font which the Semplice installer added to your Ubuntu-on-Windows environment as part of its standard installation process.
At this point, therefore, you can run Semplice-on-Windows by clicking Start -> Ubuntu and type semplice, which will get you Semplice running in a standard Windows-looking terminal. Or you can click Start -> Ubuntu and type semplice2, which will get you Semplice running in a new xterm window whose look and feel it determines. The choice is yours.
4.0 Post-Install Configuration
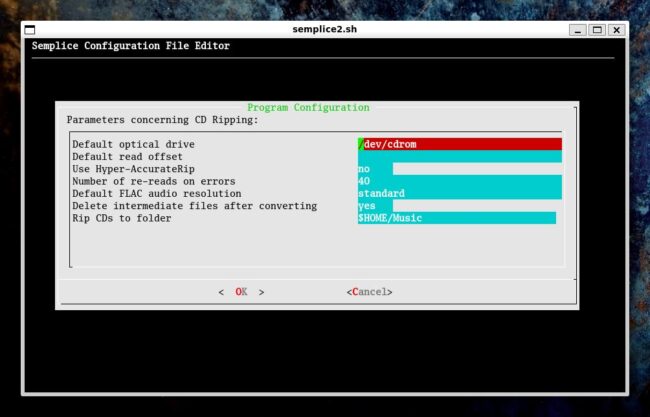
Once you've learned how to launch Semplice, you should take the time to visit the Miscellaneous menu and investigate the program's default configuration (Option 1): just tap 'M' to jump to the Miscellaneous menu, then tap '1' to activate that menu option. You can also arrow left and/or right to move the highlighted top menu option to the appropriate item and then tap '1' on arrival at the correct one. Either way, you'd see something like this:
There are four pages of configuration options, each dealing with a specific aspect of program operation. This first one, for example, has all sorts of options to do with how the program rips audio CDs. You should read the ripping-specific section of this user manual for full details on what to set and how, but I'd start by setting the 'Rip CDs to folder' option if nothing else, since that will determine where CD rips are stored on your local hard disk. The default is $HOME/Music, but that may be quite inappropriate for your purposes. Press [OK] to move to the next page of configuration options:
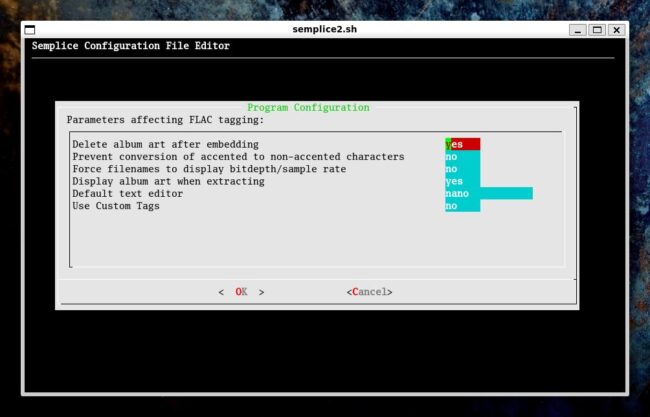
This time, the page concerns how Semplice's tagging options work. Again, see the tag-specific sections of this manual for specific details about each option, though the defaults here will probably be reasonable for most people. Another press of [OK] (or Enter) takes you to the third page of options:
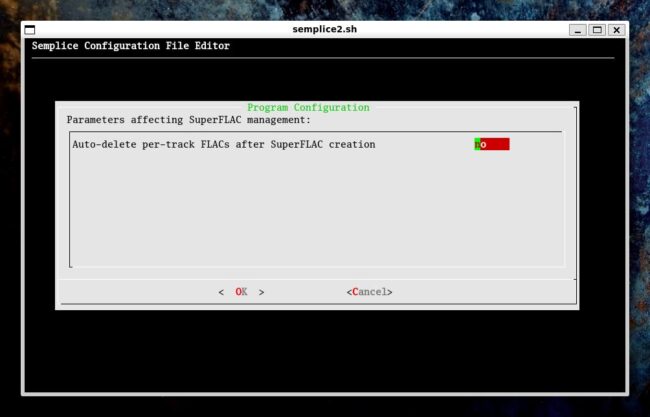
There's only one parameter (currently!) that governs Semplice's 'SuperFLAC' behaviour, and the default is again a safe one (i.e., not to delete source files automatically after creating a SuperFLAC from them). As ever, read the relevant section of this user manual to fully understand what's being configured here. One last press of [Enter] and we get to:
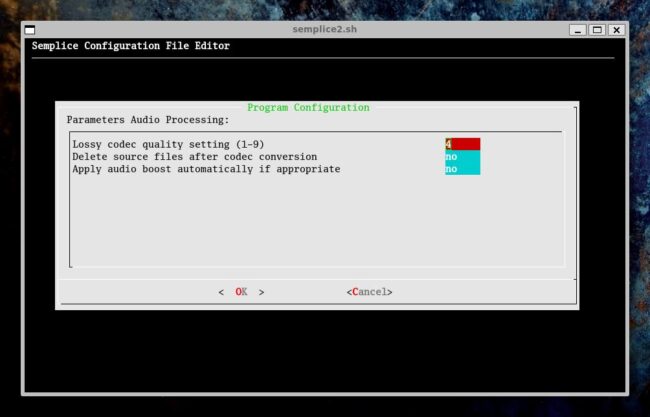
These last parameters control the 'audio processing' parts of Semplice's functionality: the defaults will again be safe and applicable to most users, but if specific need arises, you'll want to tweak them here. Consult the audio processing part of the user manual for full details.
When you have just learnt how to run Semplice, it's probably a bit ambitious to ask you to configure how it should behave, with screens full of options you won't yet understand, I realise! The main thing to grasp at this point is that Semplice's behaviour in each of its main areas of functionality can be configured, and this is the place where to configure it.
5.0 Quitting Semplice
The simplest way to leave Semplice is to tap the letter 'X' (to "exit"!). If you launched Semplice by typing the command semplice in the Ubuntu session, tapping 'x' quits Semplice but leaves the Ubuntu environment running, taking it back to the standard command prompt. If instead you launched Semplice by typing the semplice2 alias, that will have opened a new xterm session and quitting Semplice will therefore cause that second terminal to close, though the original Ubuntu session will still be running, though.
If you'd rather use Semplice's own top menu to navigate out of the program, that can be done by tapping 'Q' to get to the 'Quit' menu (or use the left- and right-arrow keys to navigate there) and then to take Option 2 from it. You will note that Option 2 is entitled 'Quit with no file processing': it's a clean exit from the program that doesn't try to do anything clever with any audio files that might be in the vicinity!
If you were to instead take the Quit menu Option 1, you would trigger Semplice's audio file 'tag cleaning' routine before the program quits -which is fine if there are no FLAC files present in Semplice's working folder. But it's not something you want to do unintentionally in a folder full of FLACs, since it involves changing the metadata associated with FLAC files: leave Option 1 until you know what you're doing with Semplice's tagging capabilities, therefore!
