1.0 Introduction
Semplice has been tested to work on a physical Sierra Mac Mini, a physical Catalina iMac, the same iMac with Monterey installed and a Big Sur installation on a VirtualBox. I am therefore pretty confident that Semplice will run on any version of macOS (i.e., from 10.12 [Sierra] upwards), though I haven't tested every single one of them and I have no idea what will happen with anything Apple releases later in 2022 (I definitely have not tested on Ventura, for example, and will never be able to do so). However, anything which claims to be macOS and isn't one of the versions I've just listed has not actually been tested and I do not have the physical resources required to provide support on those macOS versions (unless you'd like to donate hardware that's capable of running those other versions: please get in touch if you do!) For similar reasons, I cannot say whether Semplice will run on M1 Macs: I've only ever used Intel chips.
Semplice has several package dependencies -that is, programs which must also exist on your Apple computer for it to be able to work. The simplest way of ensuring all those dependencies are installed correctly is to install them with a package manager called 'MacPorts'. Once MacPorts exists, installing almost any other piece of software is just a matter of issuing an appropriate 'port install... ' command. Note that if you have already installed MacPorts in order to get Giocoso (or Niente) working, you do not need to re-install it and can basically skip Sections 2 and 3 below and move straight on to installing Semplice and its software dependencies itself (see Section 4 below).
I should also point out that the other popular way of installing software onto a Mac via the command line is called 'Homebrew'... and using MacPorts and Homebrew at the same time (at least on Intel CPUs) is a really bad idea. At this time, therefore, if you've already used Homebrew to install software, you should not attempt to install Semplice using these instructions, because they will expect to work the 'MacPorts' way! If you are skilled enough, fine: you can finagle things to co-exist and with a judicious bit of symlinking, maybe it will all hang together... but you're very definitely on your own at that point!
For the avoidance of doubt, then: these instructions assume a relatively clean Mac install and no prior use of Homebrew to install anything.
Thus, in this article, we're going to 1) Install the command line utilities that MacPorts itself will depend on; 2) install MacPorts itself; and 3) install the necessary Semplice package dependencies. Once all that is done, you'll be able to download and run Semplice on macOS (Sierra and up) without drama.
In all that follows, bear in mind that a functioning Internet connection is a necessity.
2.0 Installing Command Line Tools
Before we can install MacPorts itself, we need to install the various command line utilities that MacPorts will expect to find on the system: these are programs that, for example, compile source code into executable binary packages. Fortunately, this is quite easy to do.
Simply open a terminal and type the command:
xcode-select --install
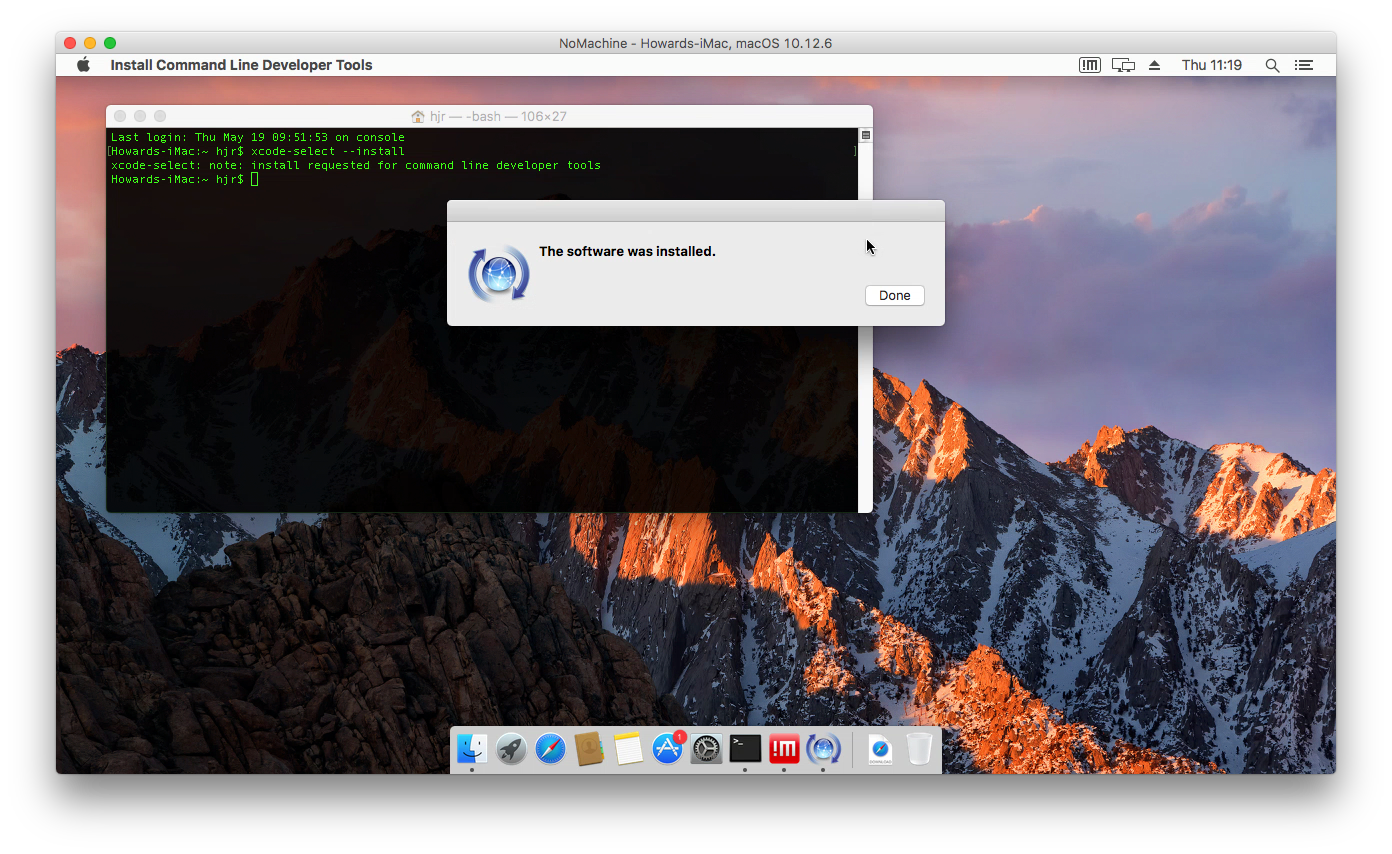
A graphical dialog will ask you if you really want to install the command line tools:

When you see this prompt, just click [Install], then agree to the huge license agreement that appears (having first read it carefully, of course!)
The installer will find and download the relevant software. Click [Done] when it's complete.
Once the install completes, you're ready to move on to the business of installing MacPorts.
3.0 Installing MacPorts
There are different versions of MacPorts to install, depending on what version of macOS you're using: you can click the Apple icon in the top panel and select the 'About this Mac' menu item to find out your OS version, if you've forgotten it.
At the time of writing, the following downloads were available:
- https://github.com/macports/macports-base/releases/download/v2.7.2/MacPorts-2.7.2-12-Monterey.pkg
- https://github.com/macports/macports-base/releases/download/v2.7.2/MacPorts-2.7.2-11-BigSur.pkg
- https://github.com/macports/macports-base/releases/download/v2.7.2/MacPorts-2.7.2-10.15-Catalina.pkg
- https://github.com/macports/macports-base/releases/download/v2.7.2/MacPorts-2.7.2-10.14-Mojave.pkg
- https://github.com/macports/macports-base/releases/download/v2.7.2/MacPorts-2.7.2-10.13-HighSierra.pkg
- https://github.com/macports/macports-base/releases/download/v2.7.2/MacPorts-2.7.2-10.12-Sierra.pkg
(Installing Semplice on anything earlier than Sierra or later than Monterey is not supported, so I've not bothered to list any MacPorts version for earlier versions of macOS than that, either).
Click whichever one of those links applies to your version of the macOS operating system and download the relevant package. Once it has downloaded, issue the following terminal commands, in sequence:
cd
cd Downloads
sudo installer -pkg MacPorts-2.7.2-10.13-Sierra.pkg -target /
The specific filename mentioned there may vary, depending on the version numbers and OS release you're actually using: the above is true for me and my Sierra macOS installation in May 2022. Remember that you can type 'MacPorts <tab>' to have the correct file name filled in for you automatically, before finishing off the command with the '-target /' bit. Since the command mentions 'sudo', you'll be asked to supply your password before the command can complete successfully: do so when prompted.
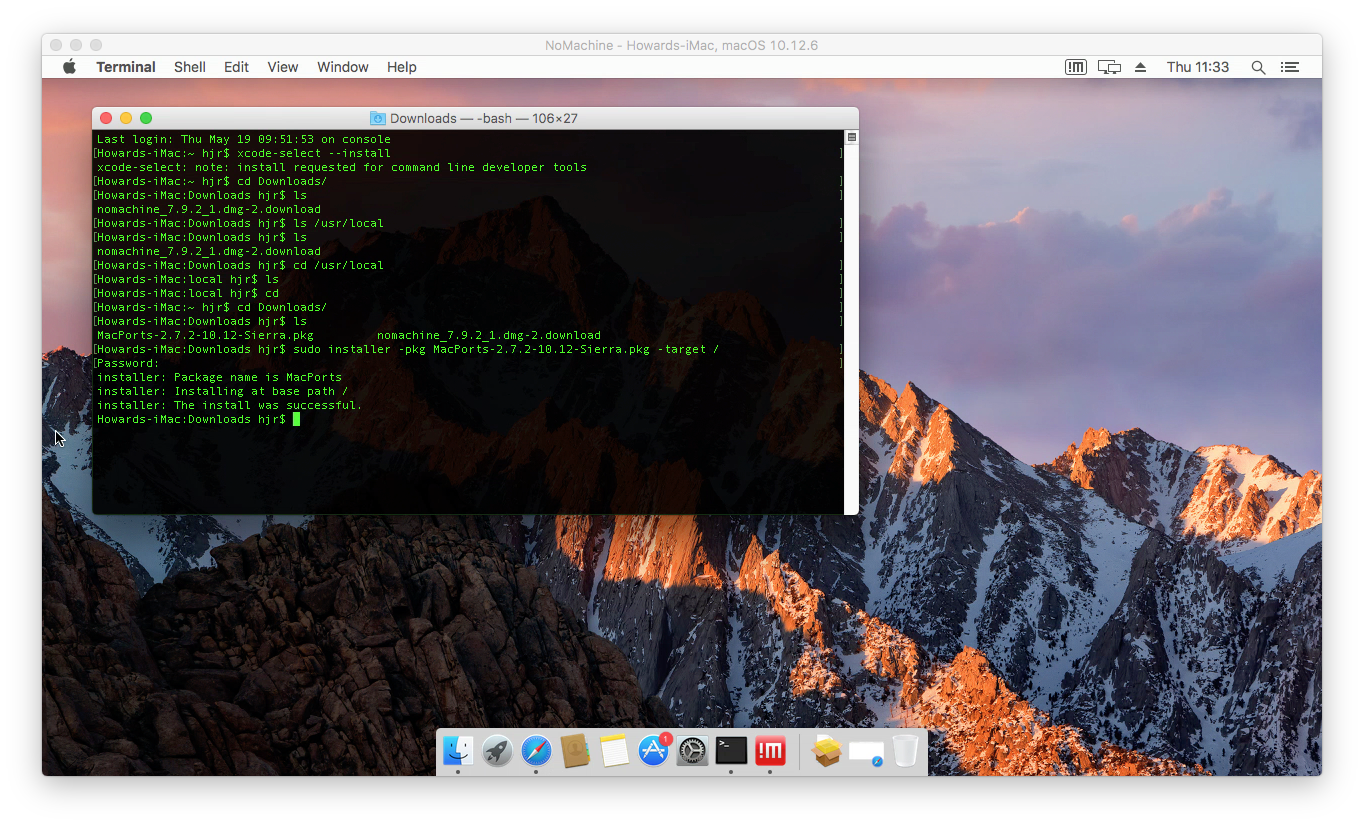
A successful installation will be indicated as you see here: 'The install was successful' is the last message returned by the installation command.
Unfortunately, the package will have been installed into a folder which is not ordinarily searched by the operating system, so we need to correct it with the following command:
sudo nano /etc/paths
That opens a text file in which the names of all the folders that macOS searches by default are listed. We need to add the one into which MacPorts was just installed to the end of that list, like so:

That is, you type the text /opt/local/bin onto a new line at the beginning of the existing list of folders, without altering any of the existing content of the file. Once that's done, you save the edited file by pressing Ctrl+X followed by y+Enter. It's vital that the /opt/local/bin folder appears first in the list, because that way we ensure that macOS searches that folder for executables before it looks elsewhere. If you tack it onto the end of the list (for example), then the old and out-of-date version of Bash will always take precedence over the more up-to-date version we're about to install.
Anyway: the short version is, make the list in your /etc/paths look like the one shown above, please!
You make the edit take effect by closing your existing terminal session and opening a brand new one. Once you've done that, we're ready to use MacPorts properly!
4.0 Installing Software Prerequisites
Now MacPorts is installed, you can move on to install the additional software that Semplice will need to work properly. You can do that in the terminal by typing this command:
sudo port install xorg-server ffmpeg flac xdotool bash imagemagick xterm wget coreutils fd xrandr gsed grep dejavu-fonts findutils
At times, you may be prompted to install associated packages that the explicitly-mentioned packages depend on. You must answer 'y' to any request to install such dependencies.
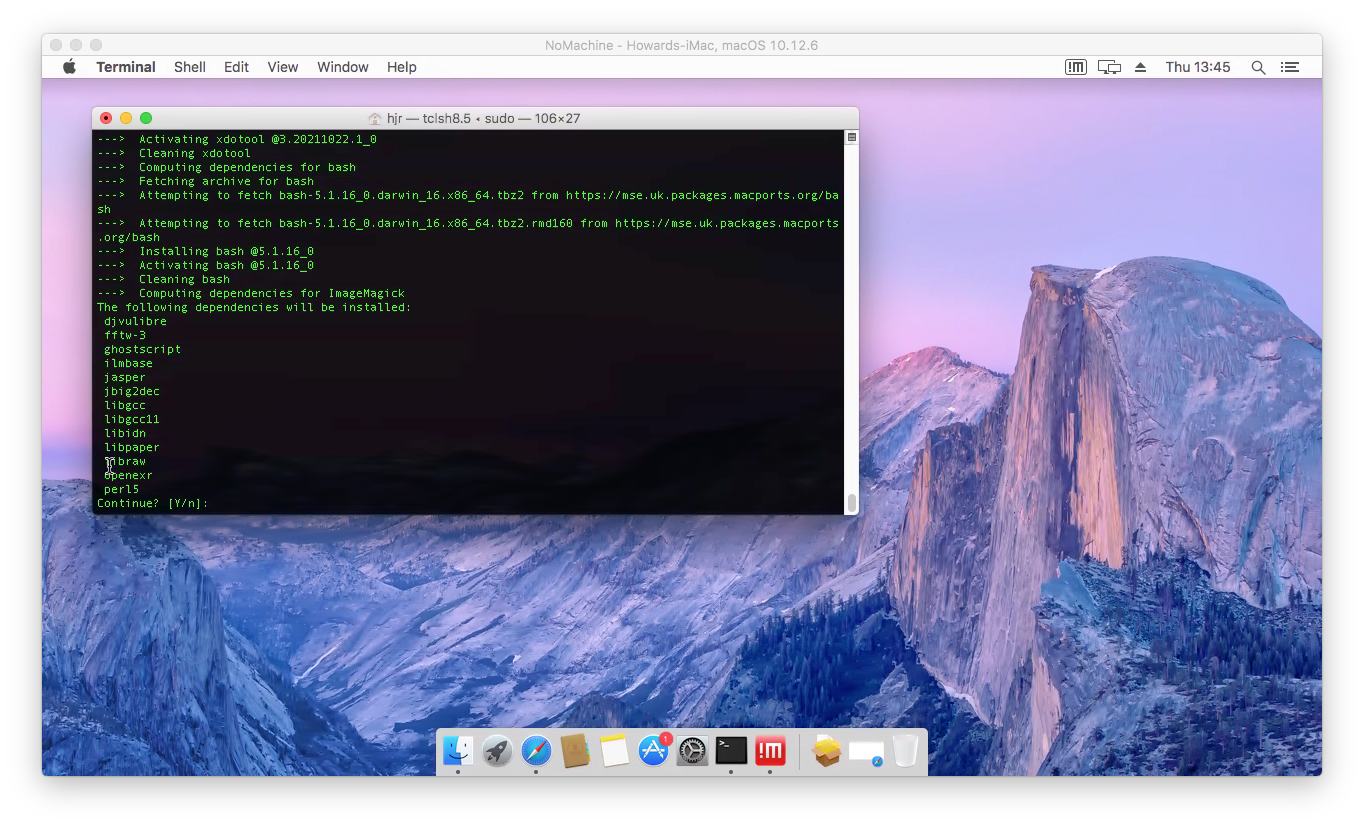
Otherwise, be prepared to wait quite a long time for that lot to finish: on my admittedly virtual version of Sierra, installing xorg-server all by itself took over 20 minutes! On the other hand, the entire installation of everything took about 30 minutes on a physical Catalina iMac. Either way, just be patientand let the process complete in its own sweet time.
Be warned too: on the latest Monterey macOS, running the 'sudo port' command caused this to happen:
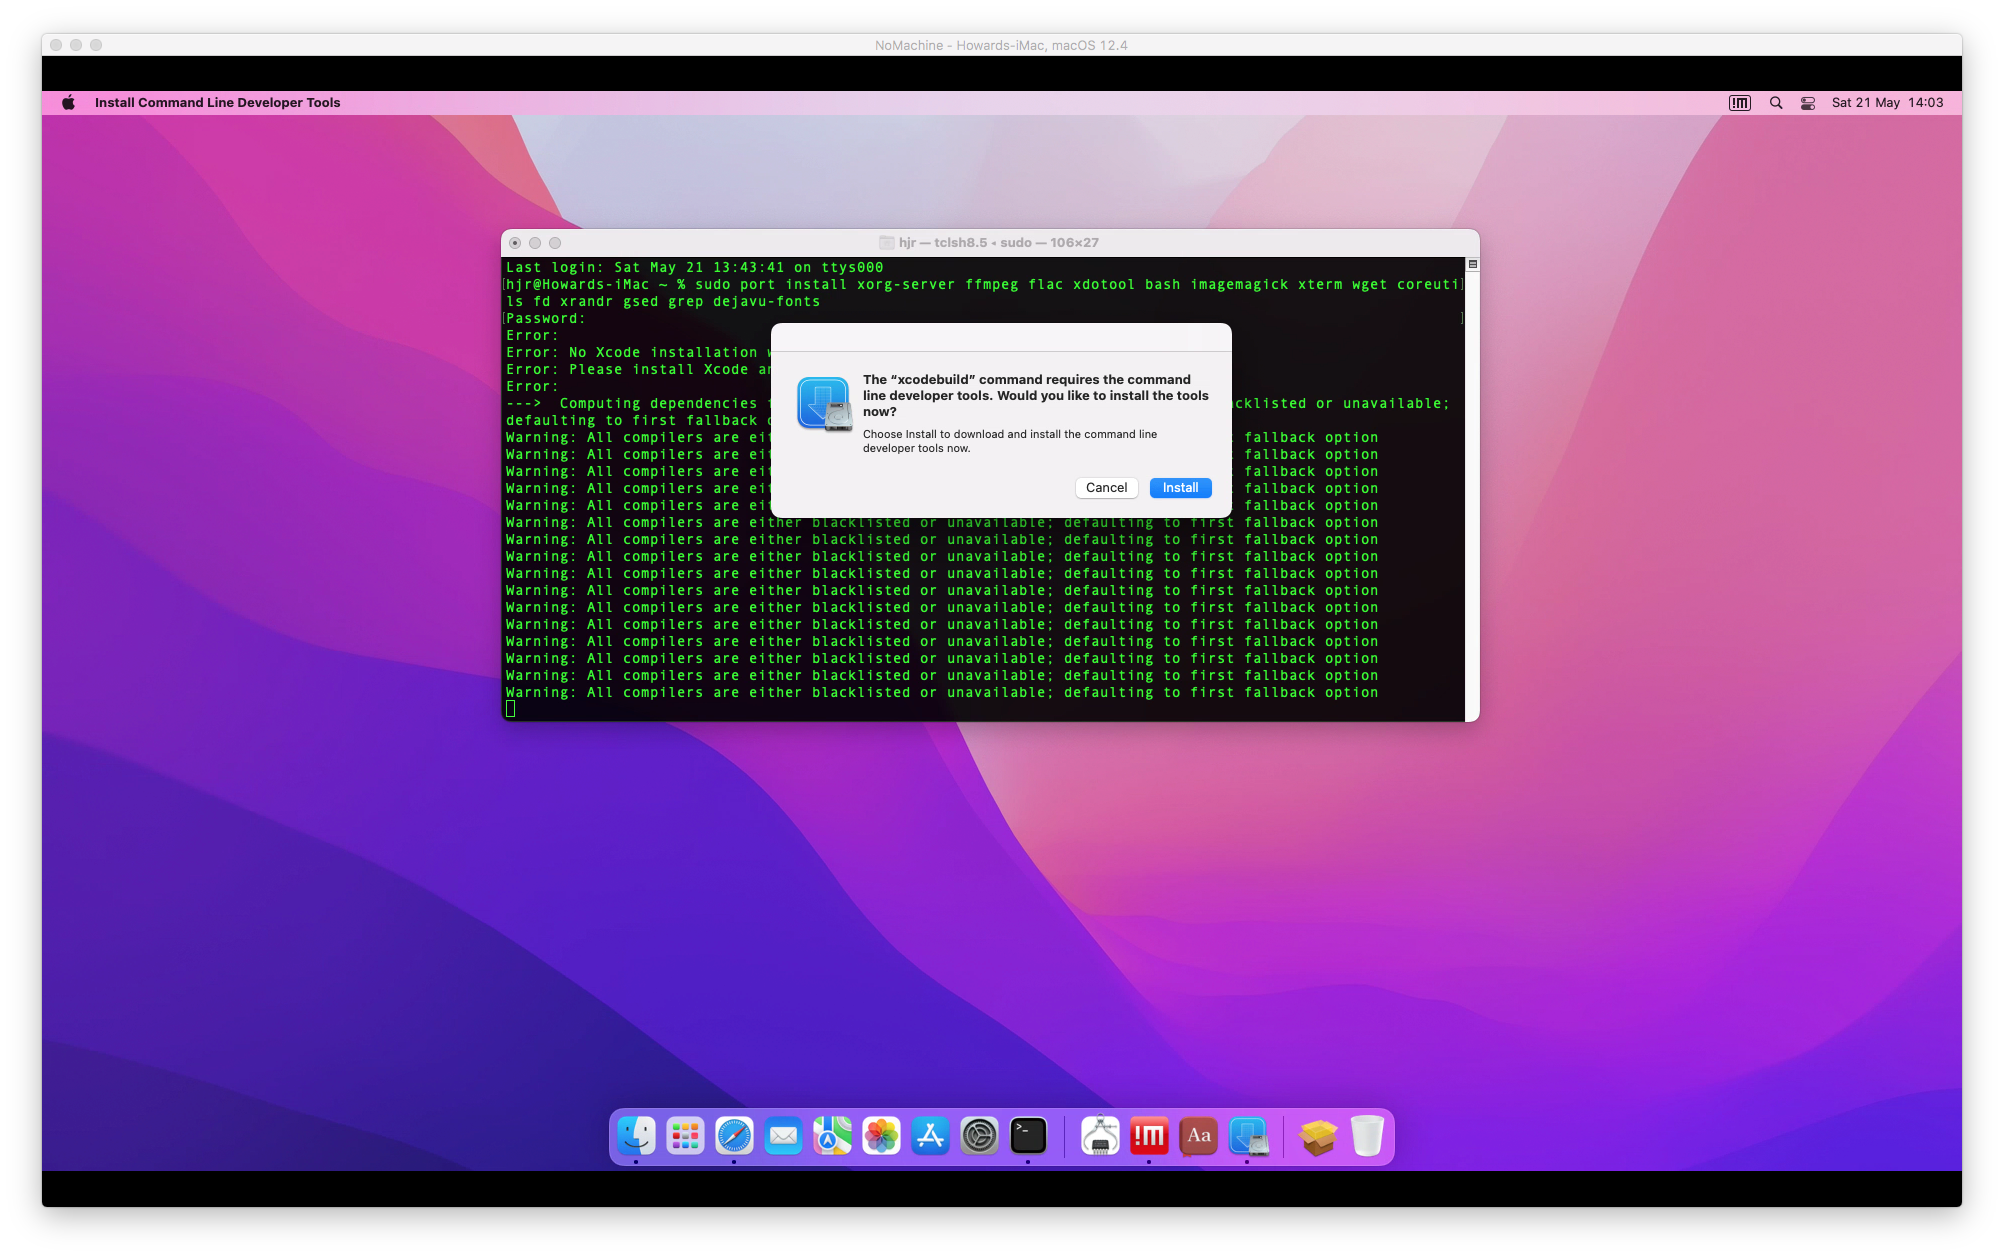
The 'would you like to install the tools' prompt looks suspiciously like a duplicate of the original prompt to install the Xcode tools we did back in Section 2, so I'm not quite sure why that's happening! Meanwhile, in the background, the terminal window is displaying all sorts of dire warning messages about 'all compilers are blacklisted'! These responses only happened in Monterey -and I'm running that on officially unsupported 2012-era hardware, so that's possibly why this issue arose for me. It didn't occur in either Sierra or Catalina, for example.
Anyway: for Monterey, I chose to click [Install] in the foreground and let the port install command continue doing what it wanted to do in the background:
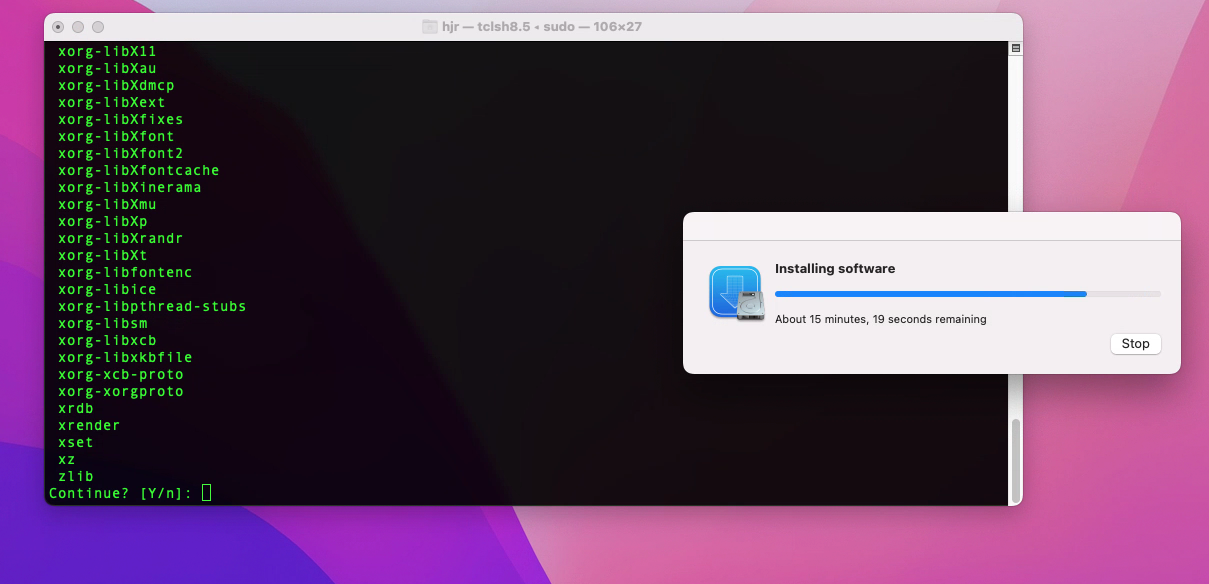
I left the terminal 'Continue y/n' prompt sit tight until the software installation in the foreground was complete, and then switched back to the terminal to tell it to continue. That seemed to work and the rest of the software installation proceeded without incident:
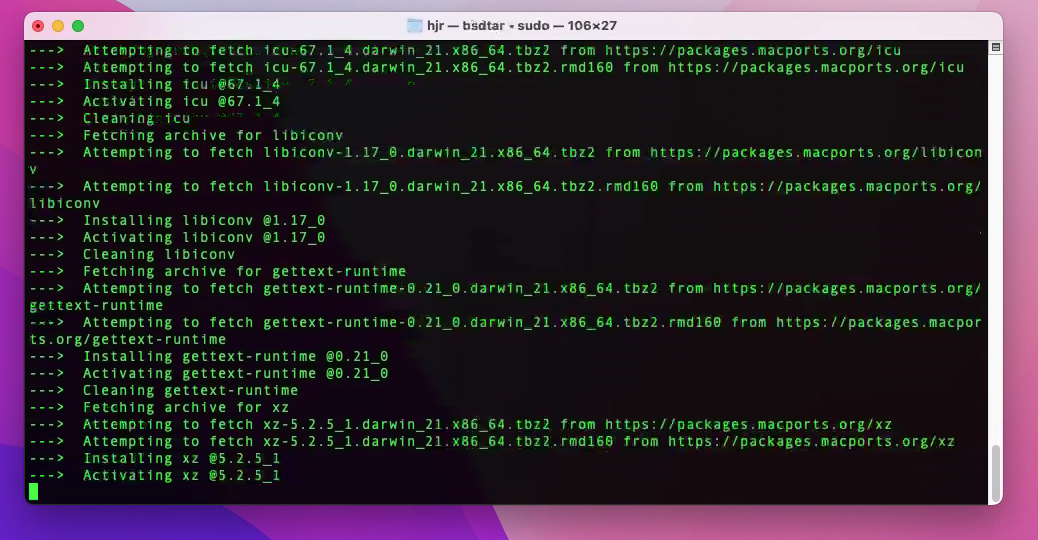
I will also note that at the end of my Monterey-installation of the software dependencies, I was told that the xorg-server had failed to install because of 'unmet dependencies', which were listed as being some X server-related fonts. I'm not entirely sure why that should have been the case, but MacPorts is known to occasionally have bugs and glitches -and maybe this was one of them. In any event, I simply re-ran the exact same 'sudo port install' command again... and, second time around, everything worked just fine:
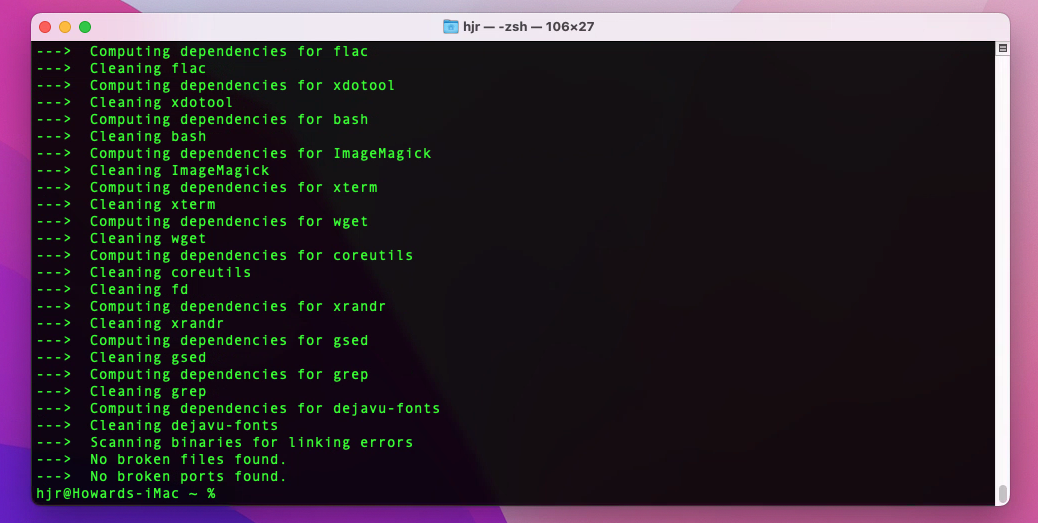
So, depending on your version of macOS and whether you're running on Apple-supported hardware, installing MacPorts software may not be the straightforward exercise it usually is. Nevertheless, I got there in the end, and you should be able to as well!
5.0 A Little System Preconfiguration...
Once the software prerequisites are installed, we need to do a couple of bits of system re-configuration to make the next steps work properly.
5.1 System Integrity Protection Modification
First, on Catalina and up, we need to make sure that the built-in System Integrity Protection (SIP) O/S feature doesn't stop the terminal application from being able to do what it will need to do in order to be able to run Semplice. Earlier versions of macOS seem to have been more permissive about this, so this step wasn't necessary in Sierra, for example, but I found it was definitely required in Catalina and Monterey.
Click the Apple icon in the top panel, then System Preferences -> Security & Privacy. On the Privacy tab, scroll down on the left-hand pane until the Full Disk Access item is visible. Click on it to select it, then click on the padlock symbol at the bottom of the screen with the 'Click the lock to make changes' text next to it: that will prompt for your password, which you should supply as usual. With the Full Disk Access item still highlighted over on the left of the screen, click the '+' button underneath the blank area on the right:
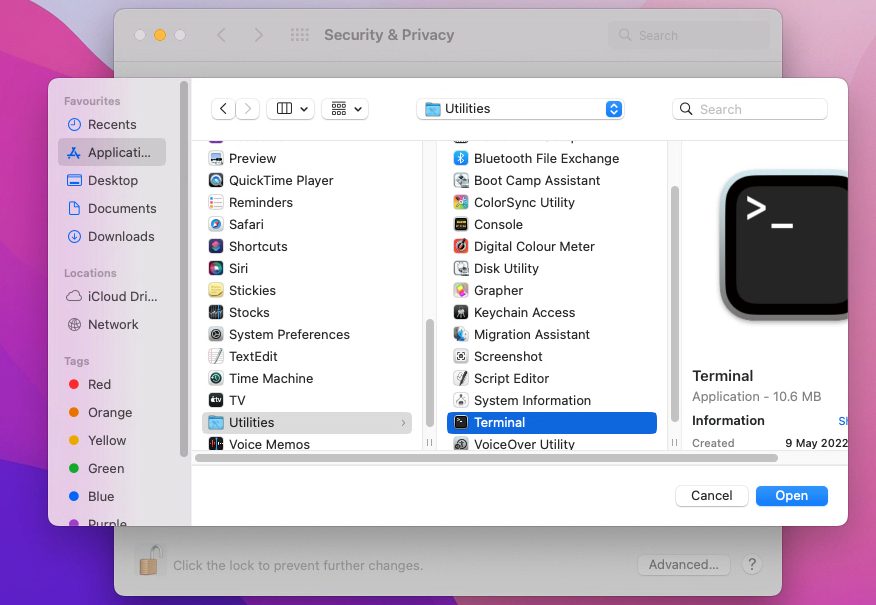
The specifics may be a little different on different macOS versions, but the general point is that you're trying to give the Terminal application full disk access. So, in the dialog that popped up when I clicked the '+' button, I've navigated to 'Applications' on the far left; I've scrolled down to 'Utilities' in the second column; I've then found 'Terminal' in the third column. With that selected, click the [Open] button:
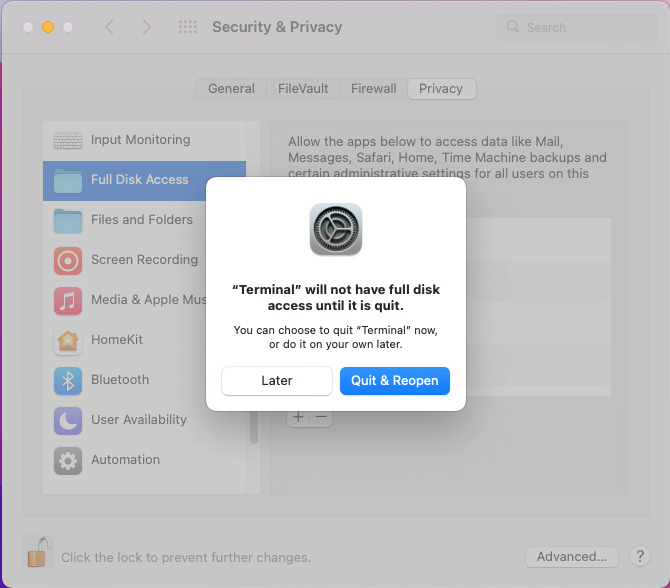
Obviously, I was doing all of this whilst a terminal session was already open -so I get to enjoy the message you see here. If you had closed down all your terminals before attempting this bit of security re-configuration, you won't have to deal with it! The issue is that running terminals can't inherit new security permissions, so the system wants to close existing terminals and re-open them. That's usually fine, so clicking [Quit & Reopen] is fine for me. If not, you can always click [Later] and close your own running terminals when it suits. Note that if you do opt for the quit-and-reopen option, the terminal tends to re-open on top of the Security and Privacy dialog: so if that disappears suddenly, it'll be hiding underneath the new terminal window!
You end up with this result:
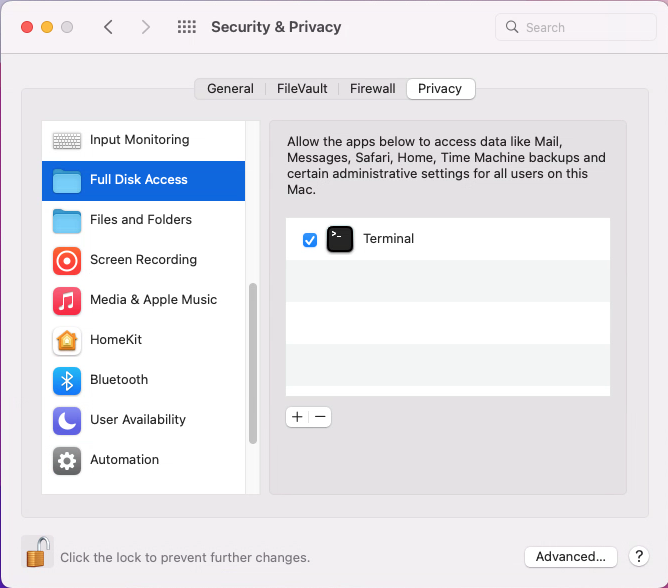
...which means Terminal now has new permissions to access your hard disk. This is needed by Semplice, but it's also fair to point out that it's a weakening of the tight security restrictions Apple brought in with macOS Catalina. If you are at all uncomfortable about the security implications of this, you can obviously revoke the permissions grant by selecting the 'Terminal' item and clicking the '-' button.
Close the Security & Privacy dialog once the Full Disk Access permissions have been granted to Terminal.
5.2 Creating a Local Bin Folder
Next, we need to create a non-root-read-writeable /usr/local/bin folder, because at the moment it probably doesn't exist (but by all means check if it does, and if it does, you can skip these next few commands). In a new terminal session, type:
sudo mkdir /usr/local/bin
sudo chown -R $(whoami) /usr/local/bin
sudo chmod -R u=rwX,go=rX /usr/local/bin
You can confirm the result of those commands with a simple ls -la /usr/local command:
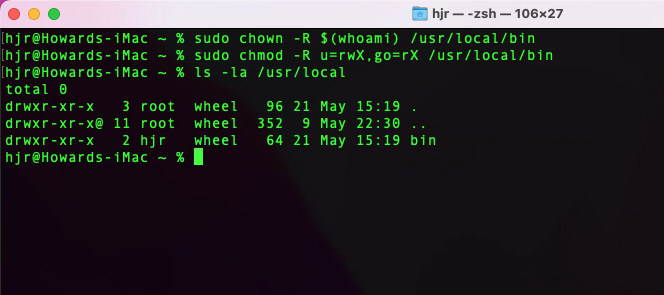
The mere existence of a bin folder within /usr/local is a good start; the fact that it's owned by me and thus writeable by me, too, is an important bonus, however!
With all that done, we're finally ready to install and run Semplice.
6.0 Installing Semplice
Once all the prerequisite software has been installed, you can obtain the Semplice installer from this website like so:
cd
wget https://absolutelybaching.com/abc_installer
Then run the installer:
cd
bash abc_installer --semplice
You'll be asked to provide your password at one point, since Semplice needs to copy scripts to appropriate folders to which access is ordinarily restricted.
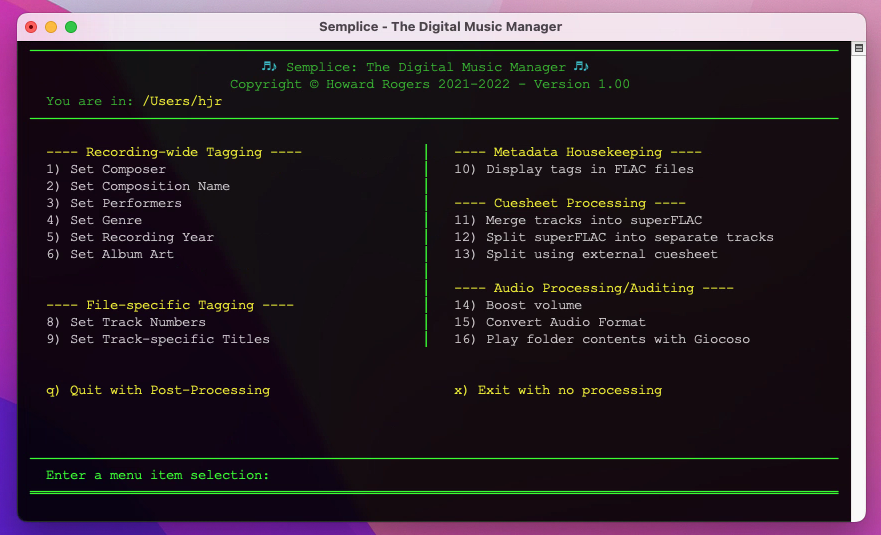
Once Semplice has been installed, you run it most simply with the bare command semplice. The first time you do so, the program will perform an analysis of your system to see if any other software packages are missing and if it thinks any are, it will prompt you to install them, after which you can try running Semplice again. If the program is satisfied that all package dependencies are met, you'll then be greeted with this screen:

Semplice uses a persistent configuration file to store various parameters that control Semplice's behaviour and appearance. For example, after you'vetagged FLACs with artwork, should the source artwork file be deleted? That behaviour is controlled by a configuration parameter ARTDELETE. Set it to 0 and Semplice won't automatically delete the source artwork; set it to 1 and it will. There are 21 such parameters. Semplice therefore always checks that a persistent configuration file exists -and if it finds one does not exist (as will always be the case the very first time Semplice is run after all software prerequisites have been met), it will download a default one from this website.
You just press a key to make the download happen.
Once a persistent configuration file has been found, the program then displays its standard menu interface:
Using Semplice broadly consists of taking, in turn:
- options 1 to 9 to tag your music files with appropriate metadata
- option 14 to see if your music files would benefit from a volume boost
- option 11 to convert per-track FLACs into 'superFLACs'
All these options require you to be 'in' a folder that contains FLACs before you run the program, so the very first thing you have to do is 'cd' to a folder of FLACs before typing the command semplice.
You may be a bit of an audio purist, in which case tinkering with the volume levels of a recording would be a no-no: option 14 is completely optional, therefore. You may also have no interest in creating 'superFLACs', in which case option 11 will be of no interest to you either.
Semplice is, in other words, a bit of a 'kit bag' of tools, and you use the ones that you find useful and ignore those you don't. It's up to you to make whatever use of it makes most sense to you.
Please note that option 7 won't be displayed (as in the above screenshot) unless you edit the persistent configuration to set ALLOW_CUSTOMTAG=1. Option 16 (to 'play folder contents with Giocoso') will similarly not be displayed if Semplice cannot spot a prior installation of Giocoso on the system. You can install Giocoso at any point to make that menu option appear next time Semplice is launched.
7.0 Conclusion
This article was intended to get you started with Semplice on macOS. There is quite a bit of preparatory work to do to make macOS a suitable environment for Semplice, because of Semplice's dependency on X11 and Bash. Once those particulars are sorted, however, running Semplice becomes merely a matter of learning how to use the abc_installer script to install it and therefore to launch Semplice inside a folder full of FLACs. Hopefully, you've seen how easy it is to install and run Semplice... after that, everything is simply a matter of becoming familiar with the array of things you can do with it.
For which the rest of this manual should be your guide!